Categories
Recipes

almond cake and tea

I got back from my trip to Taiwan a week before Thanksgiving, and time has just been barreling forward since.  Work, work, work, Thanksgiving, weekend of wedding scheming with my mom, radio appearance, work, work, work, work, work, Christmas Cookie Day, try recipes from a friend’s new cookbook, back to work. I’ve got a feeling we’ll be moving at this clip through the end of the year.

almond-cake-1 almond-cake-2

But, somewhere in there, I did have time to make this cake. This slow down and savor the moment with a cup of tea cake. Neither Jordan or I are big fans of almond flavored desserts typically, but this cake is really perfection. The crumb is tight, but not too dense, and not at all dry. The almond flavor is just right. Not enough to taste fake, just enough to say, ‘yes sir, I am an almond cake. Pleased to be your breakfast’.

I love a cake that transitions effortlessly from dessert to breakfast. Some days mustering up the strength to get out of the door is tough. Cake helps with that. This cake is my breakfast cake ideal, and I’ve been thinking about it every breakfast since I made it a few weeks ago. It feels almost premature to say this one is being promoted to one of my go-to recipes, but I’m going to put it out there. It really is that good.

***

Autosave-File vom d-lab2/3 der AgfaPhoto GmbH Autosave-File vom d-lab2/3 der AgfaPhoto GmbHAutosave-File vom d-lab2/3 der AgfaPhoto GmbH Autosave-File vom d-lab2/3 der AgfaPhoto GmbHAutosave-File vom d-lab2/3 der AgfaPhoto GmbH

In Taiwan we drank a lot of tea. It was on of my favorite parts of the trip. We’d slow down from the marathon eating and sightseeing (which also was an absolute treat), to sit down in a quiet place and share some tea. There’s a whole ritual associated with having tea in Taiwan, which the server would walk us through every time before passing the responsibility of tea-brewer onto someone in our group. Quite possibly this whole routine was just putting on a show for tourists, but I loved it nonetheless. Sitting in a quiet tea shop in a jet-lagged haze, misty air blowing in through the open windows, the business of the city moving along outside, drinking delicately brewed tea, letting the experiences of the trip wash over me. It was good.

Autosave-File vom d-lab2/3 der AgfaPhoto GmbH Autosave-File vom d-lab2/3 der AgfaPhoto GmbHAutosave-File vom d-lab2/3 der AgfaPhoto GmbHAutosave-File vom d-lab2/3 der AgfaPhoto GmbH

I tried to recreate the experience at home with Jordan, but it really wasn’t the same. I’m not quite as experienced a tea preparer as those tea house employees. Though Jordan did say that the tea tasted better out of the little tea set I brought back from Taiwan than out of our regular mugs. So that’s something. Plus, there was almond cake. Where there is tea, there should also be almond cake.

Almond Cake, from Orangette and adapted from Amanda Hesser’s Cooking for Mr. Latte
2 sticks (8 oz.) unsalted butter, at room temperature
1 cup sour cream, at room temperature
1 tsp. baking soda
2 cups all-purpose flour
1/2 tsp. salt
1 1/2 cups sugar
1 (7-ounce) tube almond paste, cut into small pieces
4 egg yolks, at room temperature
1/2 tsp. pure almond extract

Preheat your oven to 350° F. Butter and then line a 9″ springform pan with parchment paper, and then butter the paper. In a small bowl, mix together sour cream and baking soda. In another bowl, whisk together the flour and salt.

In the bowl of an electric mixer fitted with the paddle attachment, beat the butter and sugar until fluffy. Add the almond paste a few pieces at a time, and beat on medium speed for 8 minutes. Yes this is a long time, but want the almond paste to be nicely incorporated—no chunks.

Beat in the egg yolks one at a time, and mix until incorporated. Beat in the almond extract and the sour cream mixture. Reduce mixer speed to low, and gradually add the flour mixture, mixing just until combined. Using a rubber spatula, fold the batter a couple of times to make sure that all of your flour has been mixed in.

Scrape the batter into the prepared pan, and spread it evenly. Bake for about 1 hour – the cake will be a medium brown color and pull away from the sides of the pan. Transfer to a cooling rack, and cool the cake in its pan. Slice and serve with a dollop of whipped cream for dessert, or a cup of coffee or tea for breakfast.

-Emily

Categories
Recipes

nonnie’s carrot cake

After a glorious weekend away, we had to come back to reality. Back to work for both of us. But the upside to getting back to our regular routine is that I have Sundays at my disposal. Jordan works all day Sundays and so I’m left to my own devices. I like to think of Sunday as my project day. Usually this means walking Willow, putting off showering, planning dinners for the week (or as many days I as I can figure out/carry home), going grocery shopping, cooking something, listening to a lot of 99% Invisible, walking Willow some more, and maybe blogging, but usually procrastinating by checking Instagram, cleaning algae off my shower curtain or watering my plants. It’s rather glamorous.

But really, I’ve come to love having a day to myself to work on my things, whatever those things happen to be. Usually it’s food, but sometimes it’s putzing with a camera or trying to get better at calligraphy. It’s energizing to have time to myself, though maybe not quite as refreshing as no cell phone service, fresh air and a stunning view of vineyards.

Carrot Cake | The Answer is Always Pork Carrot Cake | The Answer is Always Pork

I made this cake on one such Sunday, I think it was last weekend, but it could have been the one before. Carrot cake is one of those desserts that you only really have once a year, usually around Easter. Something about bunnies and carrots, maybe? It’s is a neglected cake flavor, up against a tough crowd. Honestly, it’s hard to be a vegetable and hold a candle to dark chocolate or vanilla bean. But I happen to really like carrot cake and think it deserves a little more time in the spotlight. It popped into my head to make it, and so I did, even though Easter is long past. Cake doesn’t have to be chocolate to be delicious, especially if it has cream cheese icing.

This carrot cake is recipe from my Nonnie, which means it is pretty much perfect. It’s moist, delicately spiced, and easy to make. It doesn’t have raisins lurking in its layers, but you do get a little crunch from the pecans. The cream cheese frosting is also divine, and good on just about anything you can think to put it on. My Nonnie usually makes this cake in a 9″ x 11″ dish, but two stacked rounds with frosting sandwiched in between are just too cute to resist. Add a few more minutes to the baking time if you prefer a single layer cake.

Carrot Cake | The Answer is Always PorkCarrot Cake | The Answer is Always Pork

Nonnie’s Carrot Cake with Cream Cheese Frosting
1 1/2 cups flour
1 cup sugar
1 teaspoon baking powder
1 teaspoon baking soda
1 teaspoon cinnamon
1/2 teaspoon ginger
1/2 teaspoon nutmeg
1/2 teaspoon salt
2 eggs
1/2 cup crushed pineapple in juice (seems strange, but it’s the magic ingredient)
1 cup carrot, grated (about two large carrots)
1/2 cup pecans, chopped
2/3 cup neutral-tasting oil
1 teaspoon vanilla extract

Preheat an over to 350 degrees. Butter, line with parchment paper, butter again and flour two 8″ round baking pans. Experience has taught me that taking the extra time to add a layer of parchment really does make it easier to extract cakes from their molds.

In a medium bowl, whisk together flour, sugar, baking powder, baking soda, cinnamon, ginger, nutmeg and salt. In a large bowl, whisk together eggs, pineapple, carrot, pecans, oil and vanilla. Add the dry ingredients to the wet and mix to combine.

Divide into the two pans. Bake at 350° F for 25 to 30 minutes, or until a cake tester inserted comes out clean. Take care to not over-bake this cake, the moistness is spectacular if you don’t overdo it. Cool on a rack and frost when cooled.

Carrot Cake | The Answer is Always PorkCarrot Cake | The Answer is Always Pork

Cream Cheese Frosting
6 oz cream cheese, softened
4 tablespoons butter, softened
1 teaspoon vanilla extract or 1/2 teaspoon vanilla paste
dash of salt
2 1/2 cups powdered sugar, sifted (especially if you live in damp SF)

Cream butter, cream cheese, vanilla and salt until light and fluffy. Add powdered sugar and beat until smooth. Frost just about anything and I guarantee you’ll love it!

-Emily

Categories
Recipes

olive oil ice cream | angel food cake

Asking me to pick a favorite food is like asking a mother to pick her favorite child. It’s hard. But press me long enough and I’ll probably say ice cream. Or pasta. Or green beans. Or sushi. It really depends on the day.

Indecision aside, ice cream is up there at the top of my list. It aways sounds good even if I’m stuffed. I like even the worst of ice creams. Wendy’s frosty or McDonalds vanilla cone, I’ll choke one down—if choke is synonymous to joyfully consume with a grin of happiness across one’s face. I love ice cream.

This ice cream was inspired by the orange olive oil cake that I made a few weeks ago. The ice cream follows the same general recipe as Bi-Rite’s ice creams: heavy on the cream, light on the other flavorings. It’s really wonderful. And as my custard was chilling, I mused… orange and olive oil would go really well with pistachios, and who doesn’t like ice cream topped with with crunchy bits? Thus pistachio brittle brittle was born. It was a good hunch. This is a really sublime combination. I’m only sad I can’t fit more than one batch of ice cream into my ice cream maker.

olive-oil-ice-cream-1

angel-food-cake-1

Whenever I make ice cream, I end up with a jar of egg whites in my fridge. They’ll languish there, maybe a tablespoon is added to a cocktail, and then a few weeks later I’ll toss the rest. It’s wasteful and a shame. And so, I decided to see if I could make a baby angel food cake out of the remaining egg whites. Turns out, you absolutely can! It’s about half the height of your traditional angel food cake, but no less delicious.

Orange Olive Oil Ice Cream with Pistachio Brittle
5 large egg yolks
3/4 cup sugar
2 cups heavy cream
1 cup 1% or 2% milk
1/4 teaspoon kosher salt
1 orange, zested
1/4 olive oil

In a medium bowl, whisk the yolks just to break them up and then whisk in half the sugar (6 tablespoons). Set aside. Put a plastic container in an ice water bath.

In a saucepan, heat the cream, milk, rest of the sugar and salt over medium heat. When the mixture is just about to simmer, whisk 1/2 cup into the egg yolk mixture. Then whisk in another 1/2 cup. Then add the egg mixture in with the remaining milk in the saucepan and stir.

Cook the mixture carefully over medium heat, stirring constantly until it is thickened. If it can coat the back of a spatula and hold a clear path when you run your finger across it, it’s ready. Pour through a mesh strainer into a plastic container. Zest the orange over the custard mixture and mix in. Stir occasionally until the mixture cools. Once cool, put in the refrigerator to chill for 2 hours or overnight.

Whisk the olive oil into the chilled base. Freeze according to your ice cream maker’s instructions. Enjoy right away, or put back into the plastic container and freeze.

olive-oil-ice-cream-4 olive-oil-ice-cream-3

For the pistachio brittle
1 cup sugar
1/2 cup water
1/2 cup light corn syrup or tapioca syrup
1/4 teaspoon kosher salt
1 1/2 cup shelled pistachios
1/8 teaspoon baking soda
1 1/2 teaspoons unsalted butter

A note on candy making:  The first time I tried to make this brittle I used an organic sugar made from evaporated cane juice. It’s basically the more hippie/less processed variety you can buy at Whole Foods or Trader Joe’s. Don’t do this! Your brittle will reach a point where it suddenly transforms from syrup to rock candy. There’s no way to coax it into caramel and it is a nightmare to clean. To make this recipe, you’ll need to get the super processed C&H or Domino Pure Cane Sugar that your grandma uses.

Line a baking sheet with parchment and then brush it with a light layer of oil. Combine sugar, water, corn syrup and salt in a heavy saucepan. Put the pan over medium heat and cook without stirring until the mixture reaches 280° F, about 20 – 25 minutes. Pay close attention once it reaches 250° F because it will get to 280 very quickly and you don’t want it to burn.

Stir in the pistachios and stir frequently as the nuts toast and the syrup browns. When the syrup is a mahogany brown, remove from the heat and carefully stir in the baking soda. Once that is blended, stir in the butter.

Pour onto the prepared baking sheet and carefully spread into a thin and even layer using a heatproof spatula. You’ll want to work quickly to spread it before it hardens, but be careful because the mixture will be very hot!

Let cool to room temperature for at least an hour and then cut into pieces to sprinkle on top of the ice cream. Store in a tupperware on the counter.

olive-oil-ice-cream-2angel-food-cake-5

Baby Vanilla Angel Food Cake
2/3 cup sugar
a pinch of salt
1/2 cup cake flour, sifted
3 tablespoons warm water
5 egg whites
1/2 teaspoon vanilla paste or vanilla extract (I bought vanilla paste online for a Thomas Keller recipe about a year ago. It’s basically just several scraped vanilla beans in a bit of alcohol with some zanthan gum to give it a gel texture. It’s wonderfully strong flavored and pretty great stuff)
1/2 teaspoon cream of tartar

angel-food-cake-4 angel-food-cake-2

Preheat the oven to 350° F. In a food processor, spin the sugar for about 2 minutes until it is super fine. Sift half of the sugar with the cake flour and salt and set aside.

In the bowl of a stand mixture or a large mixing bowl, add the egg whites, water, vanilla paste and cream of tartar. Whisk on medium high until stiff peaks form. This will take about 10 minutes. Once the mixture is looking meringuey, carefully fold in the flour mixture.

Spoon batter into an ungreased tube pan. Cook 25 minutes, until a tester inserted into the cake comes out clean. Cool upside down on a cooling rack for an hour before unmolding from the pan.

-Emily

angel-food-cake-3

Categories
Recipes

buckwheat crêpe gâteau

Sometimes, when you’re feeling particularly overwhelmed by the challenges the universe has decided to throw your way, there’s really not much you can do but bake a cake. I won’t elaborate on the details because these types of details aren’t fun for anyone, but I trust you’ve all been to a similar place. A place where there is nothing you can do but put one foot in front of the other, and bake a cake.

Fortunately, I’ve got a slew of cakes for the baking. There’s Jordan’s favorite chocolate cake, there’s a perfectly citrusy loaf cake, there’s my Nonnie’s carrot cake, and now there is this cake. A cake made of crepes. Mostly it just looks pretty, but let’s not discount how a pretty thing can lift the spirit.

It can.

crepe-cake-3

Buckwheat Crêpe Gâteau
For the crepes
1 cup buckwheat flour
1/2 cup all-purpose flour
2 eggs
2 1/2 cups milk
1/2 teaspoon salt
2 tablespoons sugar
1 teaspoon vanilla

Whisk together the flours, eggs, milk, salt, sugar and vanilla. Let the batter sit in the fridge for 2 hours or overnight. Once the batter has rested, heat a nonstick sauté pan over medium-low heat. When the pan is hot, pour in about 1/4 cup of batter. Swirl the batter around the pan by tilting the pan, first to the right, then towards the back, then to the left, then to the front. Let the crepe just hang out there for a few minutes, don’t poke at it, don’t try and peak—both of these will result in a sad, probably ripped, subpar crepe. Be strong, resist the temptation.

When the batter has formed thin skin and there are bubbles throughout, use a spatula to coax up the edges. Then, using your fingers or a spatula, flip the crepe. Let it cook another 30 seconds or so and repeat with the rest of the batter. Cool the crepes before assembling the cake.

For the cream filling 
1 cup heavy cream
1 teaspoon cinnamon
1/4 teaspoon nutmeg
2 tablespoons powdered sugar
1 teaspoon vanilla
a pinch of salt
maple syrup for drizzling

In a large bowl or the bowl of a mixer, combine the cream, cinnamon, nutmeg, powdered sugar, salt and vanilla. Whisk until a fluffy cream forms.

crepe-cake-1

To assemble the cake, put a crepe on a large plate. Spread a thin layer of cream and top with another crepe. Repeat until you’ve used all of the filling and all of the crepes.

crepe-cake-2crepe-cake-4

To serve, cut into slices and drizzle with maple syrup. It’s good for dessert. It’s even better for breakfast the next day. Dessert for breakfast isn’t to be discounted either.

-Emily

crepe-cake-5


Categories
Uncategorized

zucchini banana bread

This is what you make when you have bananas going bad on your counter and zucchini lingering in your refrigerator, but not enough of either to make its own cake. Adapted very liberally from the Tartine Bakery cookbook, this breakfast bread turned out surprisingly well. It is balanced, not overly sweet and the flavors got along with one another just fine.

Zucchini Banana Bread 
1 cup plus 2 tablespoons all-purpose flour
2 tablespoons cornstarch
1 teaspoon cinnamon
2 teaspoons baking powder
1 teaspoon baking soda
2 very ripe bananas
2 large eggs
1 1/1 teaspoons vanilla extract
1/2 teaspoon salt
6 tablespoons butter, softened
3/4 cup sugar
1 1/2 cups shredded zucchini
1 cup walnuts or pecans, chopped

Preheat the oven to 325 degrees. Butter and flour a loaf pan. In a medium bowl, combine flour, cornstarch, cinnamon, baking powder, and baking soda.

In another bowl, mash the bananas. Combine with eggs, vanilla and salt and stir.

In the bowl of a mixture, beat the butter and sugar until light and fluffy. Add the banana mixture. Scrape down the bowl and then add the zucchini and walnuts. Mix until combined. Fold in the flour mixture and pour into a loaf pan.

Sprinkle the batter with 2 tablespoons of sugar for a crunchy top crust. Bake about one hour, until a toothpick inserted into the center comes out clean.

-Emily

Categories
Recipes

how to bake a wedding cake

Guess what? I’ve successfully baked my first wedding cake! It was easier and less stressful than I expected, and surprisingly, I’d even do it again. Now a most epic blog post about my adventure.

Last weekend, my friend Katie married her sweetheart and I baked her wedding cake. The bride wanted chocolate and the groom wanted vanilla. We needed enough cake for 150 guests—hands down my most ambitious baking adventure to date. After some thoughtful consideration, we decided on a three-tiered vanilla cake with vanilla swiss buttercream icing and three chocolate sheet cakes with chocolate buttercream. Once all the hard decisions were made, it was time to actually bake this monstrosity.

Research & Planning

The research and planning phase of my wedding cake adventure was by far the most crucial part. It involved lots of testing of cakes and frostings, lots of internet research and lots of math. As it turns out, making enough cake for 150 people requires a lot of calculating. Making a cake for 150 people in a tiny San Francisco kitchen with one oven, one standard Kitchen Aid mixer and one refrigerator, that requires even more meticulous calculating.

I tested a few vanilla cake recipes before landing on the final recipe. I was looking for a vanilla cake that was moist and flavorful, but dense enough to stand up to stacking. It also had to taste just as good after freezing, since I had to bake the cakes a few days before the event.

For the vanilla icing, I was looking for a frosting that would taste great, go on smoothly and not disintegrate in the Sacramento heat. The taste and texture of the frosting was key, especially since I wasn’t planning to cover the cake in fondant. In my book, buttercream wins out over fondant any day of the week.  My goal was to create a beautiful cake that was really, really delicious—even if the frosting job wasn’t fondant-pristine.

I knew I had the chocolate cake in the bag. I used my favorite tried and true chocolate cake recipe—it is always a crowd pleaser and easy to pull together. This cake is incredibly flavorful, moist and airy, but won’t stand up to hours of stacking. Sheet cakes that would be served already sliced—perfect!

After landing on final recipes, the calculations began. I had to figure out how much cake I needed to serve 150 guests, how many batches of each of the cake and frosting recipes it would take to create that amount of cake, and how much of each ingredient I would need to buy. I consulted Wilton’s cake serving chart, but decided it was a bunch of crap; 1 inch by 1 inch pieces of cake are not my style. In the end, I was conservative in my estimates on how much cake each person would eat, erring on the side of extra cake. More cake is always better.

For a wedding of 150 people, plus extra cake to be safe, I baked …

  • 2 – 2.5″ by 8″ rounds (serves approximately 15 people)
  • 2 – 2.5″ by 10″ rounds (serves approximately 25 people)
  • 2 – 2.5″ by 12″ rounds (serves approximately 35 people)
  • 3 – 18″ by 24″ sheets (serves approximately 120 people, 40 people per cake)

Which means I needed to plan for …

  • 2 – 8″ rounds = 7 cups of batter (1 batch of cake)
  • 2 – 10″ rounds = 12 cups of batter  (2 batches, minus 2 cups)
  • 2 – 12″ rounds = 16 cups of batter (2 batches, plus two cups from the 10″ cakes)
  • 1 – 18″ 24″ sheet = 14 cups of batter (2 batches)
  • 1 – 18″ 24″ sheet = 14 cups of batter (2 batches)
  • 1 – 18″ 24″ sheet = 14 cups of batter (2 batches)

Yep, that means 5 batches of vanilla cake and 6 batches of chocolate cake. When I went to the grocery store to purchase this insane quantity of  butter, flour, sugar and buttermilk  was when the scale of this task really hit me. Wedding cakes are a lot of cake.

I also purchased  3″ deep round cake pans in 8″, 10″, and 12″ diameters, wooden dowels, cardboard cake boards, cake boxes and rolls of parchment, tinfoil and plastic wrap. I was ready to go!

Baking

Because my kitchen resources were limited, I began my baking a few days before the wedding. I wanted to make sure I had enough time to bake everything before making the trip to Sacramento where I would do the frosting and assembly. Plus, you want the cakes to sit in the fridge or freezer for a day or two before you frost them. They are much easier to handle for stacking and frosting when they’re cold.

First, I cut rounds and sheets of parchment paper to size. Because you want the cakes to come out of the pan as cleanly as possible, be sure to butter the plan, line it with parchment, butter the parchment and then dust the bottom and sides with flour.

I also baked the cakes at 300 degrees for a longer amount of time than the recipe predicted. Baking at a lower temperature prevents the cake from mounding in the center, which reduces the amount of leveling you’ll have to do later.

I started with the vanilla cake. I mixed 2 batches and baked one 10″ and one 12″ cake, adding 1 cup of the extra batter from the 10″ cake into the 12″ pan. Then I baked two 8″ cakes, splitting a batch of cake. Then came a chocolate sheet cake. Then came another 10″ and another 12″ vanilla round. Then another chocolate sheet cake. I was able to bake all of the vanilla cakes and two of the chocolate cakes in one day, but it was epic (and seriously efficient for my tiny apartment kitchen!) baking.

I can now officially say that baking from 9 am to 5 pm is both intense and exhausting.  By the end, my kitchen was a flour and sugar covered disaster, but baking almost everything in one shot is the way to go. The next day, I finished up with the last chocolate sheet cake and it joined its plastic-wrapped buddies in the fridge.

Now for the cake recipes …

***

Vanilla Buttermilk Cake, from Smitten Kitchen
For one 8″ or 9″ cake with two layers 

4 cups plus 2 tablespoons  cake flour (not self-rising)
2 teaspoons  baking powder
1 1/2 teaspoons baking soda
1 teaspoon kosher salt
2 sticks unsalted butter, softened
2 cups sugar
2 teaspoons pure vanilla extract
4 large eggs, at room temperature
2 cups buttermilk

Preheat oven to 300°F. Butter the cake pans and line with circles of parchment paper, then butter parchment and dust with flour.

Sift together flour, baking powder, baking soda, and salt in a medium bowl. In a large mixing bowl, beat butter and sugar at medium speed until pale and fluffy, then beat in vanilla. Add eggs 1 at a time, beating well and scraping down the bowl after each addition. At low-speed, beat in buttermilk until just combined. The mixture will look curdled, don’t worry. Add flour mixture in three batches, mixing until each addition is just incorporated.

Spread batter evenly in cake pan, then rap pan on counter several times to eliminate air bubbles. Bake until golden and a wooden pick inserted in center of cake comes out clean, 40 minutes to one hour. Cool in pan on a rack for 15 minutes, then run a knife around edge of pan and invert onto rack. Peel off and discard the parchment. Then cool completely, about 1 hour.

***

Best Ever Chocolate Cake, from Ina Garten
For one 8″ or 9″ cake with two layers

Butter, for greasing the pans
1 3/4 cup flour
2 cups sugar
3/4 cup cocoa powder
2 t baking powder
1 t baking soda
1 t kosher salt
1 cup buttermilk
1/2 cup vegetable oil
2 eggs, at room temperature
1 cup freshly brewed hot coffee (I used decaf this time, but have used regular in the past)

Preheat the oven to 300 degrees. Butter the cake pans and line with parchment paper, then butter parchment and dust with flour.

Sift the dry ingredients into the bowl of a mixer fitted with the paddle attachment. Stir to combine. Combine wet ingredients in another bowl. With the mixer on low, slowly add the wet ingredients to the dry. Add the coffee.

Pour into prepared pans and bake for 35 – 40 minutes. Cool in the pan for 15 minutes, then invert onto a rack to cool completely.

***

Once the cakes are completely cool, wrap them tightly and thoroughly in plastic wrap. Then wrap them in  a layer of tin foil and place them in the freezer or fridge. You’ll likely have to split the cakes between both fridge and freezer, unless you’re lucky enough to have industrial sized freezer hanging around.

Frosting

Now that you’ve baked the cakes and it is the day of the wedding, you’ve got to frost those buggers. First, do yourself a favor and buy a nice, long cake frosting spatula. It will save you time and prevent an anxiety attack at the wedding venue. Second, go purchase yourself six glorious pounds of unsalted butter!

For the vanilla cake, I made one massive batch of vanilla swiss buttercream thanks to an industrial scale recipe from Deb of Smitten Kitchen. I filled each of the layers with a unsweetened whipped cream.

For the chocolate cake, I made Ina’s chocolate buttercream and just multiplied the recipe.

***

Vanilla Swiss Buttercream, from Smitten Kitchen
For one 3-tiered wedding cake
2 cups of egg whites (approx. 12 large)
3 cups sugar
5 cups butter, softened (2 1/2 pounds, 10 sticks)
1 tablespoon vanilla extract

For one 8″ or 9″ cake
1 cup sugar
4 large egg whites
26 tablespoons butter, softened (3 sticks plus 2 tablespoons)
1 teaspoon vanilla extract

Whisk egg whites and sugar together in a big metal bowl over a pot of simmering water. Whisk occasionally until you can’t feel the sugar granules when you rub the mixture between your fingers.

Transfer mixture into the mixer and whip until it turns white and about doubles in size.

Add the vanilla. Finally, add the butter a stick at a time and whip, whip, whip.

Don’t freak out when the frosting looks soupy, just keep whipping. It will come together gloriously, it just takes a while. Set the frosting aside, leaving it at room temperature.

***

Chocolate Buttercream, from Ina Garten
For three 18″ x 24″ sheet cakes
24 oz semisweet chocolate (I like Guittard)
2 lbs unsalted butter, at room temperature
4 egg yolks, at room temperature
4 teaspoons vanilla
5 cups sifted powdered sugar

For one 8″ or 9″ layer cake
6 oz semisweet chocolate
1/2 lb unsalted butter, at room temperature
1 egg yolk, at room temperature
1 teaspoon vanilla
1 1/4 cup sifted powdered sugar

Melt the chocolate over a double boiler and set aside to cool to room temperature.

In a mixer fitted with the paddle attachment, beat the butter until pale and fluffy. Add the egg yolks one at a time. Add the vanilla. Add the powdered sugar and mix until combined.

Add the chocolate and mix until just combined taking care to scrape the bottom. Set the frosting aside, leaving it at room temperature.

***

Cut cardboard cake boards about 1/2″ smaller than the diameter of the cake layer. You’ll need one board per tier. Cover the boards in foil—you don’t want the moisture from the cake to make the boards soggy. The boards will help keep your cake from falling in on itself and will also make the stacking easier. I transported each of my tiers to the venue unstacked and then assembled the cake and did the final frosting there. This worked out really well for me and I avoided any heartbreaking cake-dropping disasters.

Another key component of avoiding cake dropping or sliding disasters was the cake dowels. I purchased wooden dowels and cut them into 4″ lengths. Each tier had dowels holding its two layers together. The dowels also help prevent the cake from collapsing in on itself. Insert the dowels in a circle about 3″ from the edge of the cake; the cake board of the tier above will rest on these dowels, preventing any collapse. Win-win!

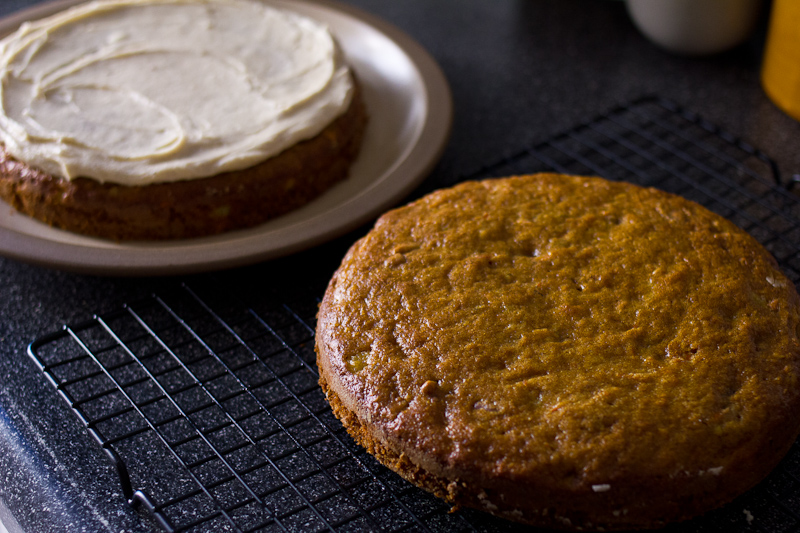
First, level the cakes, shaving off a bit of cake at a time using a bread knife. Stack the first layer of cake on the cake board. Spread some whipped cream onto the cake and then top it with another layer of the same size.

Insert the cake dowels in a circle about 3″ in from the edge of the cake. Using the vanilla butter cream, smoosh a good amount of frosting in between each of the layers. Then frost the sides and top of the cake. Try and get it as smooth as possible, but don’t stress if it isn’t gorgeous. This is the crumb coat. The cake will get another final coat of frosting at the venue. Put the cake back in the fridge to allow the frosting to firm up.

I did a crumb coat of frosting for each of the vanilla tiers, put them in the fridge to firm up and then put them in cake boxes to transport to the venue. For the chocolate cakes, I just brought the frosting to the venue and took care of them there.

Finishing Touches

Once at the venue, I put the vanilla cakes back in the fridge. I frosted each of the chocolate cakes on the back of a cookie sheet and then slid them onto white cake boards that were about 1″ larger than the cake.

The chocolate cakes went back into the fridge because it was pretty dang hot in the venue’s kitchen. You want to serve cakes at room temperature so I took the chocolate cakes out of the fridge for cutting about 1 hour before dessert was served.

After finishing up the chocolate cakes, I did a final coat of frosting on each of the vanilla layers. I focused mostly on the sides of the cake since that is the most visible part.

With Jordan’s help,  we stacked the cake in its place of honor in the main room. Once stacked, I touched up all of the frosting, adding a bit more in between each of the layers so there weren’t any gaps.

When the frosting was as close to perfect as it would ever be, I decorated the cake with fresh flowers to match the bride’s bouquet.

Ta-da! It was done! And it was pretty! And it was delicious! I was very proud and very relieved. Now for a deserved break from cake.

-Emily

Categories
Randomness

be back soon … in wedding cake land

Thanks to a kind of crazy twist of fate and two very trusting friends, I am baking a wedding cake. My friend Katie is getting married to her sweetheart this Friday in Sacramento. I’ll be there, wedding cake for 165 people in hand, praying to the sugar and butter gods that it turns out perfectly.

Over the past few days, I’ve been very busy with the prep work for my wedding cake debut. Seeing as I work full-time (not baking!) and my kitchen is 40 square feet, it’s taken a lot of planning to produce the required amount of cake. I’ll be back to tell you all about it soon, but here are some photos of the progress thus far to tide you over.

If you’re insanely curious about how this whole thing goes down, I’ll be sharing as I go on Instagram. Find me @emilyvoigtlander.

Wish me luck!

-Emily

Categories
Recipes

raspberry buttermilk cake

Oh, I love this cake. Discovered on Smitten Kitchen a while back, I’ve already made it several times this berry season. Deb calls it an everyday cake, and she’s right, it is the perfect cake for breakfast, for a BBQ, for a light dessert. And, it’s easy to throw together. I’d advise you to double the recipe and bake two if you plan to bring it somewhere—it’s so good you’ll want leftovers just for yourself when you get home.

Raspberry Buttermilk Cake, from Smitten Kitchen, originally adapted from Gourmet 
1 cup all-purpose flour
1/2 teaspoon baking powder
1/2 teaspoon baking soda
1/4 teaspoon salt
1/2 stick unsalted butter, softened
2/3 cup plus 1 1/2 tablespoons sugar, divided
1/2 teaspoon pure vanilla extract
1/2 teaspoon finely grated lemon zest
1 large egg
1/2 cup well-shaken buttermilk
1 cup fresh raspberries (or any other berry you please)

Preheat an oven to 400°F. Butter and flour an 8″ round pan.

Whisk together flour, baking powder, baking soda, and salt and set aside. In the bowl of an electric mixture, beat butter and 2/3 cup (146 grams) sugar at medium-high speed until pale and fluffy, then beat in vanilla and zest. Add egg and beat well.

At low speed, mix in flour mixture in three batches, alternating with buttermilk and mixing until just combined. Spoon batter into cake pan, smoothing top. Place the raspberries evenly over top and sprinkle with remaining 1 1/2 tablespoons sugar.


Bake until cake is golden, 20 to 25 minutes. Cool in pan 10 minutes, then turn out onto a rack and cool to warm, 10 to 15 minutes more. Enjoy!

And a fabulous tip from Deb of Smitten Kitchen—if you don’t have buttermilk on hand, add 1 tablespoon vinegar or lemon juice to 1 cup of milk and let it sit for 10 minutes until it clabbers. Instant buttermilk!

-Emily

Categories
Recipes

pumpkin bread

It’s fall, which also makes it time to bust out pumpkin-everything. First up to the plate …  pumpkin bread. The sugar crust on this bread is lovely, the spices are perfectly balanced and it has a moist, delicate crumb. Basically it is everything you want from a quick bread.

Pumpkin Tea Cake, from the Tartine Bakery Cookbook
1 1/2 cups all-purpose flour
1 1/2 t baking powder
1/2 t baking soda
1 T plus 2 t cinnamon
2 t nutmeg, freshly ground if possible
1/4 t ground cloves
1 cup plus 2 T pumpkin puree
1 cup vegetable oil
1 1/3 cups sugar
3/4 t salt
3 eggs
2 T sugar for topping

Preheat your oven to 325 degrees. Butter a loaf pan.

Sift together the flour, baking powder, soda and spices into the bowl of your stand mixer or a large bowl.

In another bowl, whisk together pumpkin, oil, sugar, and salt.  Add eggs, one at a time, mixing well after each addition. On low speed, mix the wet ingredients into the dry. Mix until just combined. You don’t want to over mix because it will make a tough bread.

Sprinkle with the sugar topping and bake for about an hour. Let cool in the pan for 20 minutes and then invert onto a rack to cool completely.

In what I thought was a stroke of pure genius, I decided to try to turn this pumpkin bread into pumpkin donut muffins. You might remember my life-changing donut muffin experience, but in case you need a refresher, check it out here. We thought that pumpkin donut muffins would be the crowning achievement of my life, but sadly (or perhaps not so sadly because now I still have future achievement to look forward to) the donut muffin topping did not really add anything to the pumpkin bread. This bread stands up perfectly well on its own. Those pumpkin donut muffins did look adorable though …

-Emily

Categories
Recipes

baking therapy: marble gugelhupf – yep, that is a cake

I bought myself a bundt pan at a thrift store when we visited Sacramento a while back and I decided to break it in with a marble cake. This recipe was adapted liberally from NPR’s The Splendid Table. The flavor is nice, but I overcooked it a bit and so, sadly, it was dry. See all those little crumbs all over the place …

Jordan was left with the terrible task of cleaning the bundt pan after I unmolded the cake. He tells me it was a real pain. Next time, I’ll just make this cake in a loaf pan. Added bonus: it’s harder to overcook things when they’re in a loaf pan. Sadly, that bundt pan might be heading back to the thrift store. You’ve got to be cut-throat when space is a premium (and when you’ve got an antiquing habit).

Marble Gugelhupf, adapted from NPR’s The Splendid Table
3 oz high-quality bittersweet chocolate, finely chopped (I like Scharffen Berger)
2 cups cake flour
2 t baking powder
1/2 t salt
1/2 cup milk
2 t vanilla
2 sticks of butter
1 cup powdered sugar
6 large eggs, separated
1/3 cup granulated sugar

Preheat the oven to 350 degrees. Coat a pan with butter and flour.

Over a double boiler or in the microwave, melt the chocolate. In a medium bowl, mix the flour, baking powder and salt. In a liquid measuring cup, mix the milk and vanilla.

In the bowl of a stand mixer, beat the butter until light and fluffy. Beat in the powdered sugar. Then beat in the egg yolks one at a time.

In a separate bowl, beat the egg whites until soft peaks form. Add the sugar and beat until stiff. Stir 1/3 of the whites into the batter to lighten it. Fold the remaining egg whites into the batter. Pour 1/3 of the batter into the chocolate and stir to combine.

Pour 1/3 of the vanilla batter into the mold. Top with the chocolate batter and then with the remaining vanilla batter. Use a knife to swirl the batters together into marbled goodness. Pretty, huh?

Bake 45 minutes – 1 hour, until a toothpick inserted into the center comes out clean.

-Emily