Categories
Recipes

coq au vin

The second way we wanted to test cooking our beautiful chicken from Eatwell Farm was to braise it. The first thing that comes to mind when I think of braised chicken is coq au vin, and the second is Julia Child. (I won’t be offended if you click that link right now and improve your day significantly by watching a few minutes of The French Chef).

My love for Julia is great. She’s taught me many things over the years, things that are just as useful in the kitchen as outside of it. The most important is probably confidence (Never apologize!!!), and the second, humor (“They’ll never know!”, she winks and scrapes an omelet that jumped ship right back into the pan). Julia’s warmth and enthusiasm for life are something I aspire to, and when I cook her recipes, I feel that much closer to it.

eatwell-coq-au-vin-5

Coq au vin tastes like comfort. You can’t go wrong with the slow simmered combination of chicken, wine and vegetables, it turns out delicious every time. And it’s impossible to not feel taken care of after you eat it. Isn’t that feeling, that love and community, exactly what inspires us every time we prepare a meal to share.

Coq au Vin, adapted from Julia Child’s Mastering the Art of French Cooking
1-3 to 4 pound chicken, broken down (legs, thighs, wings, breasts, you know the drill)
1 onion, diced
3 carrots, diced
2 cloves of garlic, diced
1/4 cup cognac
2 cups dry red wine
2 cups chicken stock (homemade if you got it, but if not, Better Than Bouillon concentrate isn’t half bad)
a few sprigs of thyme
a bay leaf
salt, pepper
2 tablespoons of bacon fat or oil
3 tablespoons butter
2 tablespoons flour
3/4 pound cremini mushrooms, cut into quarters

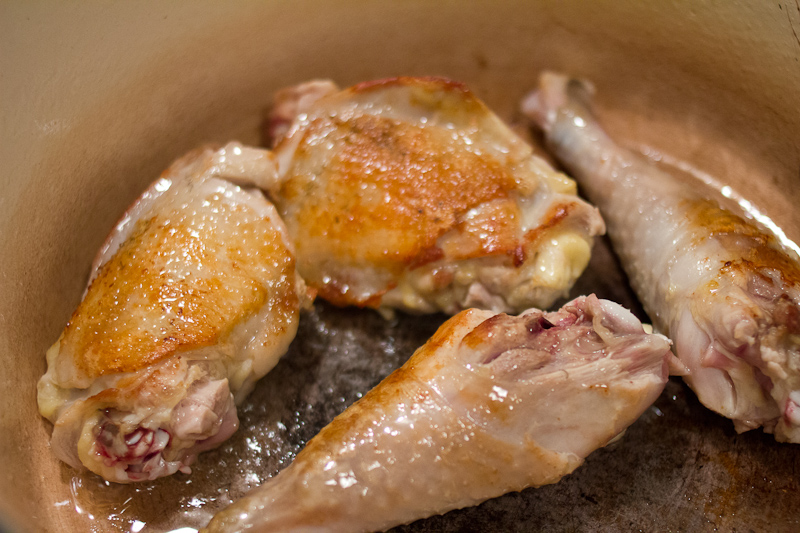
Preheat your oven to 300° F. Sprinkle the chicken pieces on both sides with salt. In a dutch oven over medium heat, heat the bacon fat or oil. Brown the chicken pieces on both sides. I’d do it in two batches so you don’t crowd the pan. Remove the browned chicken from the pot and set aside.

eatwell-coq-au-vin-1eatwell-coq-au-vin-2

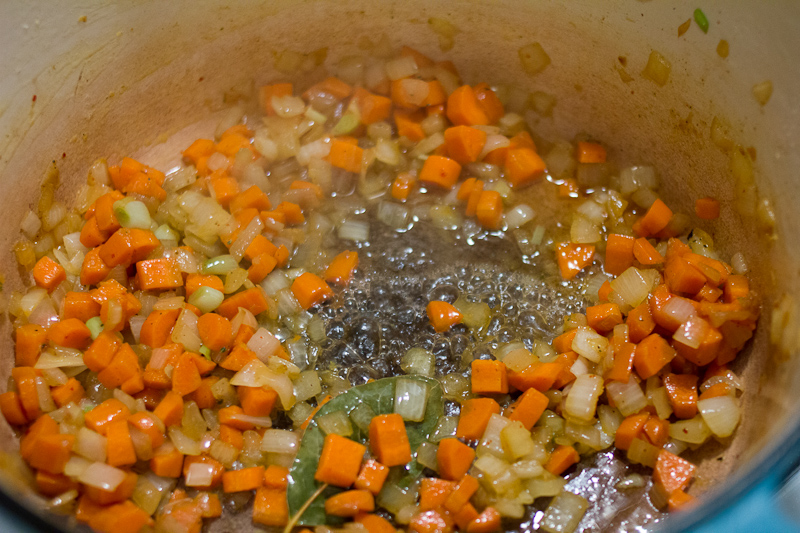
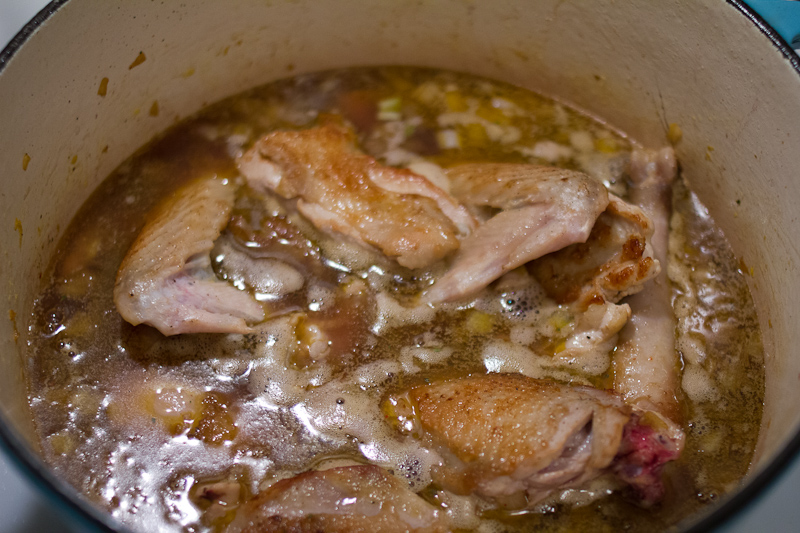
Add a bit more bacon fat or oil and sauté the vegetables until the onions are translucent, 7 – 10 minutes. Deglaze the pan with 1/4 cup of cognac and then pour in the wine and chicken stock. Add the chicken back in along with a few sprigs of thyme and a bay leaf. Bring everything to a boil.

eatwell-coq-au-vin-3eatwell-coq-au-vin-4

Once it boils, cover the pot and put it in the oven. Let simmer for about 40 minutes. Meanwhile, brown the mushrooms. Warm 1 tablespoon of butter in a pan. Add the mushrooms and brown them, stirring occasionally, about 10 minutes. Remove the mushrooms and put them on a plate.

After about 40 minutes, though you could go longer if you have a tough bird, remove the braise from the oven, and put it back on the stovetop. Fish out the chicken pieces and put them aside on a plate.

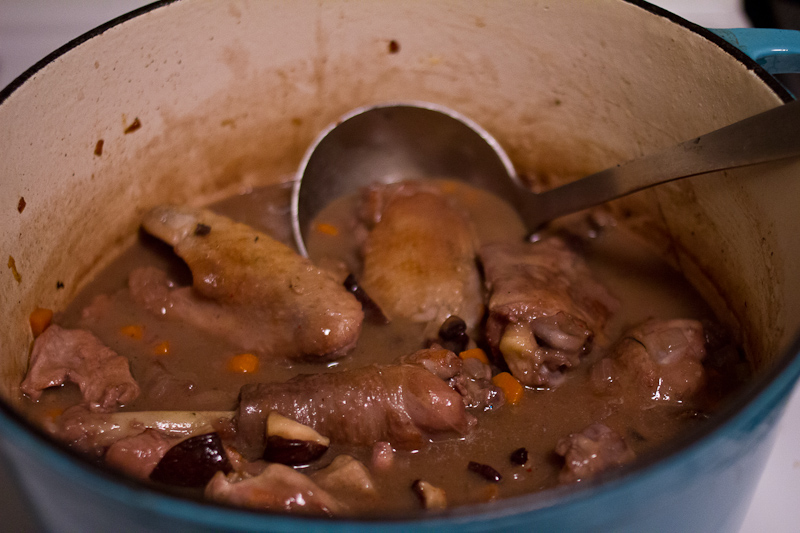
In the pan you browned the mushrooms in, melt 2 tablespoons of butter. When the butter is melted, add 2 tablespoons of flour. Cook the roux for a few minutes, until it is a light golden brown. Add the roux to the braising juices and whisk to combine. Bring the braising liquid back to a boil and the sauce will thicken nicely. Season the sauce with salt and pepper and then add the chicken and mushrooms back in.

You can serve the coq au vin immediately, or turn off the heat, cover and rewarm when you’re ready to eat. We served ours with mashed potatoes, but rice or pasta would also do just fine. It’s good to have something to soak up the sauce.

eatwell-coq-au-vin-6

Isn’t that roasted chicken head a sight to behold?! The coq au vin is on the left, and Jordan knocked that sauce out of the park.

-Emily

Ps. If you really want to nerd out and love Julia Child even more, read My Life in France, and then read this phenomenal biography by Bob Spitz. And if you’re in a bad mood, watch a few episodes of The French Chef. You cannot help but smile.

Categories
Recipes San Francisco

churros with whiskey sauce and peach compote

Tonight I’m sitting at my kitchen table waiting for Jordan to come home from school and waiting for my oven to preheat. The sound of a neighbor’s Billy Holiday record is wafting in through the open window, the smell of cooking tomato sauce along with it. I can hear the occasional clink of a spoon against a pot when the noise of traffic pauses in time to the lights. Every 20 minutes or so the robotic voice of a bus drones “2 Clement to Presidio Avenue” as it pulls away from the curb, then the Billy Holiday drifts back in.churros-2

We’re back into our usual school rhythm, Jordan teaching and working in the lab,  and working at the record store on his days off from school. It’s busy, and we don’t see as much of each other as we’d like, but it’s also familiar, more or less the pace of life since we moved here. It’s strange to feel the changing of the seasons so specifically when the temperature always seems to hover around 65°, but here we are, entering into our fourth fall in San Francisco. I’m feeling pretty good about this one.

This dessert is a perfect transition between summer and fall. You’ve got the last of summer’s peaches, paired with the warm comfort of cinnamon and whiskey. Plus fried dough. Fried dough is always in season. Churros are deceptively simple to make, far easier than doughnuts in my first-timers opinion, but they push all the same delicious buttons. Churros are no longer relegated to carnival treat in this house. So here’s to end of one season and the start of another, I’ll toast you with a churro, or three.

churros-9 churros-8

Churros with Whiskey Sauce and Peach Compote
For the churros, adapted from The Other Side of the Tortilla
1 1/4 cup water
3 tablespoons butter
3 tablespoons brown sugar
1/2 teaspoon kosher salt
1 1/2 cups all-purpose flour
1/2 teaspoon ground cinnamon
a dash of ground nutmeg
2 teaspoons vanilla extract
2 large eggs
1 liter of neutral, high heat oil (safflower, sunflower, canola)

To dust the churros
1/2 cup sugar
1 teaspoon ground cinnamon

Bring water, butter, brown sugar and salt to a boil in a medium saucepan. In a small bowl, mix together the flour, cinnamon and nutmeg. Remove the water mixture from the heat and add in the flour mixture. Mix with a wooden spoon to combine. Add the vanilla and stir again. Then add the eggs, one by one, mixing well after each addition. It will be a brief, but strenuous arm workout. Let the dough cool a bit.

Meanwhile, heat the oil in a large, heavy pot, like a dutch oven. Put it over medium low heat and let the oil come up to temperature, about 350 F.  Line a baking sheet with paper towels and top with a cooling rack. Mix the sugar and cinnamon mixture to coat and put that in a large, shallow dish.

When the dough has cooled slightly, spoon it into a pastry bag fitted with the star tip. The star tip is what gives churros their adorable shape. I usually put my pastry bag in a tall glass and then can more easily fill it with two hands. This is a sticky dough, but it comes out of the pastry bag just fine.

churros-3 churros-4

Before you pipe in a whole churro, test the oil temperature by squeezing out a 1″ piece. If the oil is ready, the churro should immediately start to bubble vigorously and float to the top. If not, wait a while for the oil to come up to temperature. If your oil isn’t hot, you’ll get soggy, greasy churros, which would be a tragedy.

Pipe a few churros into the pot. I found the easiest way to handsome churros was cut the churro from the pastry bag with a knife after I had piped about 4 inches of dough. Don’t crowd them. They will take about 3 – 4 minutes per side to become a deep golden brown. Remove them from the oil and let drain on the rack. After they’ve cooled slightly, lightly toss them in the cinnamon sugar mixture.

Serve churros immediately, or let cool completely on the rack. To reheat, warm them for 5 – 7 minutes in a 350° F oven. They’re best the first day, but not too shabby on the second if you somehow have leftovers.

churros-5churros-7

For the whiskey sauce, from the ever lovely Katie Norton
1 cup sugar
1/2 c butter (8 tablespoons, 1 stick)
1 egg, beaten
2 oz burbon whiskey

In a heavy bottomed pot, cream the butter with the sugar over medium low heat. When the sugar is almost dissolved and butter is melted, add in the beaten egg. Whisk to incorporate and then whisk constantly for one minute, until the sauce comes together and has a creamy consistency. Remove from the heat and whisk in the bourbon. This sauce is good on just about anything.

churros-1

For the peach compote
2 peaches, peeled and cut into chunks
2 tablespoons brown sugar
small pinch of salt
1/2 lemon, juiced

In a heavy bottomed pot, add the peaches and brown sugar. Cook over low heat, stirring occasionally until the fruit is quite soft. Remove from the heat and purée. I used an immersion blender. Add the lemon juice and blend just a bit more to incorporate. Store in the fridge if you have leftovers.

churros-6

-Emily

Categories
Recipes

on pear galettes and worrying

Last weekend, Jordan and I cooked a special dinner together. It was our standard birthday/anniversary/Valentine’s day meal—a beautiful steak, buttery potatoes, a good bottle of wine. We have it just a few time a year and it’s wonderful every time.

I remember the steak dinner that started this tradition, I think it was our third anniversary.  Jordan cooked at his parents’ house. I was on break from college. He made steak au poivre, roasted fingerling potatoes, beet salad and a dark chocolate souffle. I still have the menu he typed up for the occasion. (Can we just pause for a second an appreciate that he typed a menu for the occasion, adorable.) The meal has been a constant of our relationship ever since.

Now that a few years have passed, we’ve worked out all the kinks. Jordan handles the steak, usually simply grilled and finished with butter. I make the sides and dessert. Dessert is the only part of the menu that changes and this weekend I decided to make a pear galette.

pear-galette-7

So it was Saturday afternoon and I was standing in my kitchen making the galette. Now, those of of you who know me well, know that the type of experience I’m about to tell you about doesn’t really happen to me. I’m pretty solidly grounded, and frankly, if this happened to you and you told me about it, I’d probably think it was a little new-agey and nuts. Now putting all that aside, as I stood there slicing the pears for my galette, I was transported. For just a few minutes, I felt like the person I’m meant to become. She was calm and confident and capable. I folded the dough up around the pears and I knew in this very concrete way that everything is going to be alright.

It’s been an especially anxious year, full of lots of worrying on my part about big things and small (but mostly big, if we’re honest).  And so it was such a relief to just know that everything is going to be ok, that I’m going to be ok. Knowing that this happier, calmer version of myself is out there and that I’ll get there some day—even if it isn’t today or tomorrow or this year—put me at peace in a way nothing else has. I’ve tried to reason myself into feeling this way for months, but it took this unexpected, out of body experience to actually get the message across. Strangely, or maybe not so strangely, I have a pear galette to thank for that.

pear-galette-6

As for the pear galette, it was divine. Comice pears are perfect for pie—the texture can stand up to baking and they don’t get too sweet. The galette has just enough spice to accent the flavor of the pear, but doesn’t overpower it. I’d recommend you hurry and make your own before comice pears are done for the season.

Comice Pear Galette, with inspiration from Lindsay Shere, a longtime pastry chef of Chez Panisse
For the crust (makes two)
2 1/2 cups all purpose flour
1 1/4 teaspoons kosher salt
2 1/2 sticks unsalted butter
about 5 tablespoons ice water

For the galette
3 comice pears, peeled and sliced thin
2 tablespoons flour
2 tablespoons sugar
1/2 teaspoon cinnamon
1/4 teaspoon nutmeg
sugar for dusting

In a food processor, combine flour and salt. Remove the butter from the fridge and cut into 1 inch cubes. Add them to the flour mixture. Process until the butter chunks are about the size of peas. Add the water and pulse a few times to combine. Divide into two equal balls, flatten into 1″ thick discs, wrap in plastic wrap and refrigerate for at least two hours or overnight.

pear-galette-1 pear-galette-2

Preheat your oven to 400° F. Line a baking sheet with parchment paper. Peel the pears and slice them into thin slices. In a small bowl, combine the flour, sugar and spices. Dust a surface with flour and roll out the dough until it is about 1/4 inch thick. In the center of the dough, sprinkle the flour mixture. Arrange the pear slices in a mound on top of the flour mixture. Fold the dough up around the filling. Brush the dough with water and sprinkle with a heavy dusting of sugar.

Transfer to a parchment-lined baking sheet and back for 40 minutes to 1 hour, until browned and bubbly in the center. You can also form the galette, cover in plastic wrap and return it to the fridge until you want to bake it.

pear-galette-5pear-galette-4

I like to serve mine warm with ice cream and usually put it into the oven as we’re sitting down to dinner. It’s also really good for breakfast. Just say you need to take a good photo for your blog. Enjoy!

-Emily

pear-galette-8


Categories
Recipes

apple galette

A  weekends or two ago, we had our friend David over for dinner. David is usually in far off places like Thailand, Tajikistan or the Democratic Republic of Congo doing amazing, amazing work, and so it not often that he comes over for dinner. There really is nothing like dinner with old friends to make you feel like yourself again. Eating a meal with David is one of the best things for the soul, for my soul at least. Fortunately, for the next year or so he is stuck in Palo Alto learning lots, which means many more meals with David are in our future. I couldn’t be happier about it.

apple-galette-5

Onto the food. Fall is undeniably here even in temperate San Francisco, and so we roasted a chicken and vegetables to celebrate. In the spirit of fall, I thought it only fitting to make an apple galette for dessert. I’m not sure why it took me so long to discover the galette. As it turns out, galettes are everything that is wonderful about pie, but with an increased crust to filling ratio—a major pro in my book—and a far less fussy preparation. Because you simply fold a sheet of pastry around the filling, they are so easy to make. This particular apple galette turned out beautifully—rustic and delicious. I’m certain there will be many more galettes in our future, ideally eaten with David.

Apple Galette
For the Pie Crust 

2 1/2 cups all purpose flour
1 1/4 teaspoons kosher salt
2 1/2 sticks unsalted butter
about 5 tablespoons ice water

apple-galette-1 apple-galette-2

In a food processor, combine flour and salt. Remove the butter from the fridge and cut into 1 inch cubes. Add them to the flour mixture. Process until the butter chunks are about the size of peas. Add the water and pulse a few times to combine. Divide into two equal balls, flatten into 1″ thick discs, wrap in plastic wrap and refrigerate for at least two hours or overnight.

For the filling (for one galette, to serve 3 or 4 people)
3 large apples, peeled and cut into slices about 1/2″ thick
1 lemon, juiced
1/4 cup granulated sugar
2 tablespoons flour
1 teaspoon cinnamon
a pinch of nutmeg
a pinch of salt
1 egg yolk
1 tablespoon milk or cream
sugar for dusting

apple-galette-3apple-galette-6apple-galette-7

Preheat your oven to 375° F. Line a baking pan or cookie sheet with tin foil. In a large bowl, combine the apples, lemon juice, sugar, flour, cinnamon, nutmeg and salt. Roll out the crust until it is about 1/4 inch thick. In the center of the crust, mound the apple filling. Fold the dough up around the filling, take care to make sure that there aren’t any holes in the crust where the filling could leak out.

apple-galette-8 apple-galette-9

Place the galette back in the fridge for about 15 minutes for the butter in the dough to firm up. Meanwhile, whisk together the egg yolk with the cream or milk. Remove the galette from the fridge and brush with the egg mixture. Sprinkle with sugar. Bake for 45 minutes to an hour, until the crust is golden brown. Serve warm with vanilla ice cream.

apple-galette-10

-Emily

Categories
Recipes

squash stuffed with barley and chorizo

Walking down the hallway of the psychology building at school, Jordan ran into one of his fellow researchers who was enjoying a stuffed squash. He was instantly jealous. Nothing seemed more appropriate for the onset of fall weather than squash, a rustic grain, mushrooms and sausage all topped with cheese. And he said to me, “Make it so!”

Squash Stuffed with Barley and Chorizo
1 large or 2 medium squash (we used carnival, but acorn would also work. Butternut might be a bit sweet)
1/2 cup barley
1 onion, diced
4 cloves garlic, diced
8 oz button mushrooms, sliced
1 chorizo sausage
cheese for serving

Preheat an oven to 350 degrees. Cut the squash in half and scoop out the seeds. Brush with olive oil and sprinkle with salt. Bake for 45 minutes, until fork tender.

While the squash is baking, cook the barley. Boil 3 parts water with 1 part barley with a little dollop of butter. Once boiling, turn the heat down and cover. Simmer for 25 minutes, until the barley is tender.

While the barley is cooking, take the sausage out of its casing. Saute the sausage until just cooked through, about 5 minutes. Transfer to a large bowl. In the same pan, sauté the onion in a the rendered chorizo fat. When the onion is translucent, add the garlic. Saute for a few minutes more and transfer to bowl with the chorizo. Add a little butter to the pan and sauté the mushrooms. Season with salt and pepper. Once browned, add to the chorizo and onion mixture.

When the barley is finished cooking, add it to the onion, chorizo and mushroom mixture. Stir to combine and season again with salt and pepper. You want the filling to be flavorful on its own.

Once the squash is tender, remove from the oven and stuff with the barley mixture. Top with cheese — we used swiss, but Monterey jack, Gruyère or parmesan would all do— and put back in the oven for 10 more minutes to melt the cheese. This dish is very hearty and autumnal. We enjoyed it with a simple salad on the side.

-Emily


Categories
Recipes

pumpkin ice cream

It is still fall, and so I continue to cook things with squashes. Plus, I had pumpkin puree left over from the pumpkin tea cake I made last week.

This pumpkin ice cream was tasty! The second day after freezing, it had a bit of a grainy texture. I’m not really sure why that happened, but there is really only one way to get to the bottom of it. More testing/tasting!

Pumpkin Ice Cream, adapted from David Lebovitz
1 1/2 cups whole milk
1 cup  heavy cream
1/3 cup plus 2 tablespoons granulated sugar
1 teaspoon freshly grated ginger
1/2 teaspoon ground cinnamon
1/2 teaspoon freshly ground nutmeg
1/4 teaspoon kosher salt
5 large egg yolks
1/4 cup packed dark brown sugar
1/2 teaspoon vanilla extract
3/4 cup canned pumpkin puree

In a large bowl, make an ice bath. In a saucepan over medium heat, heat the milk and cream until hot. In another bowl, whisk together sugar, ginger, cinnamon, nutmeg, salt and eggs yolks. Slowly pour the hot milk mixture into the egg mixture, whisking well. Pour this custard back into the saucepan. Stirring constantly, heat over medium until the custard has thickened.

Pour this custard through a sieve into a medium metal or glass bowl. Whisk in the brown sugar. Set in the ice water bath. Let the custard cool, stirring occasionally. Once cooled, stir in the vanilla and pumpkin. Pass the mixture back through the sieve.

Pour into your ice cream maker and freeze according to the machine’s instructions. Freeze the ice cream for several hours in the freezer if you’re able. But, there is no harm in enjoying it straight out of the ice cream maker either.

-Emily

Categories
Recipes

pumpkin bread

It’s fall, which also makes it time to bust out pumpkin-everything. First up to the plate …  pumpkin bread. The sugar crust on this bread is lovely, the spices are perfectly balanced and it has a moist, delicate crumb. Basically it is everything you want from a quick bread.

Pumpkin Tea Cake, from the Tartine Bakery Cookbook
1 1/2 cups all-purpose flour
1 1/2 t baking powder
1/2 t baking soda
1 T plus 2 t cinnamon
2 t nutmeg, freshly ground if possible
1/4 t ground cloves
1 cup plus 2 T pumpkin puree
1 cup vegetable oil
1 1/3 cups sugar
3/4 t salt
3 eggs
2 T sugar for topping

Preheat your oven to 325 degrees. Butter a loaf pan.

Sift together the flour, baking powder, soda and spices into the bowl of your stand mixer or a large bowl.

In another bowl, whisk together pumpkin, oil, sugar, and salt.  Add eggs, one at a time, mixing well after each addition. On low speed, mix the wet ingredients into the dry. Mix until just combined. You don’t want to over mix because it will make a tough bread.

Sprinkle with the sugar topping and bake for about an hour. Let cool in the pan for 20 minutes and then invert onto a rack to cool completely.

In what I thought was a stroke of pure genius, I decided to try to turn this pumpkin bread into pumpkin donut muffins. You might remember my life-changing donut muffin experience, but in case you need a refresher, check it out here. We thought that pumpkin donut muffins would be the crowning achievement of my life, but sadly (or perhaps not so sadly because now I still have future achievement to look forward to) the donut muffin topping did not really add anything to the pumpkin bread. This bread stands up perfectly well on its own. Those pumpkin donut muffins did look adorable though …

-Emily

Categories
Recipes

quick baked mac and cheese with caramelized onions

So I had this whole vision of baking little lasagnas in these baby pumpkins that I bought at the farmers market. I’d invited friends over for the experiment and was very excited to bump the cute factor of my cooking up by about a million. And then my rational, forward thinking boyfriend mentioned that the adorable pumpkins that I had purchased might not actually be for eating. The doubt began to set in. I tested the pumpkin by cooking a small slice and it was indeed edible, just not that good. I was very sad. My dreams of festive cuteness were crushed.

I think Jordan may have felt a little bad and so he dug up these mini baking dishes that his mom had given us as a housewarming gift and suggested a baked macaroni and cheese instead. It was good advice. I simplified a traditional baked macaroni nixing the béchamel in favor of ricotta and a little pasta water. I added some caramelized onions, topped with gruyere and then threw it under the broiler. Quick, easy and still adorable!

Baked Mac and Cheese with Caramelized Onions
For the caramelized onions
1 onion, sliced
1 T butter
1 T oil

Saute onions over low heat for 30 – 45 minutes stirring occasionally, until deep brown in color.

For the pasta
3/4 lb dried pasta
1 cup ricotta
1/2 cup parmesan, grated
1/2 cup gruyere, grated
1/4 cup breadcrumbs
salt, pepper

Start sautéing the onion. Put a pot of salted water to boil. Cook the pasta until al dente and reserve 1/2 cup of the pasta water. Drain pasta. Combine pasta, ricotta, parmesan and pasta water. Season with salt and pepper. In a baking dish, spread the caramelized onions into a thin layer on the bottom. Spoon in cheesy pasta. Top with gruyere and breadcrumbs. Broil for a few minutes until the cheese is melted and bubbly. Enjoy!

-Emily

Categories
Recipes

baking therapy: pumpkin seeds and pumpkin bread

Yesterday was Halloween. We woke up early and hosted a pumpkinpalooza in our kitchen … pumpkin carving, pumpkin seed roasting and pumpkin bread baking!

Step one: Carve your pumpkin. Look at what a fabulous job Jordan did!

Step two: Roast the seeds.

Preheat an oven to 350 degrees. Scrape out all the goopy goop. Rinse the goop off the seeds. Pat dry. Toss with olive oil and salt. Roast for 10-12 minutes. Enjoy!

Step three: Bake pumpkin bread. I used the same recipe from the pumpkin cookies I made last week and just baked the batter in small loaf pans for 45 minutes. It turned out delicious and the browned butter icing was the perfect compliment this time around. So good that we never even got a picture. 😉

Step four: Enjoy pumpkin bread and roasted pumpkin seeds outside in the fall sunshine with beautiful people and beautiful dogs!


A perfect fall day!

-Emily

Categories
Recipes

baking therapy: pumpkin cookies with browned butter icing

Sadly, I think summer might officially be over in San Francisco. The past few days have been chilly, drizzly and grey. I’d complain more, but the end of summer means the start of fall …  new ingredients to choose from, heartier recipes to make and PUMPKIN EVERYTHING!

This week’s baking therapy showcases fall flavors- pumpkin, cinnamon, ginger, and nutmeg. Plus, who doesn’t love browned butter?!

I halved the recipe because I didn’t think Jordan and I could consume 6 dozen pumpkin cookies over the next few days, but the whole recipe is below.

Pumpkin Cookies with Browned Butter Icing, adapted from Martha Stewart Living

For the cookies
2 3/4 cups all-purpose flour
1 teaspoon baking powder
1 teaspoon baking soda
1 1/4 teaspoons coarse salt
1 1/2 teaspoons ground cinnamon
1 1/4 teaspoons ground ginger
3/4 teaspoon ground nutmeg
3/4 cup (1 1/2 sticks) unsalted butter, softened
2 1/4 cups packed light-brown sugar
2 large eggs
1 1/2 cups canned solid-pack pumpkin (14 ounces)
3/4 cup evaporated milk
1 teaspoon pure vanilla extract

For the icing
4 cups confectioners’ sugar, sifted
10 tablespoons (1 1/4 sticks) unsalted butter
1/4 cup plus 1 tablespoon evaporated milk,
2 teaspoons pure vanilla extract

For the cookies

Preheat the oven to 375 degrees. Whisk together flour, baking powder, baking soda, salt, cinnamon, ginger, and nutmeg in a medium bowl; set aside.

Put butter and brown sugar in the bowl of an electric mixer Mix on medium speed until pale and fluffy. Mix in eggs. Reduce speed to low. Add pumpkin, evaporated milk, and vanilla; mix until well blended. Add flour mixture; mix until combined.

Transfer 1 1/2 cups batter to a pastry bag fitted with a 1/2-inch plain tip (you could also use large ziplock with the tip cut off one corner). Pipe 1 1/2-inch rounds onto parchment-lined baking sheets, spacing 1 inch apart. Bake cookies until tops spring back, about 12 minutes. Cool on sheets on wire racks 5 minutes. Transfer cookies to wire racks; let cool completely.

For the icing

Put confectioners’ sugar in a large bowl; set aside. Melt butter in a small saucepan over medium heat. Cook, swirling pan occasionally, until golden brown, about 3 minutes. Immediately add butter to confectioners’ sugar, scraping any browned bits from sides and bottom of pan. Add evaporated milk and vanilla; stir until smooth. Spread about 1 teaspoon icing onto each cookie. If icing stiffens, stir in more evaporated milk, a little at a time. Cookies can be stored in single layers in airtight containers at room temperature up to 3 days.

Conclusions: The cookies are soft and delicate with a subtle pumpkin flavor. Sadly, I over-iced them and the browned butter flavor was a bit overpowering.  A lighter coating of icing next time, plus a little bit more of the spices and they’ll be spot on. Despite their imperfections, with a cup of tea or coffee these little guys are delightful!

-Emily