Categories
Recipes

how to make perfect french macarons

I’m the type who likes projects. While I enjoy cooking dinner each night for my little family and our friends, what really gets me excited is a new project. I like the research phase at the start of a project and the challenge of stepping up my game and out of my comfort zone. And I love the satisfaction of making something I’ve never made before, especially if it turns out right. I also love losing myself in a project, letting my worries slip away for a few hours and focusing in on the task at hand. It’s why I started cooking in the first place and probably why I’ll never stop. These projects are freeing for an overactive worrier like myself. My mind gets a break, and in the end, I usually have something delicious to show for it.

french-macaron-17

I decided to try my hand at french macarons last weekend. I had a free day, no plans at all. After a pep talk from Jordan the day before, it was settled and the research commenced. I read lots of recipes, read horror stories of macarons gone awry, read encouraging posts assuring me that it wasn’t nearly as hard as everyone claimed.

I’m happy to say, this will be one of those encouraging posts. It really is not as hard as you’d expect. Yes, precision is necessary and some understanding of a few key techniques is helpful, but if you’re mindful, you can make perfect a french marcaron the first go round.

french-macaron-16

The recipe I used is from a wonderful pastry blog Brave Tart. I’m positive her recipe and tips are the reason my macarons were a success the first time around. Thank you Stella!

French Macaron with Vanilla, Passionfruit or Blackberry Buttercream, adapted from Brave Tart
For the cookies
4 oz | 115 grams almond meal or almond flour (you can also grind blanched almonds in a food processor until powdery)
8 oz | 230 grams powdered sugar
5 oz | 144 grams egg whites
2.5 oz | 72 grams sugar
1/2 teaspoon | 2 grams kosher salt
the scrapings of 1 vanilla bean or 2 teaspoons vanilla extract

First, before we get into how to make the recipe, let’s talk about measuring the ingredients. Measurements by volume (cups, teaspoons, etc) are a bad idea for delicate pastry. Really, we all should always bake by weight and never volume because there can be such huge discrepancies between how each person measures one cup. There are also other intervening factors like humidity that can throw volume measurements off. So save yourself some macaron grief, and get a kitchen scale. Measuring ingredients by weight is not only more accurate, but I’m sure you’ll find that it is actually faster and easier.

Preheat your oven to 300 degrees. If you have an oven thermometer, put it in the oven to double check the temperature. If your oven is too hot, your cookies will cook unevenly or their shells will crack and crumble as they rise. Move both racks towards the center of your oven to ensure the cookies get the most even heat. See what I mean about precision? Not overwhelmingly difficult, but necessary.

Line baking sheets with parchment paper. I traced 1.5″ circles on my parchment paper so that I would have something to trace when I piped the cookies onto the sheet. It’s important that the cookie shells are all about the same size because you sandwich two together.

french-macaron-1

Insert a plain round tip into a pastry bag. This is for piping the macarons onto the baking sheet.  Here are some great tips on how to easily fill a pastry bag if the task seems daunting.

Sift together the almond flour and powdered sugar into a medium bowl. You’ll have a spoonful or two of little almond granules that are larger than the rest and don’t sift through, just discard those. Separate your egg whites from the yolks. Put your yolks in the fridge and save them to make pastry cream for a raspberry napoleon.

In the bowl of your mixer, combine egg whites, sugar, vanilla bean (not the extract if you’re using that) and salt. Mix on medium power (4 on a Kitchen Aid) for three minutes.

french-macaron-3

Increase the speed to medium-high (7 on Kitchen Aid) and whip for another three minutes.

french-macaron-4

Increase the speed to high (8 on Kitchen Aid) and whip for another three minutes.  Turn the mixer off and add any extracts or colors here. Whip on high for another minute to incorporate. The mixture should look like a very stiff, dry meringue and should clump inside the whisk. If it isn’t very stiff, beat for another minute or two until it is. Aren’t the vanilla bean flecks just the cutest!

french-macaron-5

Add the almond flour and powdered sugar to the meringue.  Using a large spatula, fold the dry ingredients into the meringue. It will take quite a while to fully incorporate. The purpose of this step is to deflate the meringue so don’t worry about knocking it around a little bit.

french-macaron-7

Stella’s recipe was astoundingly accurate for me. She said it would take about 40 folds to incorporate the dry ingredients into the wet and get a good batter consistency and she was right. You want a batter that is thin enough to pipe, but not so thin it runs all over the baking sheet. She describes the texture as “molten” if that helps you. Mixing the ingredients thoroughly is important so be sure to scrape the sides the bowl several times while mixing. Streaks of unmixed meringue could also cause your cookies to crack in the oven.

french-macaron-8

Once your batter is mixed, spoon it into a pastry bag. I’d recommend you only fill the bag about two-thirds full and then tie the top with a rubber band. Make the piping easier on yourself, don’t overstuff the bag! With a 10″ pastry bag, I only had to refill twice. Not bad.

Pipe small circles onto your parchment lined baking sheet. Let the cookies sit for a few minutes on the counter to settle. Rap the trays hard on the counter several times. Don’t be shy about it.  This removes the air bubbles that could also cause your shells to crack in the oven. I didn’t rap my first batch with quite enough vigor and most of my cookies came out with cracked shells. While cracked shells do nothing to harm the flavor, take this easy step to avoid them. For my second batch, I hit the tray hard against the counter about 10 times taking care to rotate it 90 degrees for a few of the raps and the shells came out perfectly.

french-macaron-9

Bake the cookies at 300 degrees for 18 minutes. You should be able to peel the parchment away from the macaron without tearing out the center of the cookie. I’d test on a corner cookie before removing the sheet from the oven. Remove the cookies the oven and let them cool on the trays. Use a metal spatula to detach the cookies from the parchment after they are completely cooled.

french-macaron-11

Below you can see the difference between a perfect shell and a cracked shell. The top of the cracked shell will sort of crumble and collapse when you fill it with cream, while the good shell will remain intact. Both are delicious though so don’t dispair if your shells crack!

french-macaron-12

Once cooled, fill the macarons with the buttercream of your choice. I did vanilla, passionfruit and blackberry. All were divine!

For the filling
1/2 cup sugar
2 large egg whites
12 tablespoons butter, softened
1 teaspoon vanilla extract
a pinch of salt
3 tablespoons passionfruit syrup (mine was made from 4 oz of frozen passionfruit pulp and 1/2 cup sugar simmered together for 30 minutes and strained)
3 tablespoons blackberry syrup (mine was made from 4 oz of frozen blackberries and 1/2 cup sugar simmered together for 30 minutes   and strained of the seeds)

In a bowl over a pot of simmering water, combine the sugar and egg whites. Heat the egg and sugar mixture until you cannot feel the sugar granules when you rub the mixture between your fingers.  Transfer mixture into the mixer and whip until it turns white and about doubles in size. Add the vanilla. Finally, add the butter a few tablespoons at a time and whip, whip, whip. It will look like your buttercream is ruined for a few minutes. Don’t dispair! It will come together if you just keep whipping.

french-macaron-15

Once the buttercream is has been whipped into submission, put two thirds of it another bowl. To the remaining third, add the 3 tablespoons of blackberry syrup. Whip, whip, whip again until the syrup is incorporated. Remove that from the mixer, wash the bowl and whisk and then add another 1/3 of the frosting. Add 3 tablespoons of passionfruit syrup and whip whip whip!

Put the filling in a disposable pastry bag with a round tip. Pipe about a teaspoon of filling onto the flat side of the macaron cookie. Sandwich the cream between another cookie. Continue with the rest of the cookies, alternating fillings if you’d like.

french-macaron-13

The surprisingly truth about macarons? They only get more tasty as they age. While they are delicious the first day, they are insanely good on the second and third days once the cream and cookie have really melded together and become one. Store your cookies in a tupperware in the refrigerator, but let set them out for about an hour before serving to let the buttercream warm up a bit before you eat them. The texture is even more pleasant when you let them warm a bit.

french-macaron-14

I am absolutely stoked with how these came out. They were delicious—sweet but not overwhelmingly so. Their texture was incredible—a crunchy exterior that shatters when you bite into it revealing a creamy, chewy interior. The passionfruit filling was positively addicting. Plus they are adorable.  I’ll be making them again very soon.

-Emily

Categories
Recipes

how to bake a wedding cake

Guess what? I’ve successfully baked my first wedding cake! It was easier and less stressful than I expected, and surprisingly, I’d even do it again. Now a most epic blog post about my adventure.

Last weekend, my friend Katie married her sweetheart and I baked her wedding cake. The bride wanted chocolate and the groom wanted vanilla. We needed enough cake for 150 guests—hands down my most ambitious baking adventure to date. After some thoughtful consideration, we decided on a three-tiered vanilla cake with vanilla swiss buttercream icing and three chocolate sheet cakes with chocolate buttercream. Once all the hard decisions were made, it was time to actually bake this monstrosity.

Research & Planning

The research and planning phase of my wedding cake adventure was by far the most crucial part. It involved lots of testing of cakes and frostings, lots of internet research and lots of math. As it turns out, making enough cake for 150 people requires a lot of calculating. Making a cake for 150 people in a tiny San Francisco kitchen with one oven, one standard Kitchen Aid mixer and one refrigerator, that requires even more meticulous calculating.

I tested a few vanilla cake recipes before landing on the final recipe. I was looking for a vanilla cake that was moist and flavorful, but dense enough to stand up to stacking. It also had to taste just as good after freezing, since I had to bake the cakes a few days before the event.

For the vanilla icing, I was looking for a frosting that would taste great, go on smoothly and not disintegrate in the Sacramento heat. The taste and texture of the frosting was key, especially since I wasn’t planning to cover the cake in fondant. In my book, buttercream wins out over fondant any day of the week.  My goal was to create a beautiful cake that was really, really delicious—even if the frosting job wasn’t fondant-pristine.

I knew I had the chocolate cake in the bag. I used my favorite tried and true chocolate cake recipe—it is always a crowd pleaser and easy to pull together. This cake is incredibly flavorful, moist and airy, but won’t stand up to hours of stacking. Sheet cakes that would be served already sliced—perfect!

After landing on final recipes, the calculations began. I had to figure out how much cake I needed to serve 150 guests, how many batches of each of the cake and frosting recipes it would take to create that amount of cake, and how much of each ingredient I would need to buy. I consulted Wilton’s cake serving chart, but decided it was a bunch of crap; 1 inch by 1 inch pieces of cake are not my style. In the end, I was conservative in my estimates on how much cake each person would eat, erring on the side of extra cake. More cake is always better.

For a wedding of 150 people, plus extra cake to be safe, I baked …

  • 2 – 2.5″ by 8″ rounds (serves approximately 15 people)
  • 2 – 2.5″ by 10″ rounds (serves approximately 25 people)
  • 2 – 2.5″ by 12″ rounds (serves approximately 35 people)
  • 3 – 18″ by 24″ sheets (serves approximately 120 people, 40 people per cake)

Which means I needed to plan for …

  • 2 – 8″ rounds = 7 cups of batter (1 batch of cake)
  • 2 – 10″ rounds = 12 cups of batter  (2 batches, minus 2 cups)
  • 2 – 12″ rounds = 16 cups of batter (2 batches, plus two cups from the 10″ cakes)
  • 1 – 18″ 24″ sheet = 14 cups of batter (2 batches)
  • 1 – 18″ 24″ sheet = 14 cups of batter (2 batches)
  • 1 – 18″ 24″ sheet = 14 cups of batter (2 batches)

Yep, that means 5 batches of vanilla cake and 6 batches of chocolate cake. When I went to the grocery store to purchase this insane quantity of  butter, flour, sugar and buttermilk  was when the scale of this task really hit me. Wedding cakes are a lot of cake.

I also purchased  3″ deep round cake pans in 8″, 10″, and 12″ diameters, wooden dowels, cardboard cake boards, cake boxes and rolls of parchment, tinfoil and plastic wrap. I was ready to go!

Baking

Because my kitchen resources were limited, I began my baking a few days before the wedding. I wanted to make sure I had enough time to bake everything before making the trip to Sacramento where I would do the frosting and assembly. Plus, you want the cakes to sit in the fridge or freezer for a day or two before you frost them. They are much easier to handle for stacking and frosting when they’re cold.

First, I cut rounds and sheets of parchment paper to size. Because you want the cakes to come out of the pan as cleanly as possible, be sure to butter the plan, line it with parchment, butter the parchment and then dust the bottom and sides with flour.

I also baked the cakes at 300 degrees for a longer amount of time than the recipe predicted. Baking at a lower temperature prevents the cake from mounding in the center, which reduces the amount of leveling you’ll have to do later.

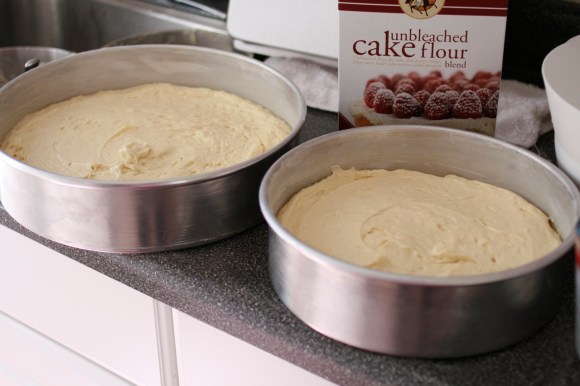
I started with the vanilla cake. I mixed 2 batches and baked one 10″ and one 12″ cake, adding 1 cup of the extra batter from the 10″ cake into the 12″ pan. Then I baked two 8″ cakes, splitting a batch of cake. Then came a chocolate sheet cake. Then came another 10″ and another 12″ vanilla round. Then another chocolate sheet cake. I was able to bake all of the vanilla cakes and two of the chocolate cakes in one day, but it was epic (and seriously efficient for my tiny apartment kitchen!) baking.

I can now officially say that baking from 9 am to 5 pm is both intense and exhausting.  By the end, my kitchen was a flour and sugar covered disaster, but baking almost everything in one shot is the way to go. The next day, I finished up with the last chocolate sheet cake and it joined its plastic-wrapped buddies in the fridge.

Now for the cake recipes …

***

Vanilla Buttermilk Cake, from Smitten Kitchen
For one 8″ or 9″ cake with two layers 

4 cups plus 2 tablespoons  cake flour (not self-rising)
2 teaspoons  baking powder
1 1/2 teaspoons baking soda
1 teaspoon kosher salt
2 sticks unsalted butter, softened
2 cups sugar
2 teaspoons pure vanilla extract
4 large eggs, at room temperature
2 cups buttermilk

Preheat oven to 300°F. Butter the cake pans and line with circles of parchment paper, then butter parchment and dust with flour.

Sift together flour, baking powder, baking soda, and salt in a medium bowl. In a large mixing bowl, beat butter and sugar at medium speed until pale and fluffy, then beat in vanilla. Add eggs 1 at a time, beating well and scraping down the bowl after each addition. At low-speed, beat in buttermilk until just combined. The mixture will look curdled, don’t worry. Add flour mixture in three batches, mixing until each addition is just incorporated.

Spread batter evenly in cake pan, then rap pan on counter several times to eliminate air bubbles. Bake until golden and a wooden pick inserted in center of cake comes out clean, 40 minutes to one hour. Cool in pan on a rack for 15 minutes, then run a knife around edge of pan and invert onto rack. Peel off and discard the parchment. Then cool completely, about 1 hour.

***

Best Ever Chocolate Cake, from Ina Garten
For one 8″ or 9″ cake with two layers

Butter, for greasing the pans
1 3/4 cup flour
2 cups sugar
3/4 cup cocoa powder
2 t baking powder
1 t baking soda
1 t kosher salt
1 cup buttermilk
1/2 cup vegetable oil
2 eggs, at room temperature
1 cup freshly brewed hot coffee (I used decaf this time, but have used regular in the past)

Preheat the oven to 300 degrees. Butter the cake pans and line with parchment paper, then butter parchment and dust with flour.

Sift the dry ingredients into the bowl of a mixer fitted with the paddle attachment. Stir to combine. Combine wet ingredients in another bowl. With the mixer on low, slowly add the wet ingredients to the dry. Add the coffee.

Pour into prepared pans and bake for 35 – 40 minutes. Cool in the pan for 15 minutes, then invert onto a rack to cool completely.

***

Once the cakes are completely cool, wrap them tightly and thoroughly in plastic wrap. Then wrap them in  a layer of tin foil and place them in the freezer or fridge. You’ll likely have to split the cakes between both fridge and freezer, unless you’re lucky enough to have industrial sized freezer hanging around.

Frosting

Now that you’ve baked the cakes and it is the day of the wedding, you’ve got to frost those buggers. First, do yourself a favor and buy a nice, long cake frosting spatula. It will save you time and prevent an anxiety attack at the wedding venue. Second, go purchase yourself six glorious pounds of unsalted butter!

For the vanilla cake, I made one massive batch of vanilla swiss buttercream thanks to an industrial scale recipe from Deb of Smitten Kitchen. I filled each of the layers with a unsweetened whipped cream.

For the chocolate cake, I made Ina’s chocolate buttercream and just multiplied the recipe.

***

Vanilla Swiss Buttercream, from Smitten Kitchen
For one 3-tiered wedding cake
2 cups of egg whites (approx. 12 large)
3 cups sugar
5 cups butter, softened (2 1/2 pounds, 10 sticks)
1 tablespoon vanilla extract

For one 8″ or 9″ cake
1 cup sugar
4 large egg whites
26 tablespoons butter, softened (3 sticks plus 2 tablespoons)
1 teaspoon vanilla extract

Whisk egg whites and sugar together in a big metal bowl over a pot of simmering water. Whisk occasionally until you can’t feel the sugar granules when you rub the mixture between your fingers.

Transfer mixture into the mixer and whip until it turns white and about doubles in size.

Add the vanilla. Finally, add the butter a stick at a time and whip, whip, whip.

Don’t freak out when the frosting looks soupy, just keep whipping. It will come together gloriously, it just takes a while. Set the frosting aside, leaving it at room temperature.

***

Chocolate Buttercream, from Ina Garten
For three 18″ x 24″ sheet cakes
24 oz semisweet chocolate (I like Guittard)
2 lbs unsalted butter, at room temperature
4 egg yolks, at room temperature
4 teaspoons vanilla
5 cups sifted powdered sugar

For one 8″ or 9″ layer cake
6 oz semisweet chocolate
1/2 lb unsalted butter, at room temperature
1 egg yolk, at room temperature
1 teaspoon vanilla
1 1/4 cup sifted powdered sugar

Melt the chocolate over a double boiler and set aside to cool to room temperature.

In a mixer fitted with the paddle attachment, beat the butter until pale and fluffy. Add the egg yolks one at a time. Add the vanilla. Add the powdered sugar and mix until combined.

Add the chocolate and mix until just combined taking care to scrape the bottom. Set the frosting aside, leaving it at room temperature.

***

Cut cardboard cake boards about 1/2″ smaller than the diameter of the cake layer. You’ll need one board per tier. Cover the boards in foil—you don’t want the moisture from the cake to make the boards soggy. The boards will help keep your cake from falling in on itself and will also make the stacking easier. I transported each of my tiers to the venue unstacked and then assembled the cake and did the final frosting there. This worked out really well for me and I avoided any heartbreaking cake-dropping disasters.

Another key component of avoiding cake dropping or sliding disasters was the cake dowels. I purchased wooden dowels and cut them into 4″ lengths. Each tier had dowels holding its two layers together. The dowels also help prevent the cake from collapsing in on itself. Insert the dowels in a circle about 3″ from the edge of the cake; the cake board of the tier above will rest on these dowels, preventing any collapse. Win-win!

First, level the cakes, shaving off a bit of cake at a time using a bread knife. Stack the first layer of cake on the cake board. Spread some whipped cream onto the cake and then top it with another layer of the same size.

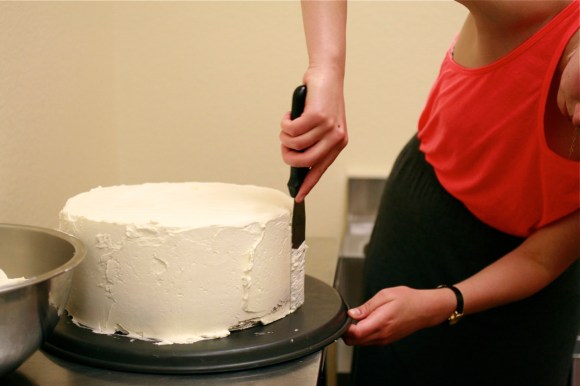
Insert the cake dowels in a circle about 3″ in from the edge of the cake. Using the vanilla butter cream, smoosh a good amount of frosting in between each of the layers. Then frost the sides and top of the cake. Try and get it as smooth as possible, but don’t stress if it isn’t gorgeous. This is the crumb coat. The cake will get another final coat of frosting at the venue. Put the cake back in the fridge to allow the frosting to firm up.

I did a crumb coat of frosting for each of the vanilla tiers, put them in the fridge to firm up and then put them in cake boxes to transport to the venue. For the chocolate cakes, I just brought the frosting to the venue and took care of them there.

Finishing Touches

Once at the venue, I put the vanilla cakes back in the fridge. I frosted each of the chocolate cakes on the back of a cookie sheet and then slid them onto white cake boards that were about 1″ larger than the cake.

The chocolate cakes went back into the fridge because it was pretty dang hot in the venue’s kitchen. You want to serve cakes at room temperature so I took the chocolate cakes out of the fridge for cutting about 1 hour before dessert was served.

After finishing up the chocolate cakes, I did a final coat of frosting on each of the vanilla layers. I focused mostly on the sides of the cake since that is the most visible part.

With Jordan’s help,  we stacked the cake in its place of honor in the main room. Once stacked, I touched up all of the frosting, adding a bit more in between each of the layers so there weren’t any gaps.

When the frosting was as close to perfect as it would ever be, I decorated the cake with fresh flowers to match the bride’s bouquet.

Ta-da! It was done! And it was pretty! And it was delicious! I was very proud and very relieved. Now for a deserved break from cake.

-Emily

Categories
Recipes

in the name of all things pancetta

Goodness me, we’ve reached a whole new level of pork devotion and oh it is glorious. During the past month, we’ve been busy—busy curing our own pork! Inspired by our friend Jessi and in collaboration with our supper club (food nerdom complete), we made pancetta. Pancetta is basically the Italian version of unsmoked bacon—pork belly that has been seasoned, rolled into a log and hung for a few weeks to cure. It’s typically cut into thin slices or small cubes then sautéed and added to pasta or vegetable dishes.

Because it takes about three weeks total to prepare, pancetta is certainly a commitment—of both time and closet space. But it is worth it, especially if you have a few friends to split the resulting 8 pounds of pancetta with.

Home-cured pancetta is complex. It is herby and slightly sweet, porky but also a little beefy. We were surprised by how many different flavors the pork belly acquired during the three-week curing process.

We followed the recipe from Charcuterie by Michael Ruhlman and Brian Polcyn. You can also find a step by step guide of the recipe complete with videos from Chow. Because their instructions are so thorough, I am going to skip the detail and just go with a photo overview of the process.

First you rub the slab of pork belly with herbs (rosemary, thyme, juniper berries), pepper, sugar and salt.

Make sure you really massage those seasonings into the belly.

Then wrap the pork belly in large plastic bags and put it in your fridge under a heavy pot or pan. Refrigerate it for a week, flipping it once a day.

After a week of refrigeration, take the pork belly out and wash of the seasonings. Pat it dry and sprinkle a bunch of cracked peppercorns on the inside. Roll it up nice and tight and truss those puppies.

Hang in a cool, dark place with some air circulation (and out of puppy’s reach) for two weeks. Ours replaced our jackets in the hall closet. Oh it just made us smile when we opened the door to grab our shoes and saw two gigantic logs of pork hanging there.

After two weeks, cut the pancetta down and slice off any little bits of mold. Slice into one-inch thick slices and share with your best foodie friends!

So far we’ve made spaghetti alla carbonara and pasta with vodka sauce. I’m thinking pancetta wrapped asparagus next. Any other ideas for me?

-Emily

Categories
Recipes

how to can 20 pounds of tomatoes

As I’ve mentioned before, we have an awesome CSA through Eatwell Farm. Every week we get a little newsletter with our box of produce describing the types of fruits and veggies and the goings-on around the farm. Last week’s newsletter had an end of the season offer for tomatoes … 20 pounds of tomatoes for $20. $20! As in $1 per pound for amazing, organic, vine-ripened tomatoes. HEAVEN!

If you know me, you know that I have absolutely no power to resist such an amazing offer despite the fact that 20 lbs is a lot of anything. I immediately called Eatwell, purchased my tomatoes and scheduled a pick up at the Ferry Plaza Farmers Market that Saturday. My friend Amanda agreed to go with me to the market and thank goodness I had her help … 20 lbs is heavy! My arms felt like jello after carrying those suckers and I absolutely counted it as exercise.

Upon inspection, I decided to can half of the tomatoes whole and make the other half into tomato sauce. I’ve never really canned anything before (aside from jam under the close observation of my Nonnie), but fortunately Ball- maker of all things canning- has a great website with helpful tips and recipes. I followed their waterbath canning instructions for cold-packed whole tomatoes and basic tomato sauce.

For the whole canned tomatoes
10 lbs tomatoes, skins removed and cored
lemon juice (2 T per quart jar)
coarse salt (1 t per quart jar)
sugar (1 t per quart jar)

To remove the tomato skins: In a large stockpot, bring water to a boil. Make a small x-shaped cut in the bottom of each tomato. Put the tomatoes into the boiling water for 1 – 2 minutes then plunge them into a ice water bath. The skins should easily peel off the tomato. After you’ve removed the skin, remove the core of the tomato.

Wash the jars in the dishwasher or boil the jars. In a saucepan, boil the jar lids and rings for 10 minutes.

In each 1-quart jar, put 2 T lemon juice, 1 t salt and 1 t sugar. Fill each jar within 1/2 inch of the rim with the peeled, cored tomatoes. Press down on the tomatoes to remove air bubbles. Wipe the rim, center hot lid on the jar and seal with the ring.

In a stock pot of boiling water, boil the sealed jars for 85 minutes.  The jars should have at least 1 inch of water covering their tops. After 85 minutes, remove the jars and place on the counter to cool overnight taking care to leave several inches between each jar for air to circulate. Once the jars have cooled, the lid should not move up and down. That is how you know you’ve achieved a good seal.

For the canned tomato sauce
10 lbs tomatoes, peeled and cores removed
3 onions, diced
1 bulb garlic, peeled and sliced
1/2 cup sugar
2 T red wine vinegar
salt, pepper, chili flake

The tomatoes were so flavorful on their own that I decided to make the most simple sauce. We’ve enjoyed it twice since the canning and it is wonderful! I am so happy to have preserved that summer flavor for us to enjoy all fall and winter long.

Remove the skins and cores of the tomatoes. In a large stockpot or dutch oven, saute the onions over medium heat until translucent. Add the garlic and saute for 2 more minutes. Add the tomatoes, vinegar, sugar, and a pinch of chili flake. Simmer for 20 – 3o minutes uncovered to evaporate some of the water. Add a pinch of salt and some pepper. Puree the sauce in a blender or using an immersion blender. Taste for salt and add more seasoning as necessary.

Prep the jars and lids as directed above. Fill each jar within 1/2 inch of the rim. Center the lid on the jar and twist on the ring.

In a pot of boiling water, boil the jars covered in 1 inch of water for 35 minutes. Remove from the water and let cool overnight. The lid should not move up and down once cooled.

I am very satisfied with my first canning adventure! It was fairly easy, although a bit time consuming. I’m considering buying one of those super large canning stock pots for the next time, since I could only fit three 1-quart jars at a time in my regular stock pot. That made for a lot of rounds of boiling and, at 85 minutes a pop,  that is no small chunk of time. Still, a day investment is nothing compared to the pleasure of enjoying summer tomatoes in the dead of winter!

-Emily