Categories
Recipes

buckwheat crêpe gâteau

Sometimes, when you’re feeling particularly overwhelmed by the challenges the universe has decided to throw your way, there’s really not much you can do but bake a cake. I won’t elaborate on the details because these types of details aren’t fun for anyone, but I trust you’ve all been to a similar place. A place where there is nothing you can do but put one foot in front of the other, and bake a cake.

Fortunately, I’ve got a slew of cakes for the baking. There’s Jordan’s favorite chocolate cake, there’s a perfectly citrusy loaf cake, there’s my Nonnie’s carrot cake, and now there is this cake. A cake made of crepes. Mostly it just looks pretty, but let’s not discount how a pretty thing can lift the spirit.

It can.

crepe-cake-3

Buckwheat Crêpe Gâteau
For the crepes
1 cup buckwheat flour
1/2 cup all-purpose flour
2 eggs
2 1/2 cups milk
1/2 teaspoon salt
2 tablespoons sugar
1 teaspoon vanilla

Whisk together the flours, eggs, milk, salt, sugar and vanilla. Let the batter sit in the fridge for 2 hours or overnight. Once the batter has rested, heat a nonstick sauté pan over medium-low heat. When the pan is hot, pour in about 1/4 cup of batter. Swirl the batter around the pan by tilting the pan, first to the right, then towards the back, then to the left, then to the front. Let the crepe just hang out there for a few minutes, don’t poke at it, don’t try and peak—both of these will result in a sad, probably ripped, subpar crepe. Be strong, resist the temptation.

When the batter has formed thin skin and there are bubbles throughout, use a spatula to coax up the edges. Then, using your fingers or a spatula, flip the crepe. Let it cook another 30 seconds or so and repeat with the rest of the batter. Cool the crepes before assembling the cake.

For the cream filling 
1 cup heavy cream
1 teaspoon cinnamon
1/4 teaspoon nutmeg
2 tablespoons powdered sugar
1 teaspoon vanilla
a pinch of salt
maple syrup for drizzling

In a large bowl or the bowl of a mixer, combine the cream, cinnamon, nutmeg, powdered sugar, salt and vanilla. Whisk until a fluffy cream forms.

crepe-cake-1

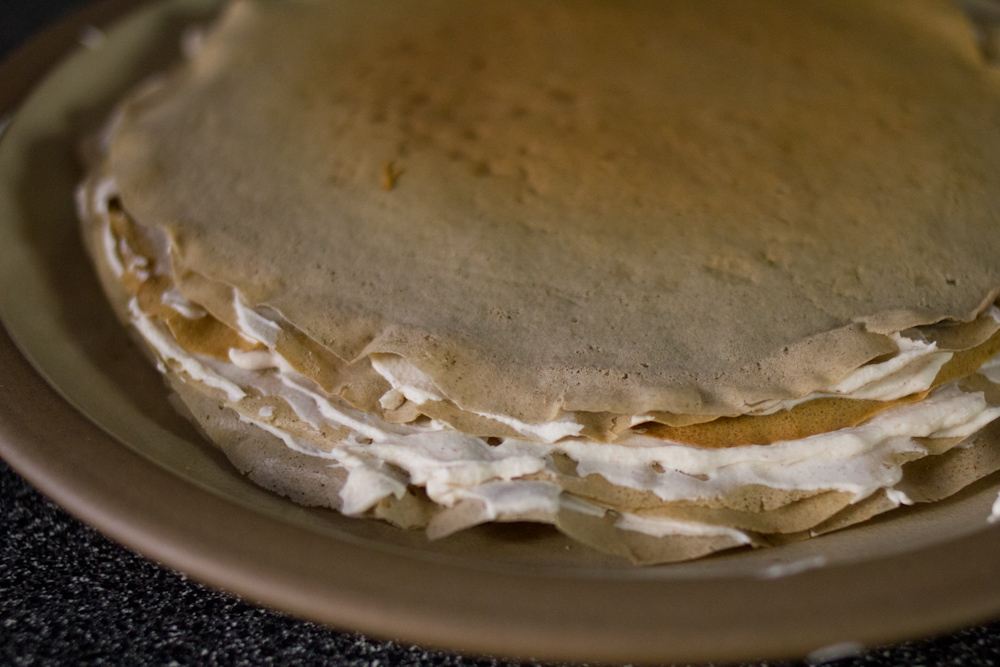
To assemble the cake, put a crepe on a large plate. Spread a thin layer of cream and top with another crepe. Repeat until you’ve used all of the filling and all of the crepes.

crepe-cake-2crepe-cake-4

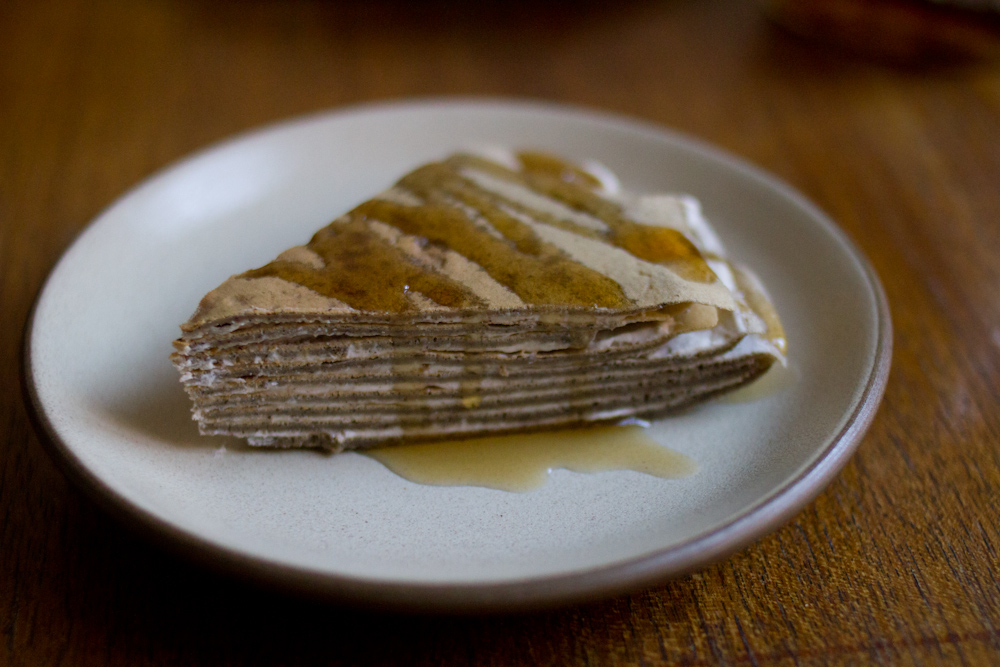
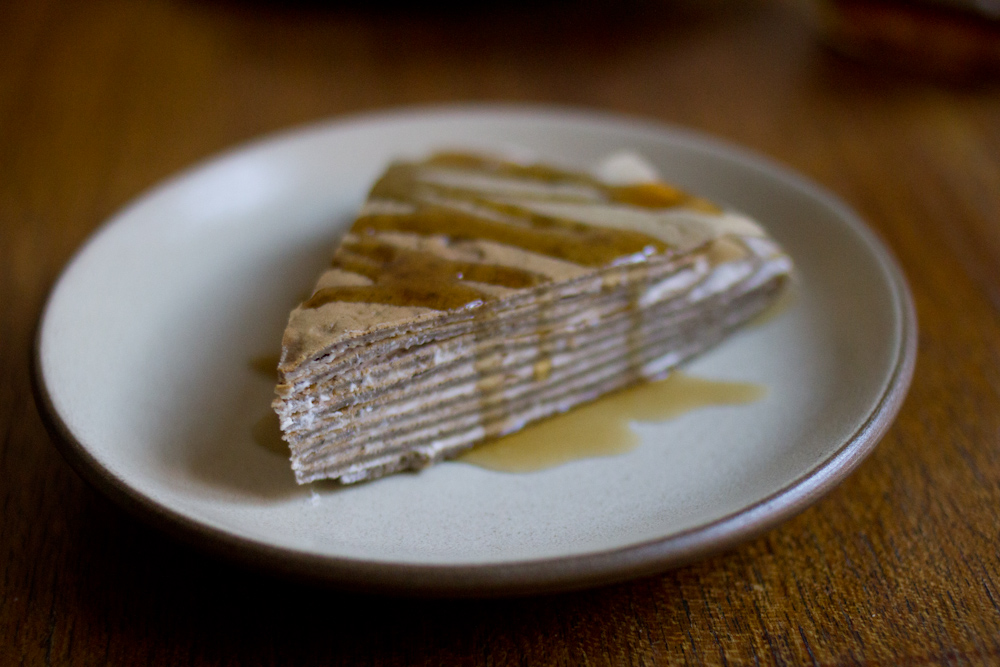
To serve, cut into slices and drizzle with maple syrup. It’s good for dessert. It’s even better for breakfast the next day. Dessert for breakfast isn’t to be discounted either.

-Emily

crepe-cake-5


Categories
Recipes

caramelized onion tart

Every time I have caramelized onions, I wonder why caramelization isn’t obligatory for all onions. It is just magical how onions can transform from sharp and pungent to sweet and magnificent with just a little heat and a little patience. This tart is lovely because it lets the onions shine. If you can crank out a decent pie crust, all the better. Flaky dough + creamy onions = heaven.

onion-tart-2

You could also consider this tart a perfect opportunity to eat bacon. I’d cook the bacon first, drain off some of the fat from the pan, add a tablespoon of butter and then saute the onions in the bacon fat and butter combo. Chop up the bacon in to bits and then combine them with the onion custard before you pour it into the tart shell.

We had this tart for dinner with a salad and roasted veggies. It would also go nicely with soup or roast chicken. I had it for lunch the next day and can attest that it reheats like a dream—in the unlikely event that you have leftovers.

Simple Caramelized Onion Tart, adapted from Orangette
1/2 recipe for flaky pie dough
3 tablespoons butter
2 large yellow onions, peeled and sliced thin
1/2 cup heavy cream
1 egg
salt
pepper
pinch of nutmeg

Flaky Pie Crust 
2 1/2 cups all purpose flour
1 1/4 teaspoons kosher salt
2 1/2 sticks unsalted butter
about 5 tablespoons ice water

Make the pie crust the night before. In a food processor, combine flour and salt. Remove the butter from the fridge and cut into 1 inch cubes. Add them to the flour mixture. Process until the butter chunks are about the size of peas. Add the water and pulse a few times to combine. Divide into two equal balls, wrap in plastic wrap and refrigerate.

Preheat your oven to 375 degrees.

onion-tart-1

In a heavy-bottomed pan over medium low heat, melt two tablespoons of butter. Add the onions. Caramelize the onions stirring occasionally. Depending on your stove, this will take somewhere in the neighborhood of 45 minutes.

onion-tart-3

While your onions are caramelizing, roll out the pie dough. Put it in a 9-inch tart pan and trim off the excess. My favorite Julia Child trick for getting perfect edges on a tart is to drape the excess dough over the edges of the pan and then roll the rolling pin on top of the dough over the edges of pan. The sharp edges of the pan will cut through the dough and you can easily pull away the excess. Put the tart shell in the fridge until your onions are done caramelizing.

Whisk together the egg, cream, salt, pepper and nutmeg.

onion-tart-4

After the onions are a medium brown, remove them from the heat. Mix them with the egg mixture and pour into the tart pan. Bake for 30 – 45 minutes, until the top of the tart is golden brown. Unmold the tart and serve hot or let cool to room temperature and serve.

onion-tart-5

-Emily

Categories
Recipes

french onion soup

A while back, we made Julia Child’s french onion soup. It was delicious, but a serious undertaking. First you make a beef stock, then you caramelize onions for a few hours, and then you make the soup. This recipe is less time intensive and uses homemade chicken stock instead of beef, which I usually have on hand. (Whole roasted chickens make up a rather large portion of our meat consumption and their little frozen carcases become stock about once a month). This soup turned out beautifully and while I don’t know if it is better than Julia’s, it’s certainly just as good.

12.18.12-1

One Year Ago: Mock Porchetta
Two Years Ago: Nonnie’s Carrot Cake

French Onion Soup, from Tartine Bread
6 large yellow onions, cut into slices
1 cup heavy cream
1 tablespoon unsalted butter
1 tablespoon duck fat (use another tablespoon of butter if you don’t have duck fat)
1 teaspoon salt
2 cups dry white wine
2 cups rich chicken stock
4 slices day old bread
5 oz gruyère cheese, grated

12.18.12-2

Preheat an oven to 400 degrees F. Combine onions, cream, butter, duck fat and salt in a large saucepan. Cook, stirring occasionally, over medium heat until the onions are translucent, about 15 minutes. Adjust the heat so that the onions and cream are at a slow boil. Spread the onions over the bottom of the pot and cook, without stirring, until the onions begin to brown, about 10 minutes. Stir the onions and scrape the browned bits off the bottom of the pot. Add 1/2 cup of wine to deglaze. Continue cooking the onions without stirring for another 10 minutes, until they brown again. Add another 1/2 cup of wine and scrape the bottom. Repeat this process two more times, until the soup takes on a deep caramel color.

12.18.12-3

While you’re caramelizing the onions, toast the bread. Spread the bread in an even layer on a baking sheet and toast until dry and brittle. About 15 minutes in a 400 degree oven.

Pour in the stock and bring to a simmer over medium heat. Cook until the broth is well flavored by the onions, about 15 minutes. Season with more salt if needed.

12.18.12-4

Ladle the soup into ovenproof bowls, float a piece or two of toasted bread on each serving and top with the grated gruyere cheese. Put the bowls on a baking sheet and carefully put the sheet into the oven. Bake until the cheese is bubbly and caramelized, about 20 – 30 minutes.

12.18.12-5

This soup is delicious—simple and satisfying. I wholeheartedly recommend you bake the soup for 20 minutes with the cheesy crouton on top, instead of just topping the soup with a piece of cheesy bread. Something magical happens when you bake the soup and bread together for a while, you don’t want to miss out on it.

-Emily

Categories
Recipes

four-hour baguette

You may be familiar with my sourdough bread adventure—a rustic country bread that in the end took over a year to perfect and became my Sunday obsession for months. Well, my experience with this bread was the exact opposite. I found the recipe, gathered ingredients, made the dough, baked and ate, all in about four hours. It was refreshing.

These french baguettes are very different from my sourdough. Where baguettes are light and delicate, my bread is dense and toothy. This baguette recipe is quick—thanks to commercial yeast—uses all purpose flour and doesn’t require any special equipment, which makes it pretty ideal for most home cooks. On top of that, your house will smell amazing while the loaves are baking. This recipe makes three 14″ long baguettes, which you’ll easily eat all of.

Four-Hour Baguette, from Saveur May 2012 Issue
1 1/2 cups tap water, heated to 115 degrees
1 t active dry yeast
3 1/4 cups all-purpose flour
1 1/2 t kosher salt
canola oil, for greasing the bowl
1/2 cup ice cubes, for making steam in the oven for a good crust

In a large bowl, whisk together the water and yeast. Let sit until foamy. Add the flour, stirring with a fork or your hands, until a dough forms. Let the dough rest 20 minutes.

After 20 minutes, sprinkle in the salt and knead it in. Transfer the dough to a lightly floured work surface and knead for about 10 minutes, until the dough is smooth and elastic. Transfer the dough to a lightly greased bowl and cover the bowl with plastic wrap. Don’t forget to grease the bowl, this is a very sticky dough. Place in a cold oven to rise. Let dough sit for 45 minutes, until doubled in size.

Transfer the dough to a lightly floured work surface and shape it into a 8″ x 6″ rectangle. Fold the long sides into the middle and then fold the short side into the center. Return the dough seam side down to the greased bowl. Cover and let rise again in the cold oven for an hour.

After an hour, remove the dough from the oven. Place a cast-iron skillet in the bottom rack. Position another rack above the skillet and place a baking stone on that rack. Heat the oven to 475 degrees.

Transfer dough to a lightly floured work surface. Divide into three equal pieces and shape each into a 14″ long rope (the length of a standard baking sheet). Flour a sheet of parchment paper and place it on a baking sheet. Place the dough ropes on the sheet evenly spaced apart. Lift the paper between the ropes to form pleats so they don’t stick together as they rise. Place two kitchen towels on each long side of the baguettes to support the loaves as they rise. Cover loosely with plastic wrap and let double in size, about 50 minutes.

By this time your oven will be hot. Uncover the loaves, remove the towels and flatten the paper to space out the loaves. Use a razor blade to score the loaves with several long diagonal cuts. Carefully, with the loaves still on the parchment paper, slide them onto the hot baking stone. Place the ice cubes in the skillet and close the oven door. The ice will create steam which helps form a nice crust on the bread. Bake the baguettes 25 – 30 minutes, until browned.

Cool on a rack or enjoy straight out of the oven with some salted butter. Jordan and I ate an entire loaf just standing at the kitchen counter, they go down that easy.

These baguettes were delicious don’t get me wrong, but the flavor wasn’t very complex. Next time I’m going to try adding a bit of sugar to the yeast and water and try for a slightly sweeter baguette.

-Emily

Categories
Restaurant Reviews San Francisco

hyde street bistro

It was Monday night. I had just gotten home from work. It was 80 degrees in our apartment (in November! in San Francisco!). We had no ideas for dinner and the thought of turning on the oven was just too much. We decided to go out. I told Jordan that I wanted to eat something light on a cool, quiet patio. Also, I didn’t want to walk far. While I thought this request impossible, my sweet Jordan found exactly what I was looking for in Hyde Street Bistro, just a few short (but uphill) blocks from our apartment.

Hyde Street Bistro (Hyde and Pacific) is a small, farm to table French restaurant. It is positively adorable, the wait staff is charming, the food is simple and French. We sat outside at a small bistro table under a tree decorated in white twinkle lights, the drone of the cable car tracks in the background. For sidewalk seating (especially in our colorful neighborhood), it was nice and quiet. I was quite pleased and I hadn’t even ordered.

We started with the butter lettuce salad with honey cider vinaigrette ($7). Simple, acidic, slightly sweet – a nicely composed salad. We then ordered the mussels mariniere ($14), fries ($5) and fresh vegetable sauté ($5). The mussels were delicious – you can’t go wrong with shallots, wine, parsley and butter. The fries were crisp and well-seasoned. The aioli that was served with them was also nice. The vegetables left something to be desired, although they were an appropriate crisp-tender. Nicely done, quickly prepared, simple and satisfying.

Overall, Hyde Street Bistro was exactly what I wanted: a light meal eaten outside on a quiet patio with no dishes for me to clean up afterward. Great pick Jordan! In addition to a full French menu, they also have a happy hour from 5:30 – 7 with $3 draft beers, $5 glasses of wine and $10 mussels with fries. We certainly will be back!

-Emily