Categories
Recipes

julia child’s beef bourguignon

For my 22nd birthday, my Nonnie gave me a copy of Mastering the Art of French Cooking. Sitting at her kitchen table, as I unwrapped the tome that changed home cooking so monumentally, she gave me some advice. “Make the beef bourguignon first. And do not skip the bacon.”

beef-bourguignon--6

Like she is on most things culinary and otherwise, my Nonnie was right. Julia Child’s beef bourguignon is perfection, worth every bit of effort, and the bacon is absolutely essential. It is easily the best braised beef I’ve ever made and I’m sure those who’ve had the pleasure of eating it with us in years since I was first gifted the book would also agree.

And what is winter for if it isn’t to embrace braising? Dedicate an afternoon to Julia’s beef bourguignon, and don’t even think about skipping the bacon.

beef-bourguignon--10

Beef Bourguignon, adapted very slightly from Mastering the Art of French Cooking by Julia Child
6 oz bacon, cut into 1/2″ pieces
3 lbs lean stewing beef, cut into 2″ chunks (we used chuck roast)
1 carrot, sliced
1 onion, sliced
salt, pepper, olive oil
3 cups red wine
2 – 3 cups beef stock
1 tablespoon tomato paste
2 garlic cloves, mashed
1/2 teaspoon thyme
1 bay leaf, crumbled
20 small white onions, brown-braised
1 lb fresh mushrooms, cut into halves or quarters, sautéed in butter

beef-bourguignon--2 beef-bourguignon--3

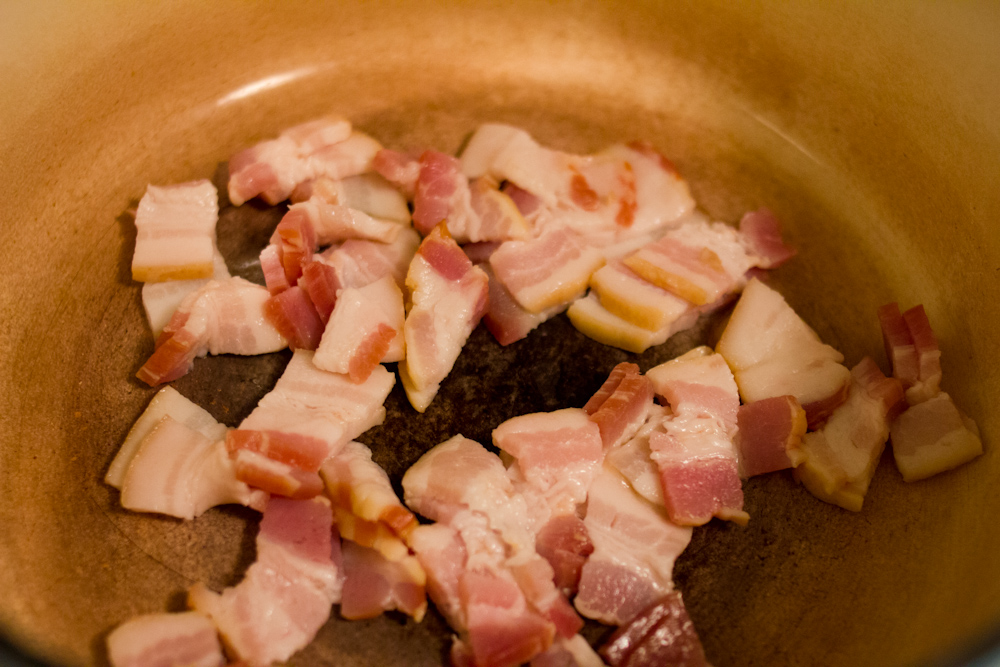
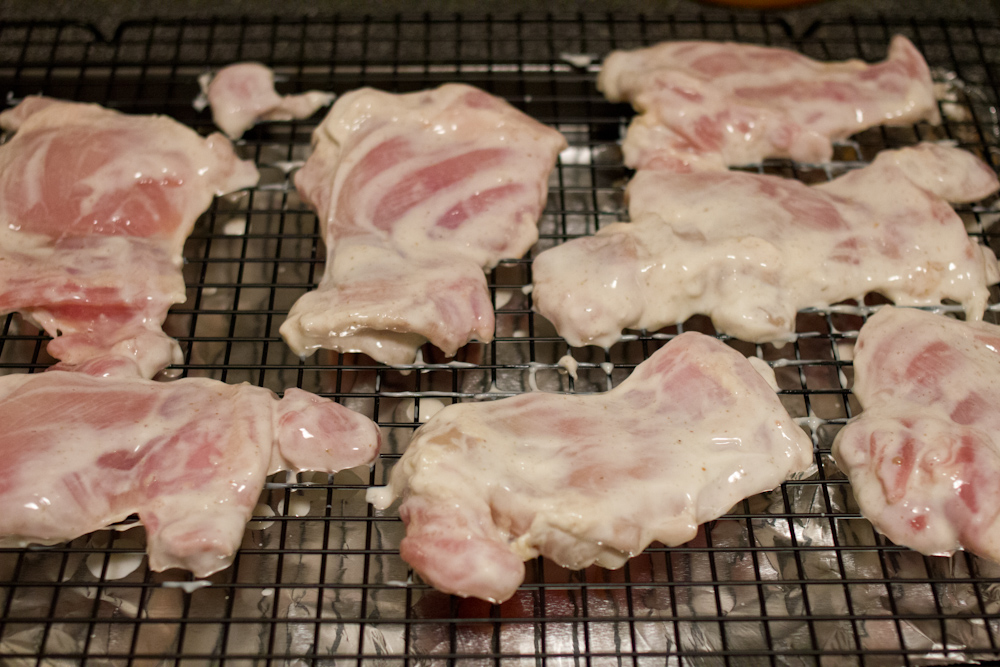
Preheat your oven to 450° F.  If you know your bacon is quite smoky, you may want to boil the bacon in some water for a few minutes to take out some of the smoke flavor before you sauté it. This is what Julia recommends, but I usually skip this step and skip right ahead to sautéing. In a cast iron pot, sauté the bacon over medium heat. After the bacon has browned lightly, remove it with a slotted spoon and set it aside. Take the pot with the bacon fat off the heat.

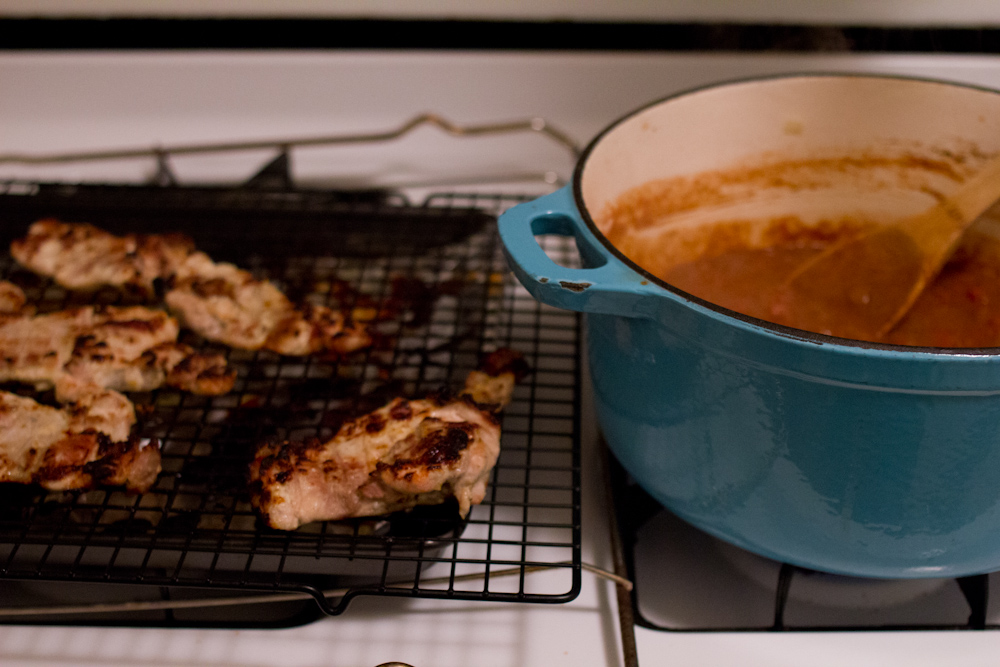
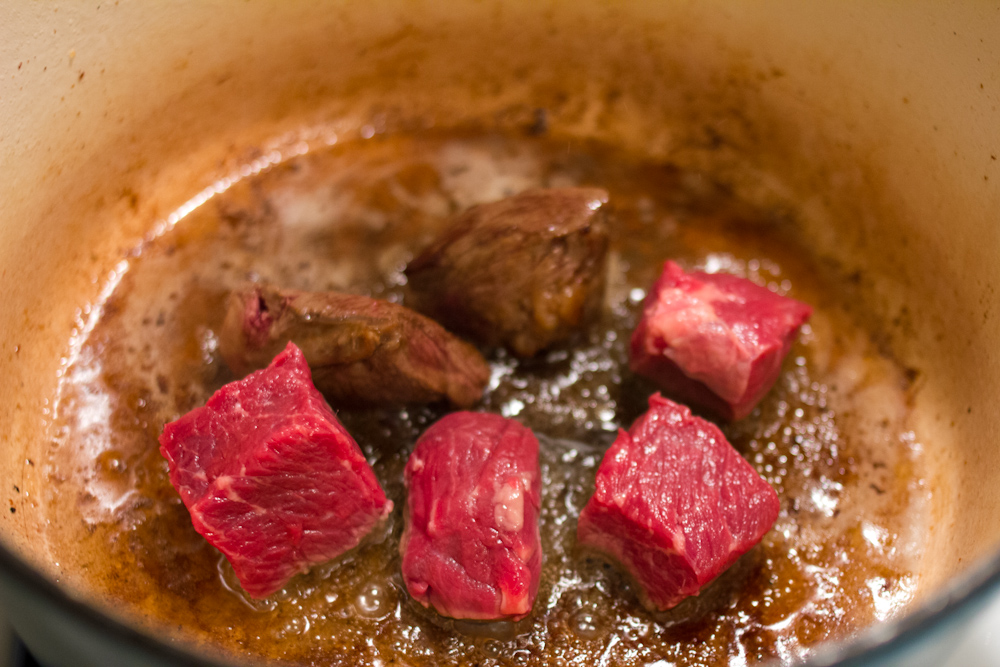
Cut the beef into 2 inch cubes and then pat them dry with paper towels. Heat the pot with the bacon fat over medium high heat until the fat is nearly smoking. If your bacon didn’t render off much fat, I would add a tablespoon of oil to the pot. Add a few cubes of the beef. Sear them, letting them sit without disturbing them for a few minutes per side, until they are a deep brown. Be sure to not crowd the pan or the beef will steam instead of browning. For about 2.5 pounds of meat, I did mine in four batches.

beef-bourguignon--4 beef-bourguignon--5

While the beef is browning, cut the onion and carrot into chunks. After browning the last of the meat, add the vegetables. Brown them slightly and then remove them and set them aside.

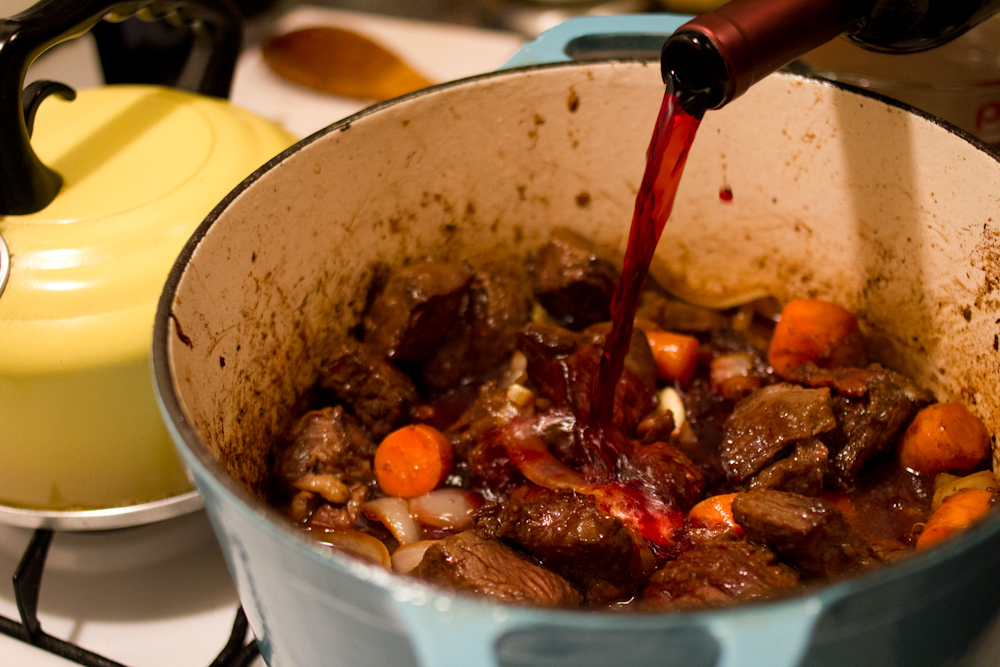
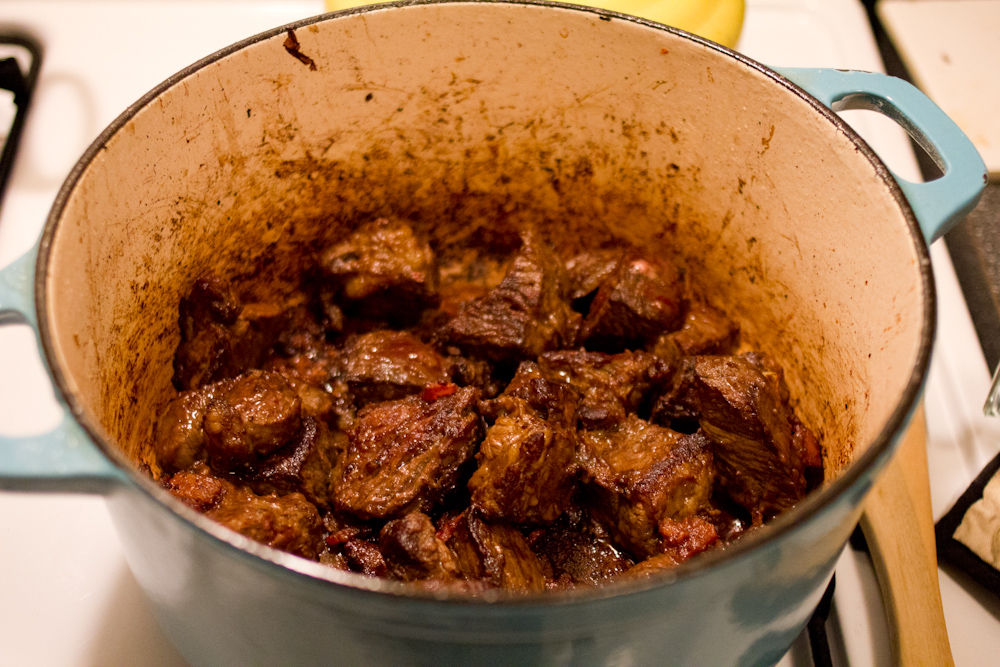
Put the beef and bacon back into the pot. Add 1 teaspoon of salt and some fresh black pepper. Toss the beef to coat. Add 2 tablespoons of flour and toss to coat again. Set the pot in the middle of your 450° oven and cook for 4 minutes. Toss the meat and cook for another 4 minutes in the oven. Reduce the heat of the oven to 325°. Return the pot to the stove top and add the vegetables, wine, broth, tomato paste, garlic, and herbs. The meat should be just barely covered by liquid. Bring to a simmer on the stove top and then place in the oven. Cook in the oven for 2 1/2 to 3 hours. The meat is done when a fork pierces it easily.

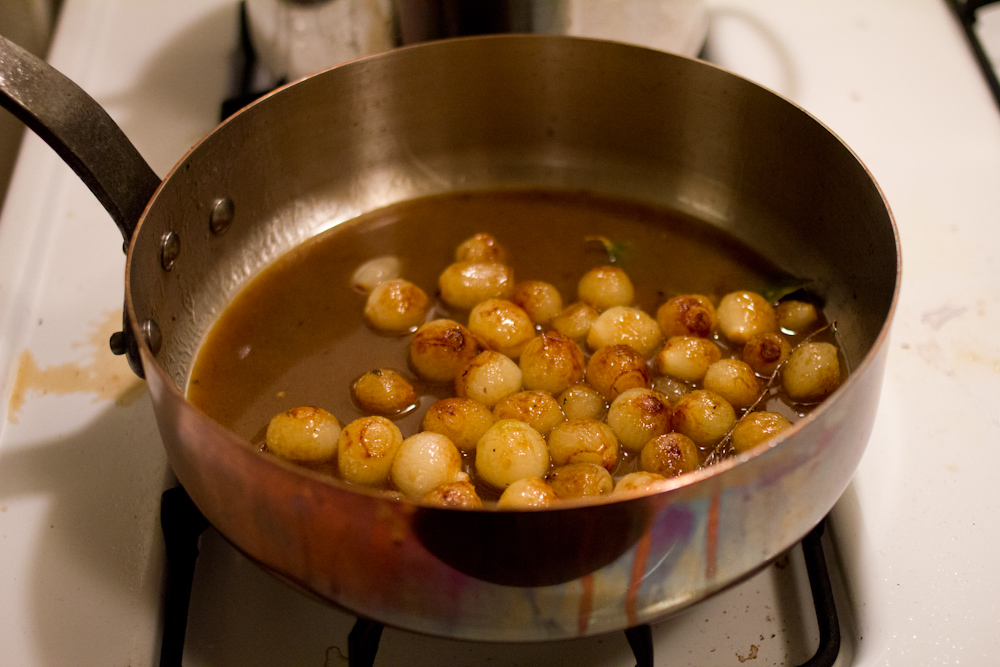
While the beef is cooking, prepare the pearl onions. For the pearl onions, peel them if using fresh. If using frozen, defrost in water. Melt 1 tablespoon of butter over medium heat. Add the onions and brown them on each side. Once browned, add 1/2 cup beef stock, a pinch of thyme and a bay leaf and reduce the heat to low. Let simmer covered for 20 minutes, until the onions are cooked through.


beef-bourguignon--8

If you’re making this in advance, you can prepare the beef and onions up until this point and then refrigerate them. You can then rewarm the beef by simmering it on the stove over low heat for 15 – 20 minutes before serving. I like to saute my mushrooms the day of serving because they are pretty easy to do while you’re cooking the potatoes.

In the last 45 minutes of cooking for the beef or 45 minutes before you want to eat, peel a few potatoes and cut them into quarters. Put them in a sauce pan and cover them with water. Season the water until it taste like sea water. Bring the potatoes to a boil and cook until tender, about 20 – 25 minutes. Drain the potatoes and mash them, adding a bit of butter, milk, salt and pepper to taste. I usually do this in my kitchen aid mixer.

For the mushrooms, clean 1 pound of mushrooms and then cut them into halves or quarters depending on their size. Sauté over medium heat in 2 tablespoons of butter, until browned and cooked through, about 10 minutes.

When the meat is tender, remove it from the oven and place on the stovetop. Skim off any fat that may be floating on the surface of the meat. In my experience, there is very little beef fat to skim off, but I generally cook with leaner grass-fed beef.  You skim off any fat to prevent a greasy gravy because greasy gravy is gross. Taste the sauce for seasoning; it may need a little salt or pepper. Before serving, add in the braised onions and sautéed mushrooms to pot along with the beef and vegetables. Serve over mashed potatoes with a gravy boat of extra sauce on the side.

beef-bourguignon--9

-Emily


Categories
Recipes

lentil salad with poached eggs

Before heading off for our Christmas festivities, Jordan and I spent a Saturday poking around Berkeley. My idea was to grab lunch at Cheeseboard, find a few outstanding gifts and then check out Berkeley Bowl, an independent supermarket of epic proportions (40,000 square feet!). The line for Cheeseboard was around the block, so we grabbed some pastrami at Saul’s Deli instead. (Not a bad call. The waffles are also delicious). Gift shopping was mostly unsuccessful, but if we’re honest, this outing was planned around the food.

Once at Berkeley Bowl, we dutifully explored each aisle with special attention paid to the vast beer selection and exotic produce. It’s a fun place to kill a few hours if you like food. We were on our way out with an assortment of tasty treats when we realized we’d spent two hours in a grocery store and still hadn’t planned anything for dinner. After a lunch of pastrami, something vegetarian for dinner seemed reasonable. I recalled some sort of lentil salad and out of grocery store fatigue we decided to run with it. At Berkeley Bowl, they have at least six types of lentils for anyone who might be counting. I chose the prettiest ones, black beluga lentils.

lentil-salad-2

This dish is simple and beautiful. The egg yolk when combined with the vinegar dressing from the lentils makes the most delicious sauce. Let’s take a moment to appreciate the perfection that is a runny egg yolk. It would be a tremendous effort to make a sauce as lovely from anything else, but with eggs it is simple—just don’t overcook them.

The salad also keeps quite well. Eat it cold from the fridge the next day for lunch, or snag a few bites before you run out the door in the morning. I can also imagine swapping the egg for poached or pan-fried fish. If you’re not an egg person but want to keep it vegetarian, you could add some crumbled goat cheese or feta.

Lentil Salad with Poached Eggs, adapted from The Art of Simple Food by Alice Waters
1 cup lentils (we used black Beluga lentils because they hold their shape when cooked, plus they are quite pretty)
1 tablespoon red wine vinegar
salt and pepper
3 tablespoons olive oil
3 tablespoons finely diced shallot
3 tablespoons chopped parsley
1 – 2 eggs per person, depending on how hungry you are

Pick out any grit from the lentils and rinse them with cold water. Put them in a medium saucepan and over with water by 3 inches. Season the water with salt until it tastes like salt water. Bring to a boil and then simmer for 30 minutes, until the lentils are tender. Drain the lentils and pour into a large bowl.

Toss the lentils with the vinegar and season with salt and pepper. Let sit for 5 minutes. Taste again and add more salt or vinegar if needed. Add the olive oil, shallot and parsley and toss to combine. Set aside.

To poach the eggs, rinse the saucepan you cooked the lentils in and fill it with 4 – 5 inches of water. Bring to just under a simmer and add 1 teaspoon white vinegar. Crack an egg into a small cup or mug. Stir the water gently in a circle to form a whirlpool. As the whirlpool spinning begins to slow, gently pour the egg into the water. If you get the cup as close to the surface of the water as possible before pouring it in, it is easier to keep the white from going all over the place. Fresh eggs also make this easier (but I’m sure you all already know that!). Use a spoon to snuggle the white around the yolk. Let cook for 3 – 4 minutes and then remove with a slotted spoon.  I can usually cook about 3 or 4 eggs at a time in a 3 1/2 quart saucepan. If you’re making any more than that, I’d do them in batches. You can also trim off the little egg white tails that furl off the egg to make your poached eggs look even more perfect, but I’m not that fussy. (Our friend Roche also shared this video in the comments, which is for a technique he finds flawless.)

To serve, mound the lentils on a plate and top with a poached egg and some fresh pepper. Enjoy!

lentil-salad

-Emily

Ps. Today marks Jordan and I’s eighth anniversary. (!!!) I wouldn’t have found a smarter, funnier or handsomer fella if I tried. I couldn’t be more happy or more grateful. I love you Jordan!

 photo (1)

Categories
Randomness Recipes Thoughts on Life

goodbye 2013

I was more than ready to say goodbye to 2013, I think I’ve been ready since July. 2013 was a bit brutal and I’m glad to be rid of her, to be quite honest about it. But, seeing as I’m sick in bed with a head cold and my consumption of TLC trash tv is getting embarrassing, I decided to give the year a closer look.

Though the lows of this past year were by far some of the lowest, and the trials some of my toughest, there is also so so much goodness in our lives. For our loving families, for our wonderful friends who feel like family, and for the silly hounds that fill my heart with joy, I am tremendously grateful. I’m also pretty dang proud that this little family of mine, Jordan, Willow and I, weathered this storm of a year. So, feeling sappy and full of snot, here are some of my favorite moments from 2013.

2013-recap

2013-recap-4

2013-recap-3

2013-recap-2

2013-recap-7

2013-recap-6

2013-recap-11

2013-recap-5

2013-recap-102013-recap-9

2013-recap-8

2013-recap-16

2013-recap-13

2013-recap-12

2013-recap-152013-recap-17

1069328_722100727815419_141319322_n-1

2013-recap-19

2013-recap-20

santa-cruz-polaroids-1

2013-recap-a

2013-recap-a-2

Onwards and upwards. 2014 we’re ready for you.

-Emily

Categories
Recipes

christmas cookie party

Every year since moving to our little apartment in San Francisco, I’ve hosted a Christmas cookie party. We bake and decorate, drink mimosas, eat take out. It’s a good time. The tradition actually goes back further to when I was living in D.C. during college. My ‘Maryland family’, the Adinehs, would host a Christmas cookie party of impressive proportions. If there were not at least 12 types of cookies baked and two card tables piled high with delicious treats by the end of it, we had not done our job. There is nothing that makes a lover of butter feel more in the Christmas spirit.

christmas-cookies-2013-13

Thanks to our friend Kelly, there were no holds barred on the decorating front at this year’s cookie party. There were Mondrian cookies, there were paisley cookies, paintbrushes and toothpicks may have been brandished. Never before had I seen such dedication to the art of decorating. I felt like I was running a Martha Stewart craft factory and it was fantastic. Beyond artfully decorated sugar cookies, there were Jordan’s mom’s chocolate snow bombs, malted milk ball cookies, chocolate chip cookies, macaroons, chewy ginger cookies, and pralines. All modesty aside, we hit it out of the park this year.

The holidays are nigh and maybe you still need gifts for the neighbors, or maybe a plate of cookies for Santa, or maybe you just really like cookies? We’ve got plenty of recipes here to help you out.

christmas-cookies-2013-2christmas-cookies-2013-9christmas-cookies-2013-8christmas-cookies-2013-5

Granny’s Sugar Cookies (another one passed down from Nonnie for those who are counting out there)
1/2 cup butter, softened
1 cup sugar
1/2 teaspoon vanilla
1 egg
1/2 teaspoon salt
2 teaspoons baking powder
2 cups flour

Beat the butter until it is light and fluffy. Add the vanilla and sugar and cream together for a few more minutes. Add the egg. In another bowl, sift together the salt, baking powder and flour. Add flour mixture into the butter mixture and stir until combined. Divide into two balls, flatten into discs and refrigerate for 4 hours or overnight. Roll out into 1/4″ thickness and cut with cookie cutters. Bake at 400° for 6 – 8 minutes. These babies cook fast so set a timer!

For the icing
4 cups powdered sugar, sifted (trust me, it will save you time in the end)
1 lemon, juiced into a small bowl and strained of seeds
a few tablespoons of milk
food coloring

Sift the powdered sugar into a large bowl. Add a few tablespoons of the lemon juice and whisk together. It will be a big sugary clump. Add a tablespoon of milk at a time, until you get a smooth icing. Careful though, you don’t want it to be so runny it runs of the cookie. Divide into as many small bowls or cups as colors you’d like to make and add the food coloring.

christmas-cookies-2013-7

Chocolate Snow Bombs (Jordan’s mom’s specialty, aptly named by Jordan)
2 cups flour
2 teaspoons baking powder
1/2 teaspoon salt
1/4 cup butter
4 oz unsweetened chocolate
2 cups sugar
4 eggs
powdered sugar for rolling

Sift together flour, baking powder and salt in a large bowl. Melt the butter and chocolate together. Cool slightly and add the sugar to the chocolate mixture. Add one egg at a time and beat well by hand with a wire whisk. Slowly add the flour mixture and mix well. Chill at least 30 minutes. Shape dough into 1″ balls, rolling in powdered sugar. Place on a greased or parchment-lined baking sheet. Bake at 300° for 18 – 20 minutes.

christmas-cookies-2013-10

Malted Whopper Cookies, adapted from Two Peas and Their Pod
2 1/4 cups flour
1/2 cup malted milk powder (we all remember this lesson, right?)
2 teaspoons cornstarch
1 teaspoon baking soda
1/2 teaspoon salt
3/4 cup unsalted butter, softened
1 cup dark brown sugar
1/4 cup granulated sugar
1 large egg
2 teaspoons vanilla extract
1 cup chopped Whoppers (or any malted milk balls)

In a large bowl, sift together flour, cornstarch, baking soda and salt. Add the malted milk powder. In the bowl of a stand mixer, beat the butter until light and fluffy. Add the sugars and beat some more. Add the egg and vanilla extract and beat until well combined. Mix in the flour mixture. Add the malt balls. Spoon onto a parchment-lined baking sheet, placing cookies about 2 inches apart. Bake at 350° for 10 – 12 minutes, until lightly golden at the edges.

christmas-cookies-2013-12

Chocolate Chip Cookies, from Eileen Crawford, my cousin Katie’s future mother-in-law (pulling out all the secret-family-recipe stops this year)
1 cup brown sugar
1/2 cup granulated sugar
12 Tbs unsalted butter (1 1/2 sticks)
1 large egg + 1 egg yolk
2 tsp vanilla
2 1/8 cup unsifted all-purpose flour
1/2 tsp salt
1/2 tsp baking soda
1-2 cups chocolate chips

Melt the butter. Combine the two sugars in bowl. Add melted butter and combine until smooth. Add eggs and vanilla and combine until smooth. In a separate bowl combine the flour, salt and baking powder, lightly stir. Add flour mixture to the sugar mixture. Combine. Add chocolate chips. Preheat oven to 325 degrees. Spoon cookie dough onto cookie sheets and bake for 13-18 minutes, depending on the size of the cookie. (I use a large soup spoon to measure the cookie dough and find 15 minutes works for me.)

christmas-cookies-2013-4

Big Chewy Ginger Cookies, adapted from AllRecipes
2 1/4 cup flour
2 teaspoons ground ginger
1 teaspoon baking soda
3/4 teaspoon ground cinnamon
1/2 teaspoon ground cloves
1/4 teaspoon salt
3/4 cup unsalted butter, softened
1 cup sugar
1 egg
1 tablespoon water
1/4 cup molasses
sugar for rolling

In a medium bowl, sift together the flour, baking soda, salt, ginger, cinnamon, and cloves. In the bowl of a mixer, beat the butter until light and fluffy. Add the sugar and beat to combine. Add the egg and then mix in the water and molasses. Shape the dough into walnut sized balls and roll in sugar. Place on a parchment-lined baking sheet about 2 inches apart. Bake at 350° for 8 – 10 minutes.

christmas-cookies-2013-11

Coconut Macaroons with Mini Chocolate Chips, adapted from AllRecipes
5 1/2 cups flaked coconut
1 can sweetened condensed milk
2 teaspoons vanilla extract
1 1/2 teaspoons almond extract

Mix all ingredients to combine. Drop by teaspoonfuls on a parchment-lined baking sheet. Bake at 350° for 8 – 10 minutes.

christmas-cookies-2013-14

So there you have it, an excess of sugar and butter that I guarantee will get you in the Christmas spirit.

-Emily
christmas-cookies-2013-3

Categories
Recipes

nonnie’s russian teacakes

russian-teacakes-8

These are probably my favorite cookie. They are buttery, just the right amount of sweet, as perfect with coffee as they are with a glass of milk. The recipe is my Nonnie’s, and she always makes sure to have a tin of them ready when I go over to visit.  Food just tastes better when someone makes it for you, especially if that person knows their way around a stick of butter like my Nonnie.

I usually have an acceptable level of self-control in regards to the desserts I make, but restraint is nearly impossible with these cookies. These cookies are are my kryptonite. Whenever I make them, or am lucky enough to snag a tin from the master herself, I force myself to ration them to make them last as long as possible. One for breakfast with coffee, two for dessert. Tin kept under lock and key. Trust me, it’s tough to not plow through the entire batch in a day or two. I ate the last one out from under Jordan’s nose and didn’t feel even the slightest tinge of remorse. That is how much I love these cookies.

Because they are a family specialty and because they are my favorites, I thought it only fitting to go all out for the Great Food Blogger Cookie Swap and send these to three lucky ladies, Rebecca, Laura and Willow.

russian-teacakes-13

Nonnie’s Russian Teacakes
1 cup (2 sticks) butter, softened
1/2 cup powdered sugar, sifted
1 tsp vanilla extract
2 1/4 cup all-purpose flour, sifted
1/4 tsp salt
3/4 cup pecans, finely chopped
powdered sugar, for rolling in after baking

russian-teacakes russian-teacakes-2

Beat the butter until light and fluffy. Beat in sifted powdered sugar and vanilla until well combined. Sift in flour and salt. Add pecans. Mix until a crumbly dough forms. Refrigerate for at least four hours, preferably overnight.

russian-teacakes-6russian-teacakes-5

Preheat your oven to 400° F. Roll dough into 1″ balls. Bake 12 – 14 minutes, until they are just starting to be a bit golden around the bottom. Roll in powdered sugar while hot. Let cool completely and roll again in powdered sugar.

russian-teacakes-7russian-teacakes-10

My Nonnie is an amazing cook. She rocks pot roast, turkey stuffing, crab cakes, berry pie, biscotti, not to mention her famous cheesecake, like nobody’s business. My russian teacakes couldn’t hold a candle to Nonnie’s until very recently, but my dedication to the art has paid off.  My secrets are revealed in this little puppet below. Watch it and learn how to make your cookies *almost* as good as Nonnie’s!

Packing cookies for transport is a serious thing. And serious things usually require a trip to Daiso, the Japanese version of the dollar store and one of my favorite places in San Francisco. There I picked up some adorable tins, mini cupcake papers and gingham wrapping paper—all in the interest of making sure my cookies arrived unharmed and as adorable as they are delicious. Once cooled, cookies were placed in tins, recipes were written up, and I packed the mailing boxes chock full with crumpled pages of an unread Vogue magazine to ensure my cookies didn’t get to jostled on their journey. Priorities.

russian-teacakes-4russian-teacakes-9russian-teacakes-12russian-teacakes-14russian-teacakes-15

And now that I’ve exhausted you with all kinds of adorable, you really should make these cookies this holiday season.

-Emily
russian-teacakes-17

Categories
Recipes

lentil stew with sesame rice

lentil-stew-6

We didn’t really eat lentils much until a dinner at our friend Ted‘s house almost two years ago. He made a delicious Indian-spiced lentil dish and we got hooked—Ted’s lentils were that good. On the whole, lentils are tasty, cheap and versatile. I’ve been trying different recipes here and there, and though I cannot seem to reproduce Ted’s, this has been one of my favorites that I’ve tried.

Like most stews, this one only gets better as it sits. The flavors meld and develop over time and it goes from pretty good to really good in about two days. If you have the foresight, make it a day or two ahead of serving it. Also, the lemon really makes this stew. It adds such a perfect brightness to the dish. It might seem weird to put lemon slices in a stew before you simmer the thing for 30 minutes, but it turns out great. Don’t skip it!

Lentil Stew with Sesame Rice, adapted from The Kinfolk Table 
1 cup red or yellow lentils
1 onion, diced
4 cloves of garlic, minced
1 – 1.5″ piece of ginger, minced
1 teaspoon ground cumin
1/4 – 1/2 teaspoon cayenne pepper, depending on how spicy you like it
1 – 15 oz can of diced tomatoes
1 lemon, sliced into rounds
3 cups chicken or vegetable stock
olive oil
salt & pepper, to taste
chopped cilantro, parsley or green onion for garnish

Rinse the lentils in cold water until the water runs clear.

lentil-stew-2 lentil-stew-1

In a dutch oven, heat a tablespoon or two of olive oil over medium heat. Add the onion and saute until translucent, about 7 minutes. Add the garlic, ginger, cumin and cayenne and saute a few minutes more. Add the tomatoes, stock, lentils and lemon slices. Turn the heat to low and let the stew simmer for 20 – 30 minutes, until the lentils are tender. If you’re eating your stew the next day, turn off the heat and stash your lentils in the fridge. If you’re eating that night, let the lentils simmer away until your rice is cooked.

For the rice
1 cup brown rice (or white rice, though the nuttiness of brown rice goes well with this stew)
2 cups water (or according to your rice cookers directions – rice cookers know all)
3 tablespoons toasted sesame seeds
1 teaspoon salt

Now brown rice takes a long time to cook. Plan for double the cooking time of white rice so about an hour on the stove or two hours in a rice cooker. If your rice cooker has a self-timer, use it. If it doesn’t, start the rice before you start the stew or the second you walk in the door after work.

I’m mentioning this because you, like me, might not be familiar with the intricacies of brown rice. You might realize only after you get home from work ravenous at 8pm that brown rice has 2 hour (!) cooking time. This news might force you to lie in dismay on the floor while your knight in flannel and skinny jeans orders Japanese takeout. Are you sensing a theme?

lentil-stew-3

While your rice is cooking and stew is warming, toast the sesame seeds in a pan over low heat until they are fragrant. Once the rice is cooked, mix them into the rice, saving a few for garnish.

To serve, ladle the stew over the rice. Top with some cilantro, parsley, green onions or sesame seeds—whatever you’ve got in the fridge will do—and enjoy!

lentil-stew-4

-Emily

Categories
Recipes

malted vanilla ice cream with kit kat

This ice cream was a challenge. Not because making ice cream from scratch is a difficult thing—I’ve made it many times before with success. But because sometimes I loose my head at the grocery store, throw reason out the window and buy something as a ‘substitute’ that should never, never be used as a substitute.

kit-kat-ice-cream-6

It was a Tuesday night and I was making ice cream for our supper club later in the week. We were responsible for dessert and I’d brainstormed a glorious candy-filled concoction. I figured I’d make the custard quickly before Jordan got home from work and we sat down to dinner. I was already feeling a bit on edge before I began this culinary project, but like I’ve mentioned before, there is nothing like cooking to help me find my center. Except when a crucial error in judgment sends the whole thing into a sticky, custardy, teary tailspin. You can probably guess which ensued that fateful Tuesday.

Dear readers, Ovaltine, though technically a malted milk beverage, is NOT malted milk powder. Don’t let any discussion forum or milk wiki on the internet convince you otherwise. And don’t try and talk yourself into it after you’ve already been to four grocery stores and not one of them sold true malted milk powder. Let me just say it again: Ovaltine is not a viable substitute for malted milk, in any cooking context.

Thankfully, Jordan got home just as I was warming the milk and cream to add to my eggy-Ovaltine blend of poor decision making and pulled the emergency break on this disaster. This is how it went down.

J: Why are those eggs so brown? I thought malted milk was white? How much did you use?

E: I … I … I went to four grocery stores. I couldn’t find malted milk powder ANYWHERE. I even went up to the market all way up the hill. I was there forever trying to find it.  So looked it up online to see if I could substitute something. Some internet people say you can substitute Ovaltine. It’s probably fine ……………(panic)……………… It’s probably horrible. I’m such an idiot. I just ruined five eggs. Five beautiful eggs. They were from our CSA, you know. And now we’re out of eggs. And the city of San Francisco still won’t offer up any malted milk powder. (Collapse in heap on kitchen floor).

J: Well, before you add the milk, did you even taste it?

E: No. (Shame face).

J: Sutter Fine Foods has malted milk powder. Let me show you.

E: (Grumble, sniff, grab purse).

And so we walked down to the corner store on our block, Jordan led me to the baking section, grabbed a container of Carnation Malted Milk Powder from the top shelf and beamed. I may have muttered something about how this was the most damn annoying ice cream that I’ll ever make, paid the cashier, and scampered up the stairs to correct my mistakes of earlier in the evening.

With actual Carnation malted milk powder instead of Ovaltine, my custard was a beautiful pale yellow, and the final ice cream was delicious. There is nothing like the combination of malted milk, vanilla and kit kat to make a person forget the trials that led them to that delicious end. And, if you heed my advice and don’t get lured to the Ovaline dark side, you too can enjoy a perfect ice cream without the drama.

kit-kat-ice-cream-1kit-kat-ice-cream-4kit-kat-ice-cream-5

Malted Vanilla Ice Cream with Kit Kat, adapted from Bi-Rite Market’s Sweet Cream and Sugar Cones
5 egg yolks
1/2 cup malted milk powder (we used Carnation)
1 3/4 cup heavy cream
3/4 cup 1% or 2% milk
1/2 cup sugar
1/2 teaspoon kosher salt
1 teaspoon vanilla extract
3 Kit Kat bars, chopped

In a medium bowl, whisk the egg yolks. Add the malted milk powder and whisk together.

In a saucepan over medium heat, warm the cream, milk, sugar and salt together. Bring just to a simmer. Whisk about 1/2 cup of the milk mixture into the egg yolks, pouring the hot milk slowly into the eggs to temper them. Add another 1/2 cup of milk into the eggs. Then pour the egg mixture back into the saucepan with the rest of the milk.

Put a mesh strainer over a medium sized bowl or tupperware. Fill a large bowl with ice and water.

Over medium heat, stir the milk and egg mixture until it begins to thicken. When the ice cream base could coat a spoon, pour it through a mesh strainer into a bowl or tupperware. Cool the base in the ice water bath, stirring occasionally. Refrigerate the base overnight.

The next day, add the vanilla to the ice cream base. Pour it into your ice cream maker and freeze according to your maker’s instructions. Meanwhile, chop up the kit kats.

kit-kat-ice-cream-2kit-kat-ice-cream-3

When the custard is just about frozen, add the kit kat pieces. Serve right away or put into a tupperware and freeze for another few hours to harden completely.

-Emily

Categories
Recipes

apple galette

A  weekends or two ago, we had our friend David over for dinner. David is usually in far off places like Thailand, Tajikistan or the Democratic Republic of Congo doing amazing, amazing work, and so it not often that he comes over for dinner. There really is nothing like dinner with old friends to make you feel like yourself again. Eating a meal with David is one of the best things for the soul, for my soul at least. Fortunately, for the next year or so he is stuck in Palo Alto learning lots, which means many more meals with David are in our future. I couldn’t be happier about it.

apple-galette-5

Onto the food. Fall is undeniably here even in temperate San Francisco, and so we roasted a chicken and vegetables to celebrate. In the spirit of fall, I thought it only fitting to make an apple galette for dessert. I’m not sure why it took me so long to discover the galette. As it turns out, galettes are everything that is wonderful about pie, but with an increased crust to filling ratio—a major pro in my book—and a far less fussy preparation. Because you simply fold a sheet of pastry around the filling, they are so easy to make. This particular apple galette turned out beautifully—rustic and delicious. I’m certain there will be many more galettes in our future, ideally eaten with David.

Apple Galette
For the Pie Crust 

2 1/2 cups all purpose flour
1 1/4 teaspoons kosher salt
2 1/2 sticks unsalted butter
about 5 tablespoons ice water

apple-galette-1 apple-galette-2

In a food processor, combine flour and salt. Remove the butter from the fridge and cut into 1 inch cubes. Add them to the flour mixture. Process until the butter chunks are about the size of peas. Add the water and pulse a few times to combine. Divide into two equal balls, flatten into 1″ thick discs, wrap in plastic wrap and refrigerate for at least two hours or overnight.

For the filling (for one galette, to serve 3 or 4 people)
3 large apples, peeled and cut into slices about 1/2″ thick
1 lemon, juiced
1/4 cup granulated sugar
2 tablespoons flour
1 teaspoon cinnamon
a pinch of nutmeg
a pinch of salt
1 egg yolk
1 tablespoon milk or cream
sugar for dusting

apple-galette-3apple-galette-6apple-galette-7

Preheat your oven to 375° F. Line a baking pan or cookie sheet with tin foil. In a large bowl, combine the apples, lemon juice, sugar, flour, cinnamon, nutmeg and salt. Roll out the crust until it is about 1/4 inch thick. In the center of the crust, mound the apple filling. Fold the dough up around the filling, take care to make sure that there aren’t any holes in the crust where the filling could leak out.

apple-galette-8 apple-galette-9

Place the galette back in the fridge for about 15 minutes for the butter in the dough to firm up. Meanwhile, whisk together the egg yolk with the cream or milk. Remove the galette from the fridge and brush with the egg mixture. Sprinkle with sugar. Bake for 45 minutes to an hour, until the crust is golden brown. Serve warm with vanilla ice cream.

apple-galette-10

-Emily

Categories
Recipes

chicken tikka masala

My first memory of chicken tikka masala was from my freshman year of college. I had gone out to eat with a group of friends from the newspaper to a nicer Indian restaurant in Georgetown. After the server sat our large group, he pointedly asked, “Raise your hand if you’re ordering chicken tikka masala. I know someone in this group is ordering chicken tikka masala”. Our friend Tim somewhat sheepishly raised his hand. He was indeed ordering the chicken tikka masala. I’d never heard of chicken tikka masala at the time, and only inferred from the waiter’s tone that chicken tikka masala was not true Indian cuisine.

Turns out, that’s probably true (the jury is still out on chicken tikka masala’s precise origins) and chicken tikka masala does win the prize for most universally appealing to white people (apparently it’s Britain’s most popular dish). But, like most popular things, chicken tikka masala is popular because it’s really, really good. Surly waiters aside, I’m never disappointed when I order it when we go out for Indian in the neighborhood and I don’t think you’ll be disappointed with this recipe.

chicken-tikka-masala-5

We decided to try and make chicken tikka masala for our supper club. After scouring the internet for recipes, cross referencing one against the other, reading comments and reviews, we landed on a recipe from The Pioneer Woman and adapted it to suit our tastes (chicken thighs forever and always). For not requiring tons of obscure spices or days of simmering, we think it turned out pretty damn good. You can feel free to cross-reference this claim with our friend Ted.

Chicken Tikka Masala, adapted from The Pioneer Woman
4 boneless skinless chicken thighs
salt
ground coriander
ground cumin
1/2 cup plain yogurt
2 tablespoons butter
1 onion, diced
4 cloves garlic, minced or grated
1 – 2″ piece of fresh ginger, grated
3 tablespoons garam masala
1 – 28 oz can diced tomatoes
1 tablespoon sugar
1 1/2 cups heavy cream
salt and pepper
cayenne pepper or jalapeños if you want it spicy

For the rice
2 cups basmati rice
2 tablespoons butter
1 teaspoon turmeric (optional)
1 teaspoon salt
4 cups water

Sprinkle the chicken on both sides with salt, ground coriander and ground cumin. Put them in a large tupperware and pour the yogurt over the chicken. Coat the chicken in the yogurt. Let the chicken sit in the marinade for an hour, or preferably overnight.

chicken-tikka-masala-1 chicken-tikka-masala-2

Turn on the broiler to high. Line a baking sheet with tin foil and place a metal rack over the baking sheet. Place the chicken in an even layer on the rack. Broil the chicken, 5 – 7 minutes per side, until charred and cooked through. Once cooled slightly, cut into chunks.

Start your rice. Cook the rice according to the rice cooker or package instructions with the turmeric, butter and salt.

chicken-tikka-masala-3

While the chicken is broiling, saute the onion in a few tablespoons of butter, until translucent. Add the garlic and ginger and cook a minute or two more. Add the garam masala. Add the tomatoes and tablespoon of sugar. Add the jalapeños or cayenne, if using. Let simmer for 15 or 20 minutes to let the flavors come together. Use an immersion blender to blend the sauce until it doesn’t have any chunks. Add the cream and season with salt and pepper. A few minutes before serving, add the chicken and stir to coat it with the sauce.

Serve the chicken tikka masala over rice. Naan optional. If you happen to be getting the frozen naan from Trader Joe’s, go with the garlic naan.

chicken-tikka-masala-4

-Emily

Categories
Recipes

chickpea lavash wraps

chickpea-lavash-wraps-3

Chickpea Lavash Wraps
For the chickpea spread
1-15 oz can of chickpeas, drained
1 lemon, zested and juiced
1/2 red onion, chopped
a few tablespoons fresh parsley, chopped
2/3 cup plain yogurt
salt and pepper

For the cucumber-yogurt dressing
1 medium cucumber, diced or sliced
2/3 cup plain yogurt
1/2 lemon, zest and juice
1 clove garlic, diced or grated
salt and pepper

To assemble 
2 cups spinach
1 bell pepper, sliced
sriracha
2 pieces lavash bread
1 tablespoon butter

chickpea-lavash-wraps-1 chickpea-lavash-wraps-2

In a food processor, chop up two-thirds of the chickpeas. Put in a medium bowl and add the rest of the chickpeas, lemon zest and juice, onion, parsley, and yogurt. Season with salt and pepper to taste. Set aside. This spread can be made a day or more in advance. After sitting in the fridge for a day or so, the flavors melt together and it gets even better.

chickpea-lavash-wraps-6 chickpea-lavash-wraps-7

In a small bowl, combine chopped cucumber, yogurt, lemon juice and zest,  garlic, salt and pepper. Stir to combine. This dressing can be made a day or more in advance as well.

To assemble, lay a lavash bread on the counter. Spoon some of the chickpea spread and some of the yogurt dressing onto the lavash. Add some sriracha for heat.  Add a handful of spinach and a few slices of bell pepper. Roll it all up like a burrito.

chickpea-lavash-wraps-4

In a saute pan, melt the butter over medium heat. When the butter is foaming, add the lavash wrap. Toast each side and serve.

chickpea-lavash-wraps-5