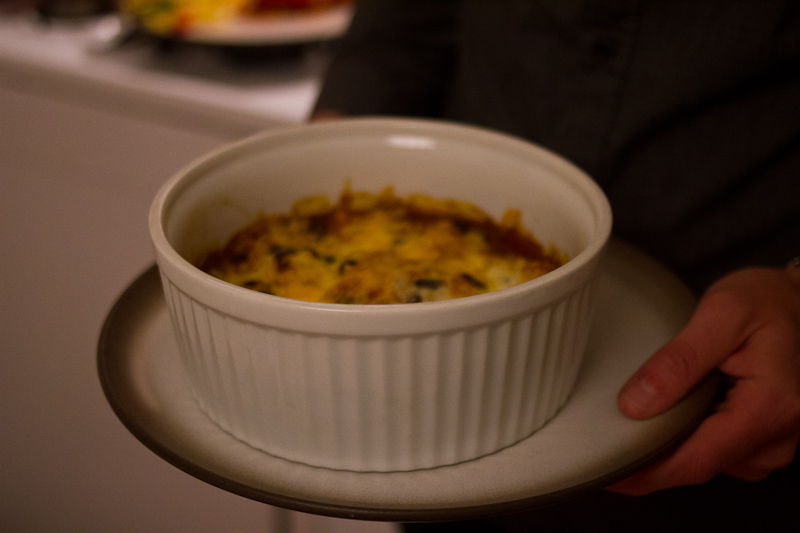
Categories
Recipes

you grew it, now eat it

Anyone who has followed this blog for a while knows that seasonal cooking is what we’re all about here at The Answer is Always Pork. I’ve written in the past about how eating with the seasons really changes your perspective on food, how your cooking simply turns out better with far less effort if you’re cooking what’s freshest, and of course about my love for the woman who made seasonal and sustainable cooking truly sexy, Alice Waters.

Now it so happens that this Sunday morning I’m teaming up with my mom and her good friend Farmer Fred to talk about seasonal cooking on the radio! The radio! We’ll be talking about growing food and then eating it, and about how you can keep that beautiful cycle of growing and eating going all year round. Listen to us live from 9 am to 10 am on KFBK, and from 10 am to noon on KTSE.

I’ll try my best to track down the audio file for those of you who can’t listen live but want some seasonal cooking fodder—or for those who want to hear my best Ira Glass impression. Update: You can listen to our show on KFBK here, and KTSE here, or download the podcast from iTunes by searching “Get Growing with Farmer Fred” and “KFBK Garden Show”.  Get the 11/30 episode if you want to hear me, though I’m sure the other episodes are equally good.

Fall into Winter Recipe Round Up

Mains
eatwell-chicken-4

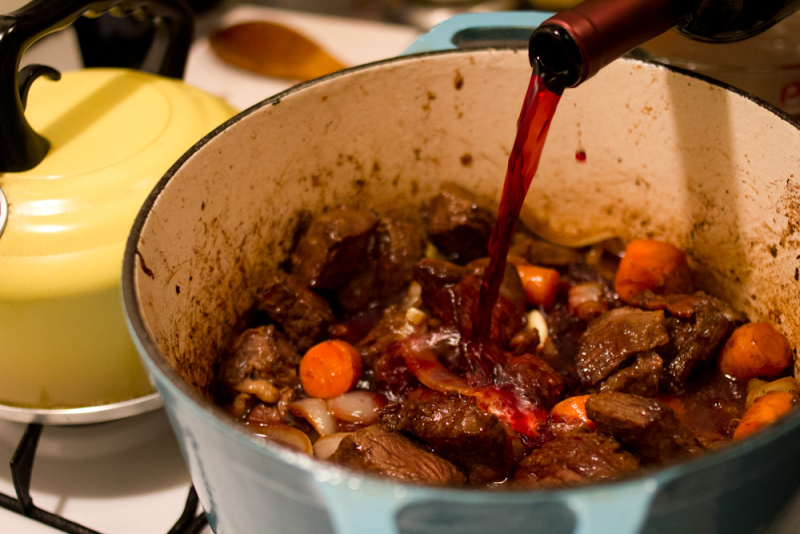
curried-butternut-squash-farro-1beef-bourguignon--6Braised Beef with Root Vegetables
Coq au Vin
Curried Butternut Squash and Farro
Crab Boil
Herb-crusted Rack of Lamb with Crispy Potatoes
Leek and Butternut Squash Risotto
Lentil Stew over Rice
Linguine with Leeks and Mushrooms
Oven Roasted Fish with Citrus
Pasta with Kale, Portobello and Parmesan
Roasted Chicken and Vegetables
Sole with Leeks and Potatoes
Soup with Lamb Meatballs and Winter Greens
Squash Stuffed with Barley and Chorizo

A few other dinners that we’re experimenting with: spaghetti squash tacos with tangy cabbage slaw, butternut squash and onion gratin with comté cheese, spicy soba noodles over greens and herbs.

Sides
10-18-11_1 onion-tart-5 03-30-13-32
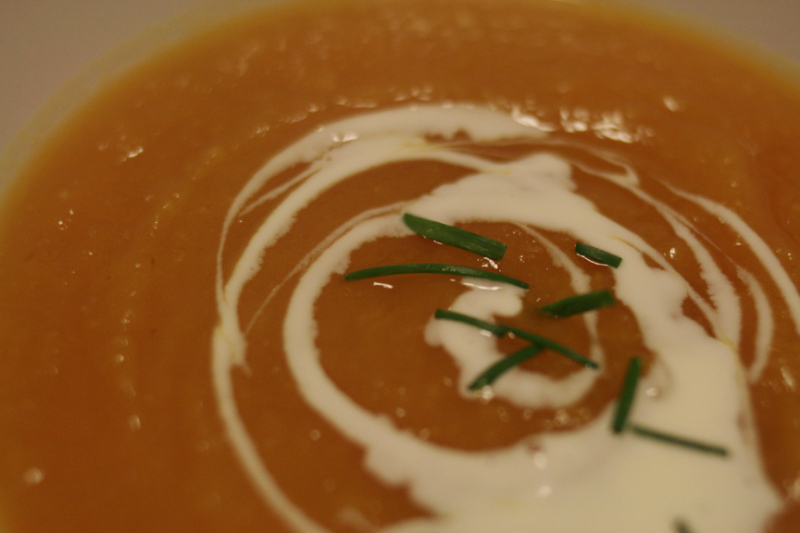
Butternut Squash Soup with Ginger
Cauliflower Soup
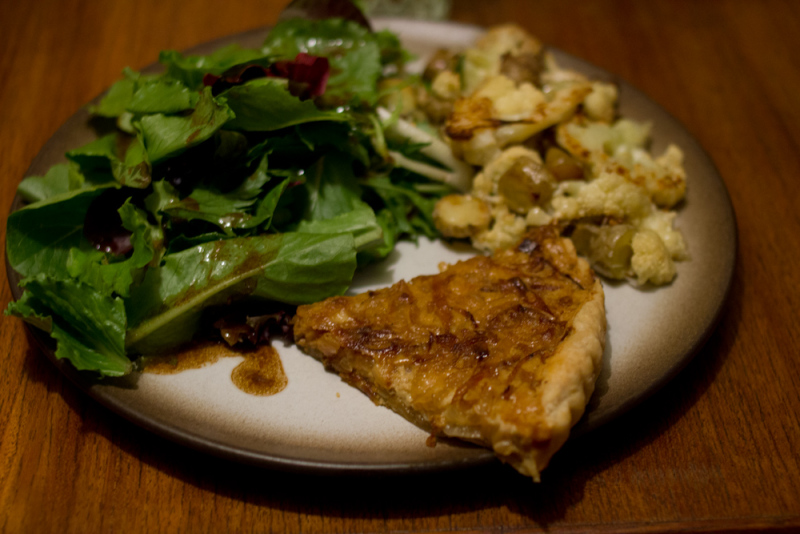
Caramelized Onion Tart
Leek Bread Pudding
Roasted Cauliflower
Winter Greens with Garlic Confit

And two sides that don’t have their own posts, but are our go-tos throughout the fall and winter:
Winter salad – spinach or lettuce, plus persimmon or pomegranate or supremed citrus, tossed with vinaigrette
Roasted veggie medley – heat oven to 400 F, toss any combination of brussel sprouts, beets, cauliflower, carrots, parsnips, or squash with olive oil, salt and pepper, roast until browned, about 40 minutes.

Desserts
apple-galette-5 citrus-olive-oil-cake-7carrot-cake-2-1
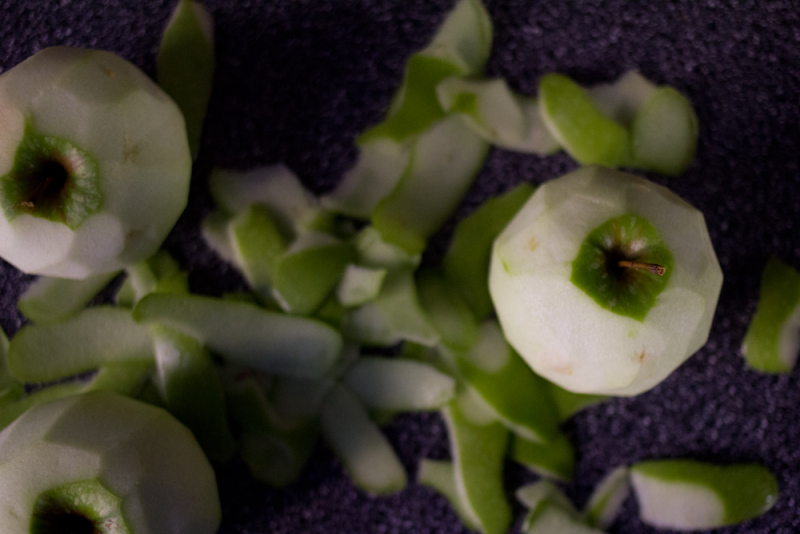
Apple Galette
Blood Orange Cake
Carrot Cake with Cream Cheese Icing
Citrus Olive Oil Cake
Pumpkin Ice Cream

You can find all of the wonderful produce mentioned in these recipes at your local farmers market, by joining a CSA, or by planting your own garden! There’s still time in the growing season to plant all of these delicious fruits and vegetables: apples, beets, broccoli, brussel sprouts, cabbage, carrots, cauliflower, chard, garlic, kale, kohlrabi, leeks, lettuce, onions, parsnips, persimmons, pomegranate, potatoes, spinach.

If you’re in the Sacramento area and need planting advice, go visit my mom and her A+ crew at El Dorado Nursery and Garden. You’ll be eating delicious produce from your garden in no time!

Now tell me, what are your favorite fall and winter recipes? We’re always on the hunt for new ones.

-Emily

Categories
Recipes

jordan’s margarita

We eat a decent amount of vaguely Mexican food at our house—quesadillas, enchiladas, tacos, burritos. I say ‘vaguely’ because what I usually throw together is so gringa, it verges on embarrassing. But let’s get real, whatever vehicle I can use to get pepperjack and sour cream into my mouth, I’m down with it.

Guacamole, my ancho chili black beans (recipe: can of black beans + onion + ancho chili powder + salt, simmered 20 minutes) and cabbage slaw (recipe: cabbage + lime juice + sour cream + salt, tossed) commonly make an appearance, and if we’re lucky, so do Jordan’s margaritas.

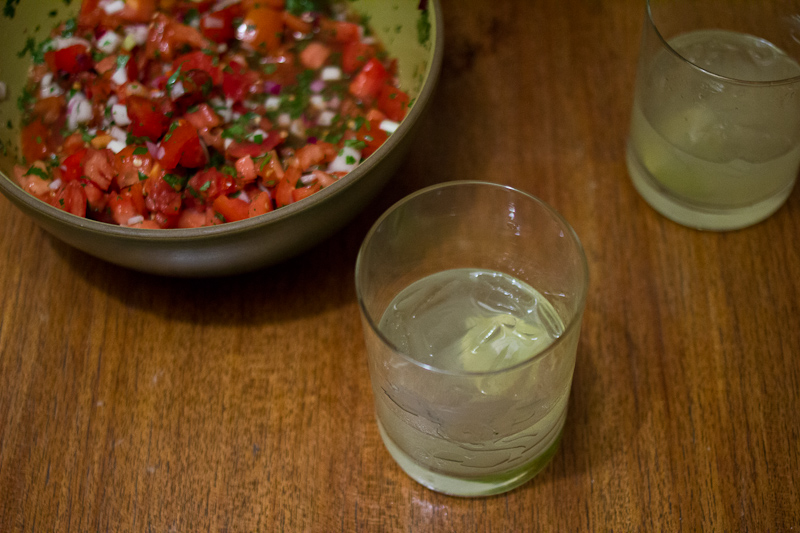
Jordan’s been perfecting his margarita recipe for quite a while now, and this one packs a decent punch. None of that citric acid / corn syrup bullshit goes down around here, just the perfect union of lime and tequila. I’m feeling pretty good by the time I’m warming up tortillas.

margarita-1

Jordan’s Margarita, serves two
1 1/2 – 2 oz fresh lime juice (depending on how sour your limes are)
1 1/2 oz tequila
1 oz mezcal (use more tequila if you don’t have mezcal, but it does add a nice smokiness to the drink)
3/4 oz agave nectar

Combine ingredients in a shaker and stir with ice. Strain into two glasses with ice. Salt the rim if you’re feeling fancy, but we usually don’t bother. That lime wedge garnish, also totally optional.

margarita-2

-Emily

Ps. Look at that bowl of pico de gallo! Our CSA is still somehow sending us tomatoes (global warming, impressive storage techniques?), and Jordan threw some salsa together. Those knife skills! Good thing I’m tying that one down.

Pps. I’m going to Taipei, Taiwan on Wednesday for work! My plan is to eat all the things and take many, many photos. Jordan’s dad’s Canon AE-1 is coming out of retirement for the occasion. More upon my return!

Categories
Recipes San Francisco Thoughts on Life

tomato sauce, chicken broth and wedding plans

Saturday was the first weekend day I’d spent at home in a month—October really was an exceptionally busy month.  I took the day to catch up on home things, which mostly meant clearing 20 pounds of tomatoes and three chicken carcasses out of my freezer. Glamorous.

october-weekend-1

While my sauce and stock were simmering, I started a new weaving. I’ve been pretty into this small-scale textile art lately. Like cooking, it requires just enough effort and concentration to occupy my mind, but not so much that it’s no longer is relaxing. On top of that, the states are low. If you make a mistake, grab a pair of scissors and you start again. Low stakes, moderate concentration, repetitive movements, reruns of Archer in the background—ideal hobby characteristics in my opinion.

october-weekend-4 october-weekend-6

We’ve also began to really put our minds to planning this whole wedding thing. My mom has been a tremendous help so far, taking most of the dull tasks off my plate, like booking hotels and shuttle buses and tables and chairs, and leaving me with the fun stuff, invitations, food, flowers, photgrapher. It’s a pretty lucky setup.

october-weekend-2 october-weekend-3

The more things we plan, the more real it gets. I’ve got our Save the Date cards mocked up, and Jordan’s favorite of those attempts is sitting on our kitchen table. Every time I look at it, I think, we’re really doing this thing, aren’t we?

Even though we’ve been together for ages, marriage still feels like a big step. I have no doubts it’s the right one, but hitching your wagon to someone else’s forever, it’s hard to imagine that not feeling pretty huge, even when you know it’s exactly right.

-Emily

Ps. Tomato Sauce Recipe & Canning Instructions, and Chicken Stock Recipe.


october-weekend-5

Categories
Recipes

tonkatsu

You and tonkatsu have probably met each other’s acquaintance at your local sushi restaurant. It’s usually an option in a bento box of some kind, alongside other Americanized favorites—salmon teriyaki, vegetable tempura, California rolls. Like Argentine milanesa or Italian chicken parmesan, tonkatsu is basically a pounded piece of meat that is breaded, fried and served with sauce. It’s hard to go wrong.

We don’t do anything fancy with our tonkatsu. It is easy to prep and takes just 10 minutes to fry (and you can shallow fry it – no need to bust out the dutch oven and a liter of oil).  We usually serve it in a large bowl with shredded cabbage, vinegar rice and a few garnishes picked up during the occasional visit to Japantown. It’s not traditional to serve tonkatsu with vinegar rice, but I love vinegar rice and it’s my kitchen. Plus it helps jazz up cabbage.

Tonkatsu | The Answer is Always Pork

Tonkatsu 
2 thin cut, boneless pork chops, pounded a bit (you could also use chicken)
1/4 cup flour
1 egg, beaten
1/2 cup panko bread crumbs
salt and pepper
high temp oil for frying (safflower, sunflower, or canola oil)

For Serving
Vegetable and Fruit Sauce (Japanese BBQ sauce)
Vinegar sushi rice (1 cup rice, 1/4 cup rice vinegar, 2 tablespoons sugar, 1 teaspoon salt)
Shredded cabbage, about 1/2 cabbage cut into thin slices (toss with some rice vinegar if you’re not making vinegar rice)
Pickled ginger (optional)
Togarashi (Japanese dried chili pepper, optional)

Tonkatsu | The Answer is Always Pork

Cook your rice according to your rice cooker or the package directions. While your rice is cooking, make the sushi su by combining 1/4 cup rice vinegar,  2 tablespoons sugar and 1 teaspoon salt in a small saucepan and heating until the sugar and salt dissolve. Slice your cabbage into very thin slices and set aside. Then prep the pork.

Using a rolling pin or the flat side of a meat mallet, pound the pork cutlets until they are about 1/2 inch thick. Season well with salt and pepper. Then dredge the pork in the flour, then the egg, then the panko. Set aside or refrigerate if your rice still has a while left to cook.

When your rice is done cooking, heat 1/2 inch of oil in a heavy sauté pan or cast iron skillet. When the oil is hot (test by dropping a bit of panko into the batter. If it immediately starts to bubble, the oil is ready), add the pork to the pan. Cook 5 minutes per side, until the pork is golden brown. Remove from the pan and let drain on a plate with paper towels or a cooling rack. Cut into thin strips.

Add the sushi su to the rice and stir gently to distribute.  Split the cabbage between two medium bowls. Top with some rice. Then top with the tonkatsu. Serve with Vegetable and Fruit sauce, togarashi, and pickled ginger.

-Emily

Tonkatsu | The Answer is Always Pork


Categories
Recipes

coq au vin

The second way we wanted to test cooking our beautiful chicken from Eatwell Farm was to braise it. The first thing that comes to mind when I think of braised chicken is coq au vin, and the second is Julia Child. (I won’t be offended if you click that link right now and improve your day significantly by watching a few minutes of The French Chef).

My love for Julia is great. She’s taught me many things over the years, things that are just as useful in the kitchen as outside of it. The most important is probably confidence (Never apologize!!!), and the second, humor (“They’ll never know!”, she winks and scrapes an omelet that jumped ship right back into the pan). Julia’s warmth and enthusiasm for life are something I aspire to, and when I cook her recipes, I feel that much closer to it.

eatwell-coq-au-vin-5

Coq au vin tastes like comfort. You can’t go wrong with the slow simmered combination of chicken, wine and vegetables, it turns out delicious every time. And it’s impossible to not feel taken care of after you eat it. Isn’t that feeling, that love and community, exactly what inspires us every time we prepare a meal to share.

Coq au Vin, adapted from Julia Child’s Mastering the Art of French Cooking
1-3 to 4 pound chicken, broken down (legs, thighs, wings, breasts, you know the drill)
1 onion, diced
3 carrots, diced
2 cloves of garlic, diced
1/4 cup cognac
2 cups dry red wine
2 cups chicken stock (homemade if you got it, but if not, Better Than Bouillon concentrate isn’t half bad)
a few sprigs of thyme
a bay leaf
salt, pepper
2 tablespoons of bacon fat or oil
3 tablespoons butter
2 tablespoons flour
3/4 pound cremini mushrooms, cut into quarters

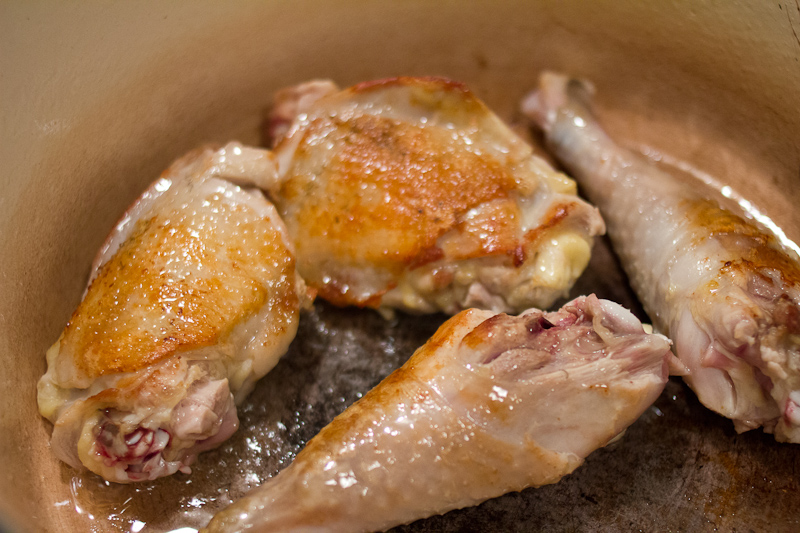
Preheat your oven to 300° F. Sprinkle the chicken pieces on both sides with salt. In a dutch oven over medium heat, heat the bacon fat or oil. Brown the chicken pieces on both sides. I’d do it in two batches so you don’t crowd the pan. Remove the browned chicken from the pot and set aside.

eatwell-coq-au-vin-1eatwell-coq-au-vin-2

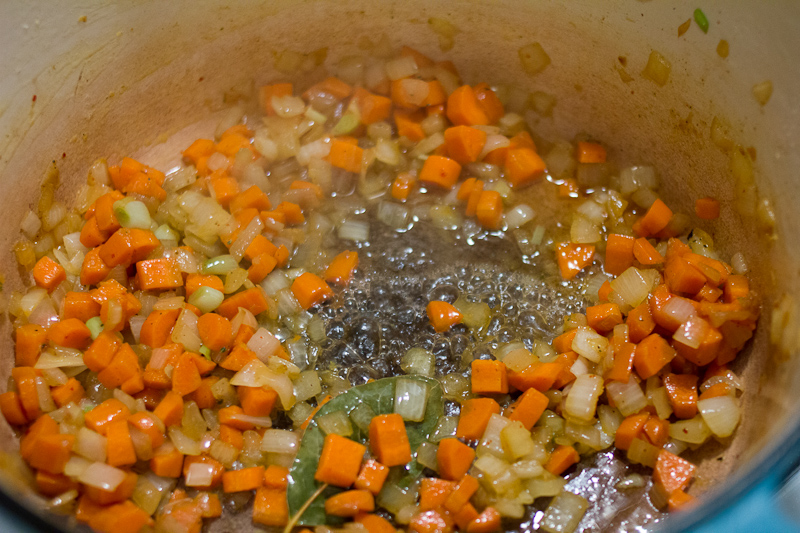
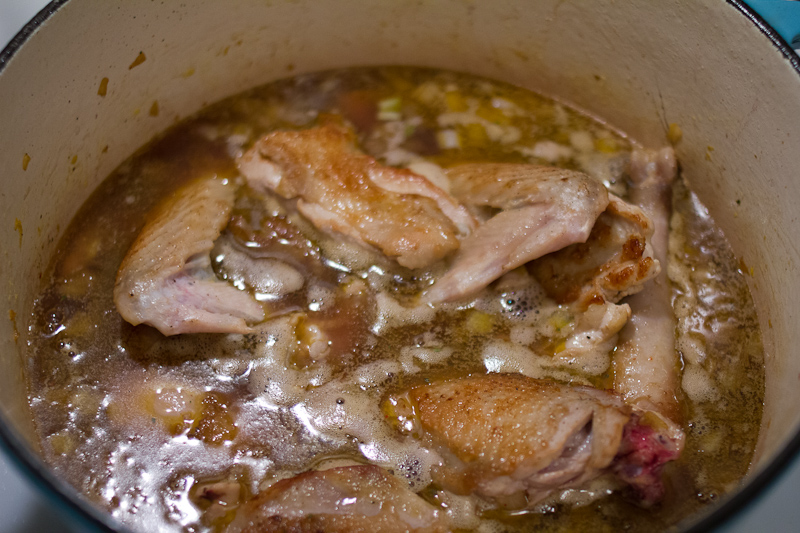
Add a bit more bacon fat or oil and sauté the vegetables until the onions are translucent, 7 – 10 minutes. Deglaze the pan with 1/4 cup of cognac and then pour in the wine and chicken stock. Add the chicken back in along with a few sprigs of thyme and a bay leaf. Bring everything to a boil.

eatwell-coq-au-vin-3eatwell-coq-au-vin-4

Once it boils, cover the pot and put it in the oven. Let simmer for about 40 minutes. Meanwhile, brown the mushrooms. Warm 1 tablespoon of butter in a pan. Add the mushrooms and brown them, stirring occasionally, about 10 minutes. Remove the mushrooms and put them on a plate.

After about 40 minutes, though you could go longer if you have a tough bird, remove the braise from the oven, and put it back on the stovetop. Fish out the chicken pieces and put them aside on a plate.

In the pan you browned the mushrooms in, melt 2 tablespoons of butter. When the butter is melted, add 2 tablespoons of flour. Cook the roux for a few minutes, until it is a light golden brown. Add the roux to the braising juices and whisk to combine. Bring the braising liquid back to a boil and the sauce will thicken nicely. Season the sauce with salt and pepper and then add the chicken and mushrooms back in.

You can serve the coq au vin immediately, or turn off the heat, cover and rewarm when you’re ready to eat. We served ours with mashed potatoes, but rice or pasta would also do just fine. It’s good to have something to soak up the sauce.

eatwell-coq-au-vin-6

Isn’t that roasted chicken head a sight to behold?! The coq au vin is on the left, and Jordan knocked that sauce out of the park.

-Emily

Ps. If you really want to nerd out and love Julia Child even more, read My Life in France, and then read this phenomenal biography by Bob Spitz. And if you’re in a bad mood, watch a few episodes of The French Chef. You cannot help but smile.

Categories
Recipes

roast chicken

This past week, we had a wonderful opportunity through Eatwell Farm, our CSA farm, to cook three very special chickens. The chickens are a heritage breed, Black Australorp, and were raised in the open air on pasture for the past four months at their farm as part of a sustainable poultry project they’ve been developing at the farm. The birds were harvested the very same morning they were dropped off with me. I know for a fact that I’ve never had the chance to cook a chicken as fresh or as humanely raised as these beauties, and the experience was delicious from start to finish.

eatwell-chicken-3eatwell-chicken-5

In the United States, and especially in big cities, we’re incredibly distanced from where our food comes from. Our meat comes butchered, pre-packaged and shrink-wrapped, even if we’re shopping at quality markets. It’s very easy to forget that meat comes from animals, animals who gave their life so that we could take pleasure in eating them. It’s a convenient system, but I find, even as a person who thinks about food a lot, I often forget this incredibly important fact.

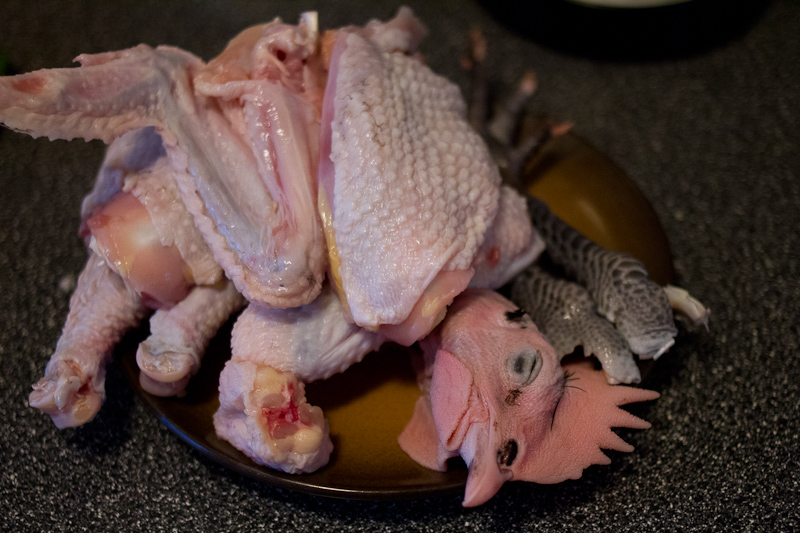
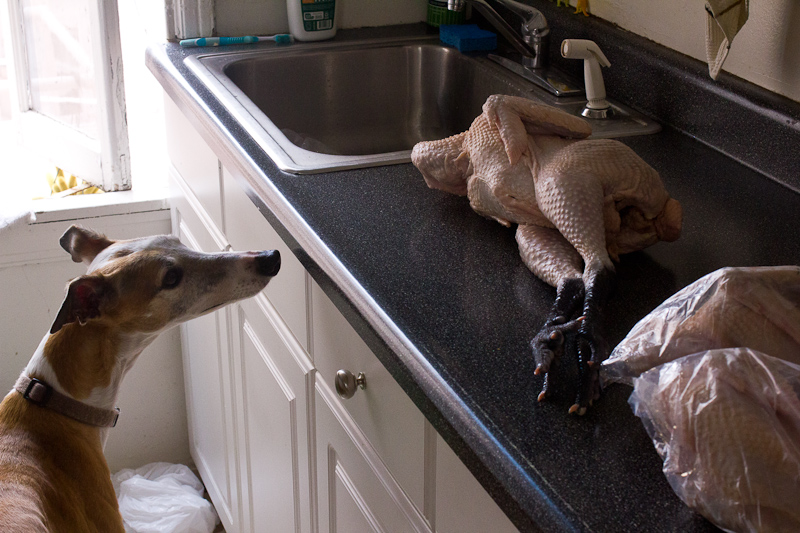
And so it was exciting, and intimidating, to be handed three large birds with head and feet still attached on Friday afternoon. They were impressive and a bit scary with their black talons sticking eight inches out of a plastic bag. But what I did not expect when I signed up to test cooking a few chickens was how differently I’d feel about the birds because of this simple change in butchering style.

eatwell-chicken-1eatwell-chicken-2

My emotional connection to sitting down for a meal is very strong, but I’ve never experienced that type of connection with a piece of raw meat before now. Sure I’ve appreciated a steak for it’s perfect marble, but holding that chicken’s head in my hand, examining it’s long, lean legs, I felt an entirely new appreciation for the creature and for the effort that went into raising it. Because it was undeniable that the bird I was planning to cook was a very real animal, cooking it was even more meaningful. I could begin to grasp the sacredness this exchange. That awareness is something that we don’t often experience with city living, and I’m grateful for it. Being more thoughtful and emotionally engaged is always a good thing, especially regarding something we do every single day—eat.

Now, what you really want to know—how did that handsome bird taste? The skin was phenomenal. Thicker and fattier than a typical store-bought chicken, which meant it crisped up into perfect chicken cracklins! I could have eaten the whole birds worth on my own. The meat was far more complex than a conventional bird, even the breasts had a ton of flavor. The thighs and legs were not as tender, but I liked that, evidence that the bird used it’s muscles like it was meant to. Our friend Josh thought the chicken tasted wild, and meant that in the most complimentary way possible. Thanks to these chickens, we had two very special meals, and I’d jump at the chance to cook more of these wonderful birds.

eatwell-chicken-4eatwell-chicken-6

Roast Chicken with Butter, Piment d’Ville and Lemon
1 whole chicken
kosher salt
4 tablespoons butter, melted
Piment d’Ville (or other mildly spicy and flavorful pepper, piment d’espelette, paprika, ancho chili)
1 lemon

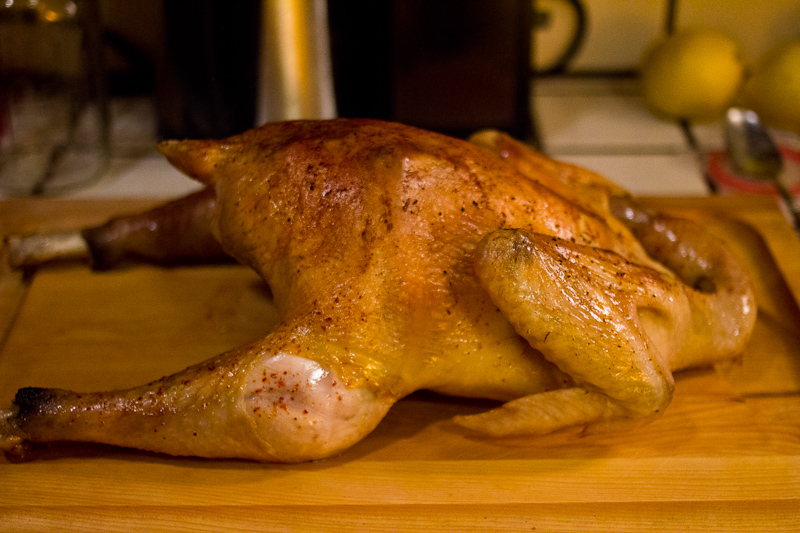
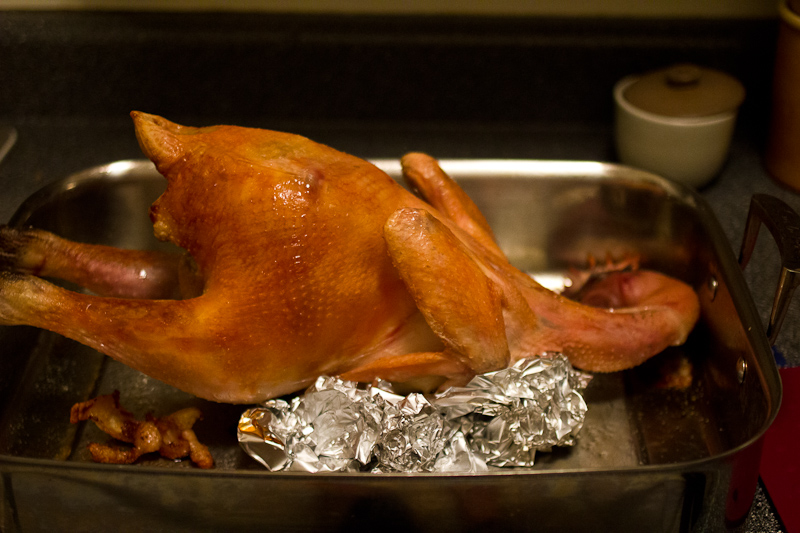
A note on my butchering before we begin, I roasted these birds the same way on two separate occasions. One I brought over to our friends place, and not knowing the size of their oven, I cut off part of the legs and butterflied the chicken. These were tall chickens! The other I roasted at home and left completely intact, using tinfoil to keep the bird upright. I must say quite enjoyed the presentation!

One day before you plan to cook your chicken, sprinkle it liberally with salt. I like to use about 1 teaspoon per pound, as the wonderful Judy Rodgers of Zuni Café recommends (and if anyone knows a roast chicken, it’s Zuni). Salting early allows the salt to really permeate the meat and keeps it very moist after cooking.

Preheat your oven to 400° F. Place your chicken in the center of a large roasting pan. After about 25 minutes, baste your bird with the fat that has rendered out. Tilt the pan, and just spoon the fat over the whole chicken. After about 35 minutes, check the it and baste it again, this time with a little melted butter. My bird was done after about 40 minutes, but be sure to check yours for doneness. The internal temperature should be 160° F.

eatwell-chicken-7eatwell-chicken-9eatwell-chicken-10

Remove the chicken from the oven, and sprinkle it with the Piment d’Ville, or whatever pepper is your favorite. Let it rest for 10 minutes before carving. Carve the chicken, taking care to put a piece of crispy skin with each piece of meat. Pour the remaining melted butter over the carved chicken pieces and sprinkle with lemon juice.

-Emily

Ps. Coming up next with our final chicken—coq au vin!

Categories
Recipes San Francisco

churros with whiskey sauce and peach compote

Tonight I’m sitting at my kitchen table waiting for Jordan to come home from school and waiting for my oven to preheat. The sound of a neighbor’s Billy Holiday record is wafting in through the open window, the smell of cooking tomato sauce along with it. I can hear the occasional clink of a spoon against a pot when the noise of traffic pauses in time to the lights. Every 20 minutes or so the robotic voice of a bus drones “2 Clement to Presidio Avenue” as it pulls away from the curb, then the Billy Holiday drifts back in.churros-2

We’re back into our usual school rhythm, Jordan teaching and working in the lab,  and working at the record store on his days off from school. It’s busy, and we don’t see as much of each other as we’d like, but it’s also familiar, more or less the pace of life since we moved here. It’s strange to feel the changing of the seasons so specifically when the temperature always seems to hover around 65°, but here we are, entering into our fourth fall in San Francisco. I’m feeling pretty good about this one.

This dessert is a perfect transition between summer and fall. You’ve got the last of summer’s peaches, paired with the warm comfort of cinnamon and whiskey. Plus fried dough. Fried dough is always in season. Churros are deceptively simple to make, far easier than doughnuts in my first-timers opinion, but they push all the same delicious buttons. Churros are no longer relegated to carnival treat in this house. So here’s to end of one season and the start of another, I’ll toast you with a churro, or three.

churros-9 churros-8

Churros with Whiskey Sauce and Peach Compote
For the churros, adapted from The Other Side of the Tortilla
1 1/4 cup water
3 tablespoons butter
3 tablespoons brown sugar
1/2 teaspoon kosher salt
1 1/2 cups all-purpose flour
1/2 teaspoon ground cinnamon
a dash of ground nutmeg
2 teaspoons vanilla extract
2 large eggs
1 liter of neutral, high heat oil (safflower, sunflower, canola)

To dust the churros
1/2 cup sugar
1 teaspoon ground cinnamon

Bring water, butter, brown sugar and salt to a boil in a medium saucepan. In a small bowl, mix together the flour, cinnamon and nutmeg. Remove the water mixture from the heat and add in the flour mixture. Mix with a wooden spoon to combine. Add the vanilla and stir again. Then add the eggs, one by one, mixing well after each addition. It will be a brief, but strenuous arm workout. Let the dough cool a bit.

Meanwhile, heat the oil in a large, heavy pot, like a dutch oven. Put it over medium low heat and let the oil come up to temperature, about 350 F.  Line a baking sheet with paper towels and top with a cooling rack. Mix the sugar and cinnamon mixture to coat and put that in a large, shallow dish.

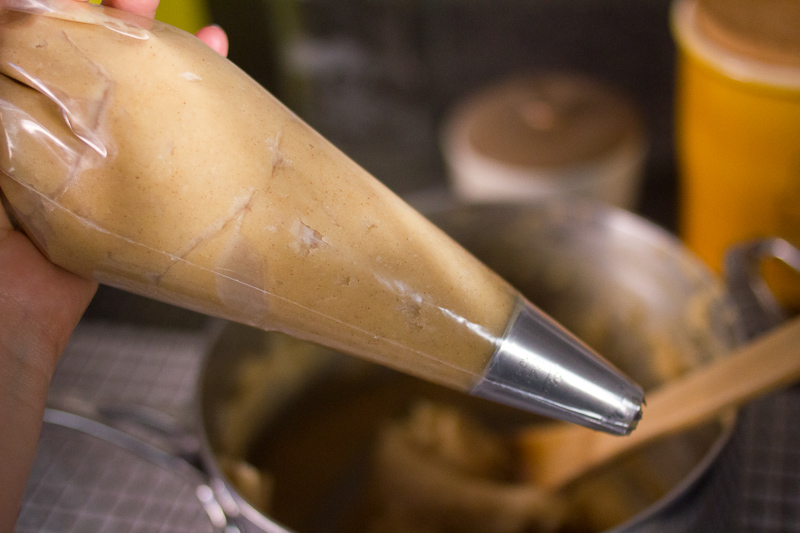
When the dough has cooled slightly, spoon it into a pastry bag fitted with the star tip. The star tip is what gives churros their adorable shape. I usually put my pastry bag in a tall glass and then can more easily fill it with two hands. This is a sticky dough, but it comes out of the pastry bag just fine.

churros-3 churros-4

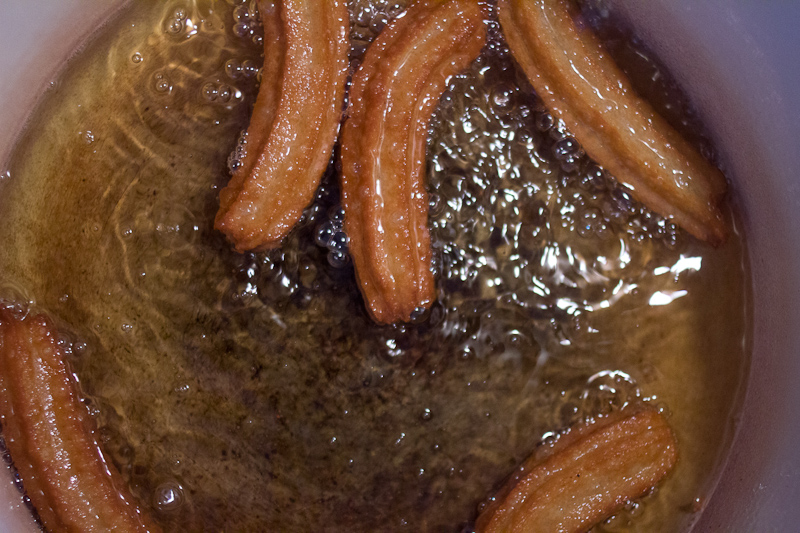
Before you pipe in a whole churro, test the oil temperature by squeezing out a 1″ piece. If the oil is ready, the churro should immediately start to bubble vigorously and float to the top. If not, wait a while for the oil to come up to temperature. If your oil isn’t hot, you’ll get soggy, greasy churros, which would be a tragedy.

Pipe a few churros into the pot. I found the easiest way to handsome churros was cut the churro from the pastry bag with a knife after I had piped about 4 inches of dough. Don’t crowd them. They will take about 3 – 4 minutes per side to become a deep golden brown. Remove them from the oil and let drain on the rack. After they’ve cooled slightly, lightly toss them in the cinnamon sugar mixture.

Serve churros immediately, or let cool completely on the rack. To reheat, warm them for 5 – 7 minutes in a 350° F oven. They’re best the first day, but not too shabby on the second if you somehow have leftovers.

churros-5churros-7

For the whiskey sauce, from the ever lovely Katie Norton
1 cup sugar
1/2 c butter (8 tablespoons, 1 stick)
1 egg, beaten
2 oz burbon whiskey

In a heavy bottomed pot, cream the butter with the sugar over medium low heat. When the sugar is almost dissolved and butter is melted, add in the beaten egg. Whisk to incorporate and then whisk constantly for one minute, until the sauce comes together and has a creamy consistency. Remove from the heat and whisk in the bourbon. This sauce is good on just about anything.

churros-1

For the peach compote
2 peaches, peeled and cut into chunks
2 tablespoons brown sugar
small pinch of salt
1/2 lemon, juiced

In a heavy bottomed pot, add the peaches and brown sugar. Cook over low heat, stirring occasionally until the fruit is quite soft. Remove from the heat and purée. I used an immersion blender. Add the lemon juice and blend just a bit more to incorporate. Store in the fridge if you have leftovers.

churros-6

-Emily

Categories
Recipes

fiesta peppers

This is a recipe from my mama—the type of recipe you that’s told to you over the phone because it’s a little of this, a little of that, a little of whatever you’ve got in the fridge. It’s perfect for the end of summer when your pepper plants are exploding with fruit, or your CSA has blessed you with a cornucopia of them. The flavors are vaguely Mexican and it’s quick to throw together, especially if you have a tupperware of leftover rice languishing in your fridge (or, alternatively, a rice cooker with a timer).

Fiesta Peppers | The Answer is Always PorkFiesta Peppers | The Answer is Always Pork

It’s also the type of dish that’s great for a party because you can make the whole thing in advance. All that’s left to do once you’ve got a house full of friends is taking a hot dish out of the oven and setting it on the table. It isn’t the most picturesque of dishes when all said and done, but you can’t go wrong with the flavor combinations—the curse of the casserole. We made it for our dinner club last Thursday, and it’s more than fair to say everyone left full and happy. There isn’t really anything better than sitting down at a table filled with people you love, eating some solid, soul-warming food, and cracking a lot of jokes.

Fiesta Peppers, adapted from my mother’s recipe, serves 8 
1 onion, diced
2 fresh chorizo sausages, removed from their casings (skip the sausage and this can be made vegetarian. Jordan made these sausages, no wondering I’m marrying him!)
1 can of black beans, drained
2 cups white rice, cooked (1 cup uncooked, this is a great way to use up leftover rice)
1/4 -1/2 cup sour cream (our addition, I’m sure my mother would skip it, but it does help everything stick together a bit better)
1 cup mild cheese, grated (we used a mixture of monterey jack and cheddar)
6-10 mild peppers, cut in half with seeds removed (bell pepper, poblano, any sweet pepper will do)
1 1/2 cups enchilada sauce (we used 2 bottles of Trader Joe’s enchilada sauce – it’s good and makes this dish even easier to pull together)
salt and pepper
Tapatío hot sauce
lime for serving

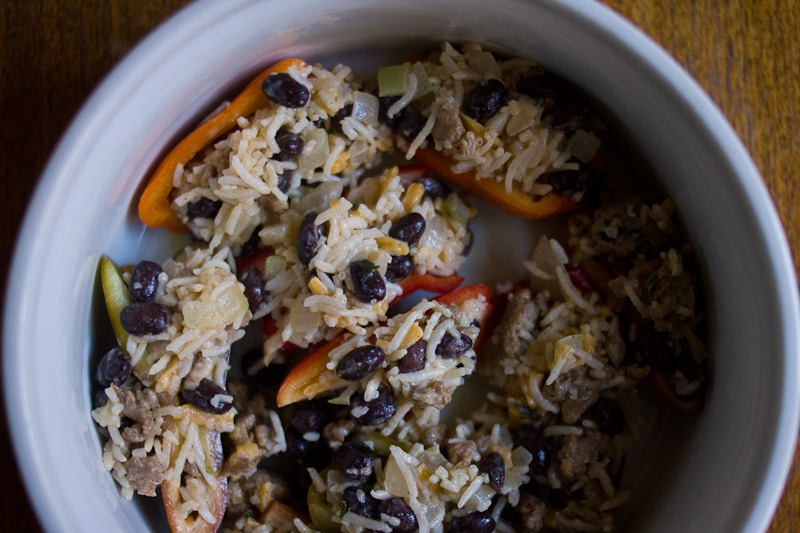
Preheat your oven to 350° F. In a sauté pan over medium heat, cook the chorizo in a bit of oil. When the chorizo is starting to brown, add the diced onion and cook a few minutes more. Put the chorizo onion mixture in a large bowl. Add the rice, black beans, sour cream and 1/2 cup of cheese, and mix to combine. Season with salt, pepper and a dash or two of Tapatío.
Fiesta Peppers | The Answer is Always PorkFiesta Peppers | The Answer is Always PorkFiesta Peppers | The Answer is Always Pork

Lightly oil two oven-safe baking dishes (I filled one 9″x11″ and one 8″ round). Stuff the peppers with the sausage mixture and arrange them in the dish. Cover with enchilada sauce and sprinkle with the remaining cheese. Bake 25 minutes, until the sauce is bubbling and cheese has melted. Serve with lime, plus whatever other fixings you like—sour cream, guacamole, salsa, you know the drill.

Fiesta Peppers | The Answer is Always PorkFiesta Peppers | The Answer is Always Pork

-Emily
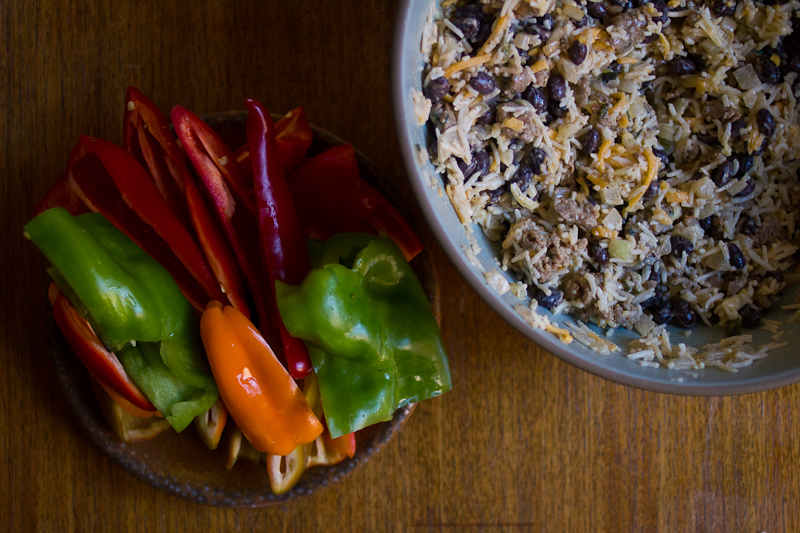
Ps. Eatwell Farm’s offer to our readers to try their CSA Farm Share subscription at a discount still stands! New Eatwell Farm subscribers can use the code: ALWAYSPORK to get their first 4 box subscription for just $99. $20 a week for perfect produce, like the sexy peppers and watermelon pictured above? You can’t go wrong!

Categories
Recipes

daily toast

There’s a really sweet breakfast spot in our neighborhood called Farm Table. They run the whole thing out of a space no larger than a San Francisco studio apartment, which for those who don’t know this reality personally, means there’s about 40 square feet of kitchen real estate. Still, they manage turn out some seriously tasty breakfast treats, along with solid cups of coffee just about every morning.
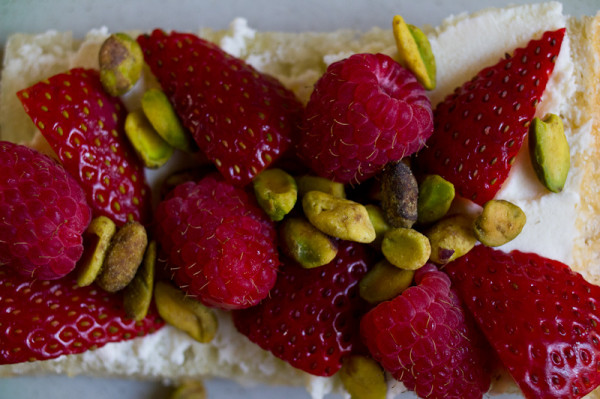
Their “Daily Toast” is my favorite dish. It starts with slightly salty slice of focaccia bread, topped with a generous spread of sweetened mascarpone, seasonal fruit and a sprinkling of pistachios. It’s a simple, stunning combination. Inspired after stopping by for breakfast a while back, I wanted to see if I could do it any justice at home. Turns out, I can, which means you can too. The Daily Toast actually comes together in 15 minutes, if you don’t go full on crazyperson and make focaccia from scratch (ahem).

Daily Toast | The Answer is Always PorkDaily Toast | The Answer is Always Pork

There’s a pretty interesting trend sweeping San Francisco, and I’m sure other cities too, of artisanal toast. Like the cupcake and donut before it, toast has been transformed from a boring, at-home-breakfast to a fancy, indie coffee shop specialty complete with from-scratch breads and snazzy toppings. I don’t scoff because I happen to really like toast—more than cupcakes anyway—and I know making a good loaf of bread is dang hard, but the trend bears mentioning. The word is that it all stems from a coffee shop in the Outer Sunset, Trouble Coffee. I’ve had their cinnamon toast on many occasions, it’s delicious, and worth every penny. Not much beats the warm comfort of cinnamon toast as it mixes with the salty breeze off the Pacific, blanket of fog surrounding you, softly whining greyhound at your side. But, Daily Toast sure makes a decent effort, and you should absolutely give it a shot.

Daily Toast
Several slices of plain focaccia bread (I made mine from scratch, but you can often find focaccia at the grocery store. I think they use Acme Bread at Farm Table)
1 cup mascarpone
2 tablespoons powdered sugar
1 teaspoon vanilla
1 dash of cinnamon and nutmeg
1 cup berries, washed, dried and sliced if needed (We used a combination of strawberries and raspberries, but you could really use any berry or stonefruit. Supremed citrus would also be wonderful in winter)
1/4 cup pistachios

For the toast
In the bowl of a standing mixer or a large mixing bowl, combine the mascarpone, sugar, vanilla and spices. Beat to combine. Taste for sweetness, it should be just a tad sweet. Wash, dry and slice the berries.

Cut a piece of focaccia about 3 inches by four inches. Cut in half as if you were making a sandwich and spread each half generously with the mascarpone. Top with berries and sprinkle with pistachios. Enjoy!

Daily Toast | The Answer is Always Pork

For the focaccia, from The Bread Baker’s Apprentice
5 cups (22.5 oz) bread flour
2 teaspoons (0.5 oz) salt
2 teaspoons (0.22 oz) instant yeast
6 tablespoons (3 oz) olive oil
2 cups (16 oz) water, at room temperature
olive oil and sea salt for drizzling

Stir together flour, salt and yeast in the bowl of an electric mixer. Add the oil and water and mix with the paddle attachment on low speed, until the ingredients start to come together into a wet, sticky ball. Switch to the dough hook and knead for 5-7 minutes on medium speed. The dough should be smooth, sticky and clear the sides of the bowl.

Sprinkle your counter with a light dusting of flour. Scrape the dough out of the bowl and onto the counter. Dust the top liberally with flour and pat into a rectangle. Let rest for 5 minutes.

Coat your hands with flour and stretch the dough into a rectangle twice its original size. Fold the dough letter style; fold one side into the middle and then fold the other side over that. Dust with flour and cover loosely with plastic wrap. Let rest for 30 minutes.

Once again, stretch the dough into a rectangle, fold it letter style, dust with flour and let rest for another 30 minutes. Allow the dough to ferment on the counter for one hour.

Line a 17″ x 11″ baking pan (I used a rimmed baking sheet) with parchment. Sprinkle some olive oil on the pan and coat your hands with some. Transfer the dough from the counter onto the baking dish, taking care to maintain its rectangular shape. Using your finger tips, press the dough into a rectangle about 1/2″ thick.  Drizzle with some oil, cover loosely with plastic wrap and refrigerate overnight.

Daily Toast | The Answer is Always Pork

Remove the pan from the fridge three hours before baking. Drizzle olive oil over the surface and dimple the bread by poking it with your finger tips. Cover the pan again with plastic wrap and let proof for 3 hours, until the dough doubles in size, about 1″ high.

Preheat your oven to 500° F and put a rack in the middle. Uncover the dough, and sprinkle with sea salt. Put the dough in the oven on the middle rack and lower the temperature to 450° F.  Bake 10 minutes, then rotate the pan 180° and bake for another 10 minutes. When the bread is golden brown, remove from the oven and transfer to a rack to cool. The internal temperature of the bread should be 200° F. Let cool 20 minutes before slicing and assembling.

Daily Toast | The Answer is Always Pork Daily Toast | The Answer is Always Pork

-Emily

Categories
Recipes

summer vegetable crumble

Growing up, eating with the seasons just happened to a bi-product of my mother’s obsessive gardening. She’d try planting just about anything once, but under that hot Sacramento sun things like squash and tomatoes really thrived. I remember harvesting zucchini the size of toddlers and tossing them back and forth in the swimming pool. Summer produce stands out most in my memory, though I’m sure we ate from her garden past August.

The Answer is Always Pork | Summer Vegetable Crumble

Eating from the garden was just how eating went in my family, and it wasn’t until my senior year of college when I became more interested in food politics and the complexities of our industrial food system, that I really understood the impact eating seasonally and locally has on our local economy, our environment and our health. The short answer is it’s a big one. And the long answer is much better explained by the folks who really know what they’re talking about, Michael Pollan and Marion Nestle to name a few.

Eating with respect to the seasons and spending our dollars in support local farms and food businesses has become a not-so-private mission of ours, and even in my mother’s eyes, we verge on militant. But if there is one thing to care about, the health of our family and our planet isn’t a bad one, especially if it also means eating wonderful food.

Living in middle of downtown San Francisco, we don’t grow much beyond a few pots of herbs, which is where our CSA (Community Supported Agriculture) Farm Share subscription from Eatwell Farm comes in. Eatwell Farm’s mission is to feed body and soul. They are committed stewards to the environment and constantly challenge industrial agricultural practices in favor of sustainable ones. They care about their land, their employees, and growing the healthiest and best food money can buy—and you can absolutely taste it.

We’ve had our CSA with Eatwell for over 3 years and could not be happier. We get perfect produce. We eat healthier. We stretch ourselves by cooking with ingredients we might not necessarily buy. We know our dollar is going to support a local farm and local families working hard to change our food system. And we spend the same amount as we would spend at the grocery store, where just pennies of your dollar make it back to the farmers. If we don’t support local farms, we’ll lose them—a tragedy with repercussions far beyond just taste—and a CSA is a simple, effective and delicious way to vote with your dollar.

If I haven’t convinced you, taste the difference for yourself! Eatwell Farm has been kind enough to offer our Northern California readers a discount to try their CSA Farm Share subscription. New Eatwell Farm subscribers can use the code: ALWAYSPORK to get their first 4 box subscription for just $99. Good ingredients make it easier to cook good food, and I honestly cannot recommend Eatwell enough. If you don’t live in Eatwell’s delivery radius, I urge you to check out Local Harvest to see if there are any farm share subscriptions in your area.

The Answer is Always Pork | Summer Vegetable Crumble

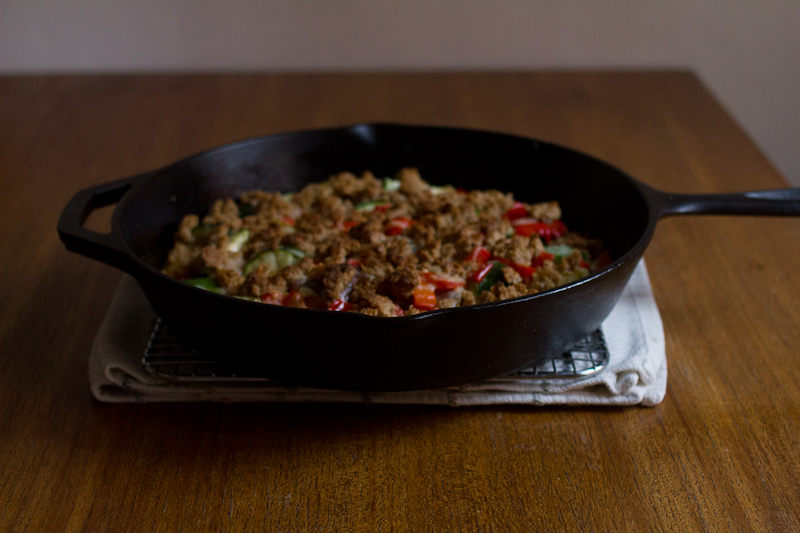
Now I’ll step down of my soapbox and move onto the recipe. This dish is made with all kinds of wonderful summer produce—zucchini, eggplant, tomatoes, peppers. It was inspired by ratatouille, with a little sprinkle of cheese and buttery pastry crumble added to jazz it up a bit. It’s great as a vegetarian main dish, but could also be served as a side. It takes just 30 minutes to throw together, but tastes like far more effort went into it.

Savory Summer Vegetable Crumble
1 onion, diced
1 cup tomatoes, diced
1 Japanese eggplant, cut into 1” chunks (or half of a globe eggplant)
1 – 2 zucchini, cut into 1” chunks
2 peppers, diced (we used bell pepper, but any mild pepper will do)
a good sprinkle of fresh thyme or oregano
1 – 2 tablespoons olive oil
chili flake, salt and pepper to taste
⅓ cup gruyere, mozzarella or parmesan cheese, shredded (use what you have)

For the crumble topping
4 tablespoons butter, cold and cut into small 1 tablespoon pieces
¾ cup whole wheat or all-purpose flour (we used Eatwell’s Sonora Wheat Flour, which was A+)
½ teaspoon kosher salt

Preheat your oven to 450° F and put one rack closest to the top.

The Answer is Always Pork | Summer Vegetable Crumble

First make the crumble topping. In a medium bowl, combine the flour and salt. Add the butter and work it into the flour with your fingers or a pastry blender, until the butter is in pea-sized pieces and the mixture just comes together if you squeeze it. It will still be pretty crumbly, which is just what you want. Put the crumble topping into the fridge until the veggies are ready.

The Answer is Always Pork | Summer Vegetable Crumble

In a cast iron skillet or other oven-safe pot, sauté the onion in a little olive oil over medium-low heat. When the onions are soft, add the tomatoes and sauté just a minute more. Season well with salt, pepper and chili flake. Add the other chopped vegetables and toss to combine. Sprinkle with the grated cheese and then with the crumble top.

Bake 20 minutes on the top rack, until the vegetables are just starting to get soft at the edges and the crumble top is browned. This will serve two to three people as a vegetarian main, or four to five people as a side dish. It would be delightful alongside a roast chicken or quickly sautéed pork chop. You could also top with a few eggs in the last few minutes of cooking if you’d like something a bit heartier. The beauty of good, simple food is it’s flexibility, so mix it up! I hope you enjoy!

The Answer is Always Pork | Summer Vegetable Crumble

The post was written in partnership with Eatwell Farm, but the opinions are always our own.

-Emily