Categories
Recipes

baking therapy: pumpkin cookies with browned butter icing

Sadly, I think summer might officially be over in San Francisco. The past few days have been chilly, drizzly and grey. I’d complain more, but the end of summer means the start of fall …  new ingredients to choose from, heartier recipes to make and PUMPKIN EVERYTHING!

This week’s baking therapy showcases fall flavors- pumpkin, cinnamon, ginger, and nutmeg. Plus, who doesn’t love browned butter?!

I halved the recipe because I didn’t think Jordan and I could consume 6 dozen pumpkin cookies over the next few days, but the whole recipe is below.

Pumpkin Cookies with Browned Butter Icing, adapted from Martha Stewart Living

For the cookies
2 3/4 cups all-purpose flour
1 teaspoon baking powder
1 teaspoon baking soda
1 1/4 teaspoons coarse salt
1 1/2 teaspoons ground cinnamon
1 1/4 teaspoons ground ginger
3/4 teaspoon ground nutmeg
3/4 cup (1 1/2 sticks) unsalted butter, softened
2 1/4 cups packed light-brown sugar
2 large eggs
1 1/2 cups canned solid-pack pumpkin (14 ounces)
3/4 cup evaporated milk
1 teaspoon pure vanilla extract

For the icing
4 cups confectioners’ sugar, sifted
10 tablespoons (1 1/4 sticks) unsalted butter
1/4 cup plus 1 tablespoon evaporated milk,
2 teaspoons pure vanilla extract

For the cookies

Preheat the oven to 375 degrees. Whisk together flour, baking powder, baking soda, salt, cinnamon, ginger, and nutmeg in a medium bowl; set aside.

Put butter and brown sugar in the bowl of an electric mixer Mix on medium speed until pale and fluffy. Mix in eggs. Reduce speed to low. Add pumpkin, evaporated milk, and vanilla; mix until well blended. Add flour mixture; mix until combined.

Transfer 1 1/2 cups batter to a pastry bag fitted with a 1/2-inch plain tip (you could also use large ziplock with the tip cut off one corner). Pipe 1 1/2-inch rounds onto parchment-lined baking sheets, spacing 1 inch apart. Bake cookies until tops spring back, about 12 minutes. Cool on sheets on wire racks 5 minutes. Transfer cookies to wire racks; let cool completely.

For the icing

Put confectioners’ sugar in a large bowl; set aside. Melt butter in a small saucepan over medium heat. Cook, swirling pan occasionally, until golden brown, about 3 minutes. Immediately add butter to confectioners’ sugar, scraping any browned bits from sides and bottom of pan. Add evaporated milk and vanilla; stir until smooth. Spread about 1 teaspoon icing onto each cookie. If icing stiffens, stir in more evaporated milk, a little at a time. Cookies can be stored in single layers in airtight containers at room temperature up to 3 days.

Conclusions: The cookies are soft and delicate with a subtle pumpkin flavor. Sadly, I over-iced them and the browned butter flavor was a bit overpowering.  A lighter coating of icing next time, plus a little bit more of the spices and they’ll be spot on. Despite their imperfections, with a cup of tea or coffee these little guys are delightful!

-Emily

Categories
Recipes San Francisco

fall dinner for four

Last night, my sister and my cousin joined us for dinner. It was another rainy day and I’d decided soup seemed to be the perfect cozy fit. Jordan was so sweet and did all the work for this delicious meal while I gabbed with the girls.

Butternut Squash Soup with Ginger and Garlic
Butternut squash, about 3 pounds, cut into large chunks
Small onion, cut into large chunks
2 carrots, cut into large chunks
6 cloves of garlic
4 cups vegetable stock
1 t ginger, pealed and grated

Preheat oven to 375 degrees. Toss squash, onion, carrot and garlic with a drizzle of olive oil, salt and pepper. Roast, stirring occasionally, for 45 minutes to an hour.

Put roasted veggies in a large pot or dutch oven. Add 3 cups of stock and ginger. Simmer, covered for 20 – 30 minutes. Puree in a food processor or blender. Simmer for another 15 minutes. Season once again and serve with crusty bread and a salad.

Jordan did a beautiful job emulsifying the vinaigrette for our spinach and arugula salad. He’s such a pro!

Conclusions: Positively fall! This soup is so hearty it makes a perfectly substantial meal all on its own. The crusty caraway bread from Tartine Bakery and acidic spinach and arugula salad were perfect accompaniments. Hurray for fall and the start of squash season!

-Emily

Categories
Recipes

baking therapy: easy chocolate cake

Another coworker’s birthday, another cake. This time I went with chocolate because we all know that any real dessert has to be chocolate.

Easy Chocolate Cake, adapted from Martha Stewart’s Everyday Food
3/4 cup unsalted butter, room-temperature
3/4 cup unsweetened cocoa powder
3/4 cup flour
1/2 t baking powder
1/4 t salt
1 cup sugar
3 large eggs
1 t vanilla
1/2 cup sour cream

Powdered sugar for dusting, fresh berries and chocolate shavings for garnish

Preheat the over to 350 degrees

Butter an 8 inch round cake pan, line bottom with parchment paper, butter, dust with cocoa powder.

In a medium bowl, sift together cocoa powder, flour, baking powder and salt. In a separate mixing bowl cream butter, then sugar until light and fluffy. Beat in eggs, one at a time, then beat in vanilla. Reduce speed to low. Add flour mixture alternating with sour cream.

Spread batter into prepared pan. Bake 30 – 35 minutes. Cool 10 minutes in pan and then invert onto a wire rack to cool completely. Once cooled dust with powdered sugar, then garnish with berries and chocolate shavings.

Conclusions: A pretty dense chocolate cake. The berries were a nice way to cut the richness of the cake, and this may sound crazy, but I’m glad I accidentally burnt the ganache that was supposed to top the cake. It would have pushed this dessert over the edge. The coworkers enjoyed it, but I have to say it wasn’t my best work. The search for the perfect chocolate cake recipe continues!

-Emily

Categories
Recipes

baking therapy: cheesecake

It was my coworker’s birthday on Monday, and as office manager, it falls within the vast scope of my duties to provide a dessert and organize the eating of said dessert. For David’s birthday I decide to make a cheesecake. And no, this is not the super top-secret recipe to Nonnie’s famous cheesecake. I’m not giving that one up this easy.

Cheesecake with Mixed Berry Sauce

For the cake
1 1/2 cup ground shortbread cookies
1/2 stick butter, melted
2 8-ounce packages cream cheese, room temperature
1/2 cup (packed) fromage blanc (you could also use crème fresh or ricotta)
3/4 cup plus 2 tablespoons sugar
1 teaspoon vanilla
4 large eggs

Preheat oven to 325°F.

Melt butter and mix with cookie crumbs. Press cookie mixture firmly onto bottom of a springform pan. Wrap outside of pan tightly with 3 layers of heavy-duty foil so water doesn’t leak in while baking. Using electric mixer, beat cream cheese, fromage blanc, sugar and vanilla in large bowl until smooth. Add eggs 1 at a time, beating until incorporated after each addition. Pour batter over prepared crust in pan. Place cake in roasting pan; add enough hot water to roasting pan to come halfway up sides of springform pan.

Bake cake until set but center moves very slightly when pan is gently shaken, about 1 hour. Remove cake from roasting pan; cool 1 hour at room temperature. Refrigerate uncovered overnight. (Can be prepared 2 days ahead. Cover and keep refrigerated.)

For the sauce
1 -2 cups mixed berries (I used frozen … it’s cheaper)
1/4 cup water
1/2 cup sugar

Simmer berries, water, sugar in a medium saucepan over medium low heat for 20 minutes. Strain out seeds through a fine mesh strainer or cheesecloth.

Serve with sauce, garnish with a few fresh berries.

Conclusions: Well, it was gone so fast I wasn’t even able to take a picture and a coworker asked for the recipe. I consider it a job well done.

-Emily


Categories
Recipes

sunday breakfast: french toast

My love of breakfast foods has already been professed, but here I go again … I love breakfast! I love it deeply, and especially so after sleeping in on a lazy Sunday morning.

Emily and Jordan’s French Toast
Day old baguette (sourdough is our favorite), sliced into 1 inch thick slices
3 eggs
1/4 cup milk
1 t vanilla extract
1 T brown sugar
1/2 t salt
1 t ground cinnamon (I love cinnamon and so I put a lot on my french toast)

Mix all of the above ingredients in a shallow baking dish. Melt 1 T of butter in a nonstick skillet over medium heat. Generously coat the slices of bread with the egg mixture and place them in the hot pan. Cook several minutes per side, dust with powdered sugar and enjoy!

-Emily

Categories
Recipes

buttermilk reincarnated: vichyssoise

Remember that leftover buttermilk from my butter-making experiment? Well, I just couldn’t let it go to waste and so I spent a little time browsing for buttermilk recipes online. After sifting through dozens of buttermilk fried chicken and buttermilk pancake entries, I found … vichyssoise with cauliflower and buttermilk. First thought: “Yum!”. Second thought: “Thank you Martha!”.

Vichyssoise with Cauliflower and Buttermilk, adapted from Martha Stewart Living
1/4 cup (1/2 stick) unsalted butter
5 leeks, white and pale-green parts only, thinly sliced and rinsed well (about 3 cups)
1 white potato, peeled and cut into 1-inch pieces
Freshly ground white pepper (I used black because I didn’t have white, but the white would make it a prettier soup)
Large pinch nutmeg
1 small head cauliflower, cut into florets (about 4 cups)
Coarse salt
3 1/2 cups homemade or low-sodium store-bought chicken stock
1 cup buttermilk (ta-da!!)

Melt the butter in a medium saucepan over medium heat. Add leeks, and cook, stirring occasionally, 5 minutes. Add potato, a generous grinding of pepper, and the nutmeg, and cook, stirring, 1 minute. Stir in cauliflower, a large pinch of salt, and 3 cups stock. Simmer, partially covered, until cauliflower has softened, 12 to 15 minutes. Using a slotted spoon, remove 2 florets, and transfer to a cutting board; thinly slice lengthwise. Set aside for garnish.

Working in batches, puree vegetable mixture in a blender (I used an immersion blender-much easier), filling no more than halfway each time. Return to pan. Stir in buttermilk and remaining 1/2 cup stock.  Season again with salt and pepper. Serve hot or cold, garnished with cauliflower slices.

Hot this is soup referred to as potato and leek soup, cold as vichyssoise … if anyone can explain this to me, I’m all ears.

Conclusions: While not the most photogenic of dishes, this soup is delicious! Quick, easy and really comforting. We ate it for three days and weren’t too upset about that fact.

-Emily

Categories
Recipes

baking therapy: miykaelah’s madeleines

Oh, how I’ve missed Miykaelah’s madeleines since moving to San Francisco! They are the perfect cookie whether eaten by themselves or accompanied with tea, and thanks to Miykealah, one of my favorites. I know the madeleine pan is a bit of an investment, but these cookies are so worth the $14 pan. And, because of that scalloped pan they come out so darn cute!

Miykaelah’s Madeleines
1 1/4 cup cake flour
1/4 t baking powder
1/4 t salt
2 large eggs + two large egg yolks, room temperature
1 t vanilla extract
3/4 cup sugar
grated zest of 1/2 lemon
1/2  cup unsalted butter, melted then cooled

Preheat oven to 375 degrees

Generously brush madeleine pan with melted butter and dust with sugar

In a large bowl with an electric mixer on medium speed, beat the whole eggs, egg yolks and sugar until light and fluffy. Add vanilla and lemon zest and beat until well combined.

In a separate bowl, combine cake flour, baking powder and salt.

Using a rubber spatula, fold the flour mixture into the egg mixture until blended. Add the melted butter and fold until combined.

Drop batter by the spoonful into the madeleine molds. Fill each 3/4 full. Bake until golden brown and springy to the touch, 12-15 minutes.

Immediately invert pan onto a wire rack. Let cool completely. Wipe out pan, let cool, brush with melted butter, dust with sugar and repeat with remaining batter.

Conclusions: Wonderful, perfectly wonderful. I wouldn’t change a thing!

-Emily

Categories
Recipes

pizza, pizza, pizza

Friday night we had a couple friends over to our place for dinner.  Emily and I discussed a dinner menu; we knew we wanted something casual that would be a crowd pleaser.  Obviously, the perfect answer was pizza.  (On a more personal note, I think pizza is one of the two perfect foods in the universe.  Maybe I’ll discuss the other later, but for now, I’ll keep you in suspense).  When making homemade pizza, I usually assume one pizza per two people.  It seems like a lot, but it’s really difficult to make large pizza at home (more than 12″) and I make pretty thin crust, so it’s not too filling.

I’m going to make a confession right away.  I bought the dough from Whole Foods.  I know it’s a terrible thing to do, but to be perfectly honest, their dough is really good.  I’ve made my own before and it only comes out okay in my opinion.  As an added bonus, they only cost $1.30 each.  I’ve also heard that Trader Joe’s dough is tasty too, but I’ve never tried it.

To make up for my store bought dough, I did make the sauce from scratch.  This is something I highly recommend because it’s super easy, cheap, it tastes better than jarred sauce, and you can make a batch as large as you want and just freeze it for at least a year.  I made a very basic version where I simply sautéed an onion, a carrot and a few cloves of thinly sliced garlic.  Then I deglazed with some red wine vinegar (probably about 1/4 cup) and added two 28oz. cans of whole tomatoes.  Let that simmer for a couple hours and puree to your desired consistency.  Season with salt, pepper, chile flake, and a couple tablespoons of sugar (to cut the acidity).

Now for the fun part.  Preheat your oven as high as it will go (If you have a pizza stone, which is highly recommended, preheat for about an hour so the stone gets good and hot).  I like to take the dough out of the fridge about a half hour before baking to make it a bit easier to work with.  Stretch it out with some flour on the counter and get it to a nice thin disc about 12″ in diameter.  Put some cornmeal on your pizza peel and lay the dough on it (I leave about an inch hanging over the edge of the peel as the dough seems to slide off more easily that way, that could just be me though).  Then you just throw on your toppings.  The only advice I can really give here is that less is more.  Just use a little bit of sauce, a good quality cheese (I like fresh mozzarella) and no more than 4-5 toppings.  We made three pizzas: one was sausage (pork of course), olives, and cherry tomatoes; basic mozzarella and basil; and bacon, sautéed chanterelles, goat cheese, garlic, and onion (I also threw some fresh tarragon on after it came out).

Conclusions:  We’ve done this before and we will do it again.  It’s super fun and not too difficult (your friends will love you for it too).  If you’ve never made homemade pizza before then just give it a try; it seems really hard at first, but the more you do it, the easier it gets.

P.S. We had a salad too.  Just spinach and arugula with more cherry tomatoes and a balsamic vinaigrette.  Tasty.

-Jordan

Categories
Recipes

quick chick(en)

Last night dinner had to be easy, and preferably quick. Why? Well, because I’ve neglected all of my chores in favor of baking and butter making. Hard to believe, I know.

I also have this problem at the butcher counter where if all of the young, corporate women in front of me (I am one now, sort of) ask for boneless, skinless chicken breasts, I have to break the mold by asking for an entire chicken, and 3 lbs of lamb shanks. Yep. And I was making a dinner for two.

These two issues (mountain of chores and whole chicken) collided last night and  … I made easy roast chicken thighs and legs.

Preheat an oven to 350 degrees.

Break down the chicken into appropriate sized pieces for two people (or don’t go crazy at the butcher counter). Salt and pepper both sides.

Place chicken in an oven safe baking dish, drizzle with a little olive oil, toss in some sliced onion, carrot, and whole garlic cloves. I forgot to, but you could also throw in some rosemary or thyme to jazz the bird up a bit.

Bake for 45 minutes (or until the meatiest part feels like the fatty palm of your hand when you press it — Jordan’s trick).

While this is cooking you can start a load of laundry, throughly clean the bathroom, and scrub the kitchen floor, assuming your home is less than 500 square feet.

Conclusions: The chicken was delightful, as roast chicken always is, especially the juices in the bottom of the pan, and super easy. I tossed it in the oven, and forgot about it for 45 minutes and it still turned out just fine. My perfect bite … roasted garlic clove, dark meat, crispy skin, dunked in chicken juice. Try it, you won’t be disappointed.

-Emily

P.S. Throwing the chicken under the broiler at the last minute makes the skin nice and extra crispy as well.

-Jordan

Categories
Recipes

butter! homemade butter!

Last night laying in bed, Jordan and I had a serious discussion. It went something like this …

“If you had to live the rest of your life without bacon or butter, which would it be?” “Ummmm, that’s a tough one. But as much as I love pork, especially bacon, I’m going to have to say butter.”

Then …

“If you had to live the rest of your life without coffee or butter, which would it be?” “Oh! Now that is just not fair. Ummmmm. Butter. A life without coffee is cruel, but butter just makes everything better. ” “So, butter?” “Yes, butter.”

Although the final decisions were hard to come to, the clear winner in these match-ups is butter, which brings us to today’s culinary experiment …

Heavy whipping cream -> Homemade butter! from Julia Child’s Mastering the Art of French Cooking 
1 pint heavy whipping cream
Salt (optional)
Garlic, herbs, pepper (optional)

Start with a pint of heavy whipping cream. I poured it into my kitchen aid stand mixer and set the dial to high speed (6-8). You could also use a hand mixer, or put the cream in a jar and shake that sucker for 20 minutes. I took the easy way out and it took about 8 minutes to get from cream to butter.

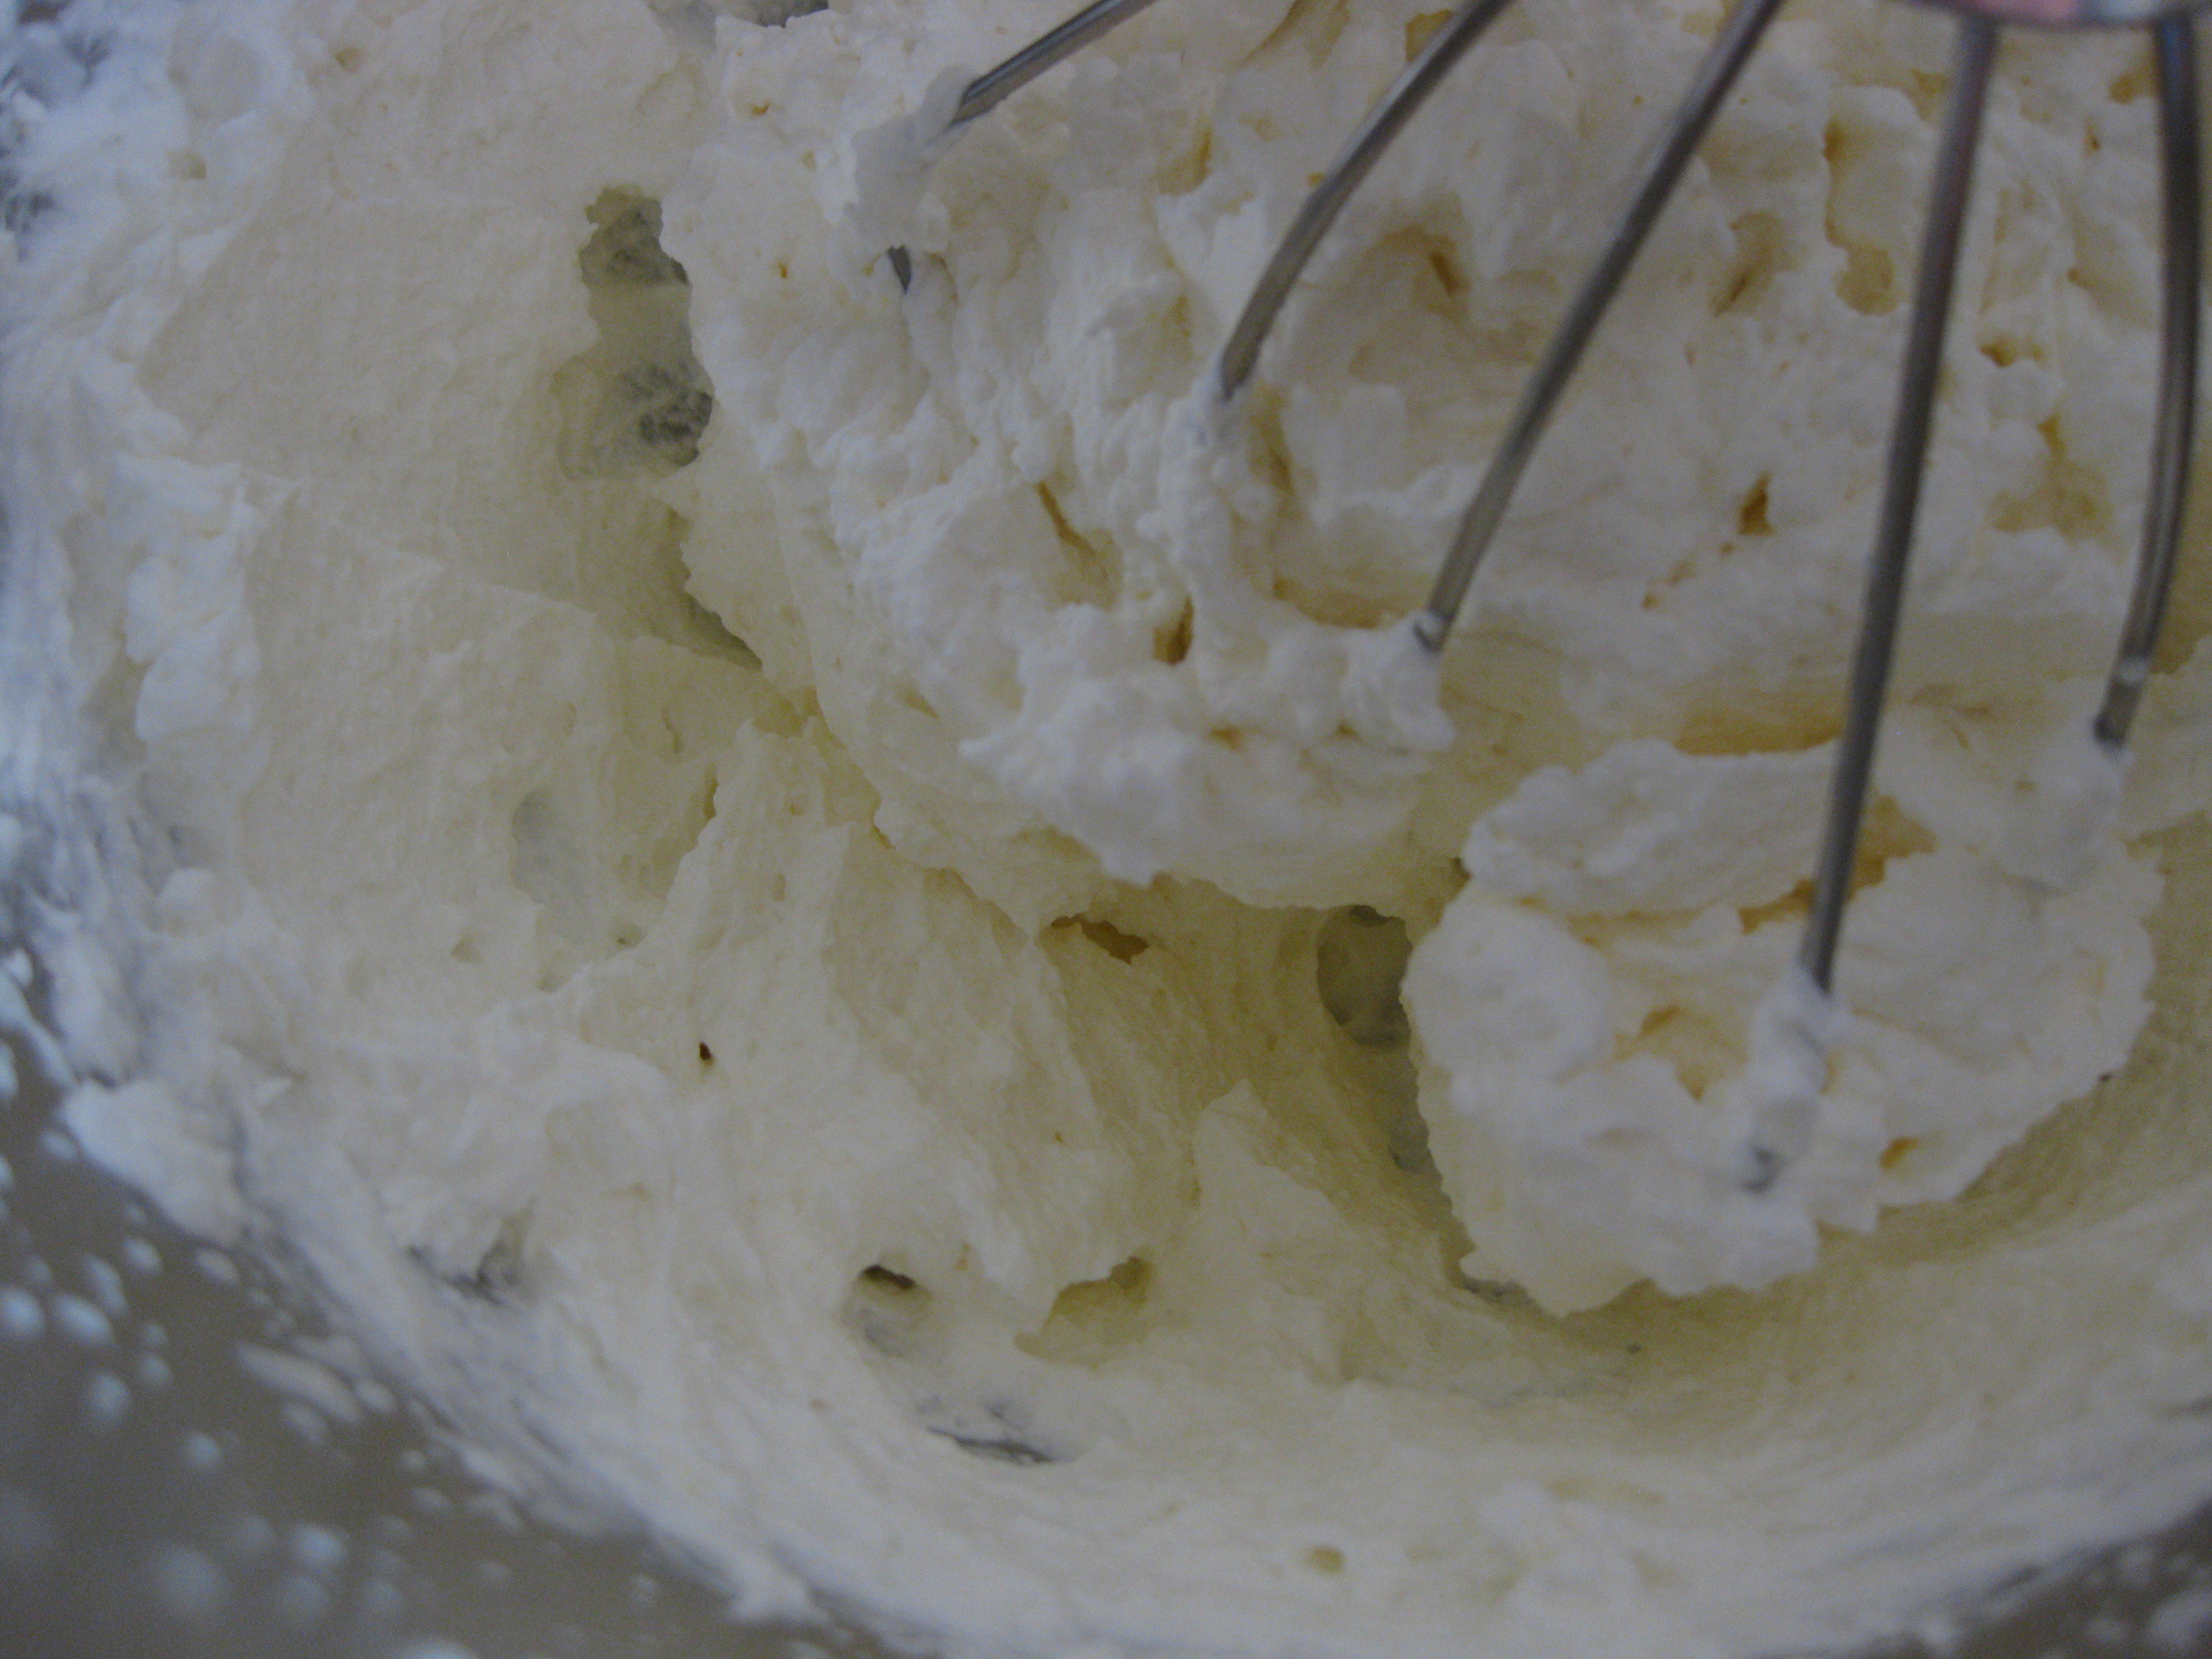
Beat the cream for several minutes, occasionally scraping down the sides of the bowl with a spatula. The cream will go through several stages. The transformation is pretty incredible. When the cream has turned into butter and buttermilk, you’ll know.

Stage 1: cream

Stage 2: whipped cream

Stage 3: extra-thick whipped cream

Stage 4: broken whipped cream (crumbly looking little bits)

Stage 5: separation of cream into butter and buttermilk!

Note: You may want to drape a kitchen towel over the mixer as to prevent splattering cream all over your kitchen. I realized this about half way through the process, and had a little extra cleaning up to do afterward.

Once the cream has separated into butter and buttermilk, strain the buttermilk out with a fine mesh sieve into a bowl. Place the butter in a separate bowl and press out more of the buttermilk with a wooden spoon. Pour off the buttermilk. Put the buttermilk aside and brainstorm a recipe using buttermilk.

Note: It is very important to get all of the buttermilk out of the butter. If you don’t remove all of the buttermilk from the butter, it will go rancid very quickly.  And that would be very, very sad.

After you’ve squeezed most of the buttermilk, pour a cup or two ice-cold water over the butter. Using the back of a wooden spoon, smash the butter around. Washing the butter with water helps to remove the last of the buttermilk. Pour off the water. Repeat this process until the water you pour off is clear. I did it three times.

Note: the water must be ice-cold as to not melt the butter solids.

Add salt to taste and mix throughly with a wooden spoon.

The final product! Salted butter (about 1/2 cup) and buttermilk (about 1 cup)!  YUM!

As an accompaniment to tonight’s dinner (Jordan will bring us more on that later), I decide to make Beurre d’ Ail garlic herb butter from Julia Child’s “Mastering the Art of French Cooking”.  I’ve reduced her recipe to a one meal for two serving size.

4 T fresh, salted butter

1 clove garlic

1 T  parsley (or other green herb), minced

Set the unpeeled clove of garlic in boiling water. Bring to a boil for 5 seconds. Remove from pot, rinse and peel. Bring to a boil again for 30 seconds more. Pound to a smooth paste in a mortar and pestle (or garlic press, if you don’t have a mortar and pestle).

Pound or cream the butter and garlic  together. Season with additional salt, pepper, and herbs.

Conclusions: The salted butter is divine! I can’t be more thrilled to have it on hand. Plus, making it was a fun (and quick!) science experiment. I highly recommend it! When the cream shifted into butter and buttermilk, Jordan could hear me shouting from the kitchen, “It worked! It really worked!” I’m also pretty happy to have a back-up plan for the next time I over-whip whipped cream. Lastly, the garlic herb butter was terrific on bread at dinner. The garlic flavor was strong so if you don’t love garlic like we do, scale back a bit. Homemade butter is the best!

-Emily