Categories
Recipes

chocolate chip zucchini bread

It’s late summer which means that you probably have zucchini the size of toddlers growing in your backyard or left on your doorstep in the night by a neighbor or delivered in your CSA box. This recipe is here to help you out. We made several variations, tweaking the recipe each time to maximize the amount of zucchini used, minimize refined sugar and retain deliciousness. I won’t claim this bread is healthy, but I also don’t think you should feel guilty eating it for breakfast. You are using up those zucchini after all.

zucchini-bread-5

Chocolate Chip Zucchini Bread
1 1/2 cup all-purpose flour
1 1/2 cup whole wheat flour
1 teaspoon salt
1 teaspoon baking powder
1 teaspoon baking soda
1 teaspoon cinnamon
1/4 teaspoon nutmeg
3 eggs
2/3 cup coconut oil (or vegetable oil)
1 cup crushed pineapple
3/4 cup granulated sugar
2 1/2 cups zucchini, shredded
1 cup walnuts
1/2 cup chocolate chips
1/2 cup flaked coconut, toasted (optional – we did it once, but didn’t repeat for the next few batches)

Preheat your oven to 325° F. Grease two loaf pans with butter and dust with flour.

zucchini-bread-2-1zucchini-bread-1

Combine flours, salt, baking powder, baking soda, cinnamon and nutmeg in a medium bowl. In a large bowl, whisk together eggs, oil, pineapple and sugar.  Add grated zucchini into to the other wet ingredients. Add the dry ingredients to the wet and stir until just combined.

zucchini-bread-2

Stir in walnuts, chocolate chips and coconut if using. Divide batter into two loaf pans. Bake 30 – 40 minutes, until a tester inserted into the center comes out dry.

zucchini-bread-3 zucchini-bread-4

Enjoy! For breakfast, lunch and dessert!

Categories
Recipes

middle class brioche

At the end of the spectrum opposite spelt bread, there is brioche—lest you worry our dedication to butter had wavered. For Mardi Gras a few weeks ago, our friend Kelly made an amazing King Cake. Buttery, airy, just slightly sweet, it was perfection. I enjoyed it for dessert, and then again for breakfast the next day. It took a lot of self-control to not eat Jordan’s piece while he slept. Obviously, I asked for the recipe.

What I received in return was 6 pages of instructions with different classes of brioche, each with different amounts of butter and egg, and each with different baking techniques. The recipe titles were pretty great. Rich Man’s Brioche, featuring a whole pound of butter. Middle Class Brioche, a moderate 8 ounces or two sticks. And Poor Man’s Brioche, a modest 4 ounces of butter. Kelly recommended Middle Class and that is what I bring you today.

03-30-13-23

This was my first time making brioche. Working with brioche dough is very different from most other bread doughs I’ve made. Because of all the butter, you shape it when it is very cold, which was much more similar to cookies than bread. The shaping was actually much easier for a first timer than a sourdough hearth bread or baguette. It gives me confidence for future croissants!

Middle Class Brioche Buns 

Sponge
1/2 cup (2.25 oz) unbleached bread flour
2 teaspoons (0.22 oz, 1 packet) instant yeast
1/2 cup (4 oz) whole milk, lukewarm (I used 2% without incident)

Dough
4 (8.25 oz) large eggs, at room temperature
3 cups (13.75 oz) unbleached bread flour
2 tablespoons (1 oz) granulated sugar
1 1/4 teaspoons (0.35 oz) salt
1 cup (8 oz) unsalted butter, at room temperature
1 egg, whisked until frothy for egg wash

03-30-13-15

Make the sponge. Stir together flour and yeast in a large mixing bowl or the bowl of your stand mixer. Add the milk and stir until just combined. Cover with plastic wrap and set aside for 20 minutes in a warm place.

Make the dough. Add the eggs to the sponge and whisk or beat with the paddle attachment until smooth.  In a separate bowl, stir together flour, sugar and salt. Add the flour mixture to the sponge mixture. Stir until all the ingredients are combined. Let the dough rest for 5 minutes. Add the butter, one quarter at a time, stirring the dough well after each addition. This should take a few minutes. Continue mixing for another six minutes on medium speed. You’ll have to scrape down the bowl from time to time. The dough should be smooth and soft.
03-30-13-16

Refrigerate the dough. Line a sheet pan with parchment. Mist lightly with oil or coat lightly with oil using a brush or paper towel. Transfer the dough to the pan, spreading it into a rectangle about 6 inches by 8 inches. Coat the dough lightly with oil and cover with plastic wrap. Refrigerate overnight, or for at least four hours.

03-30-13-17

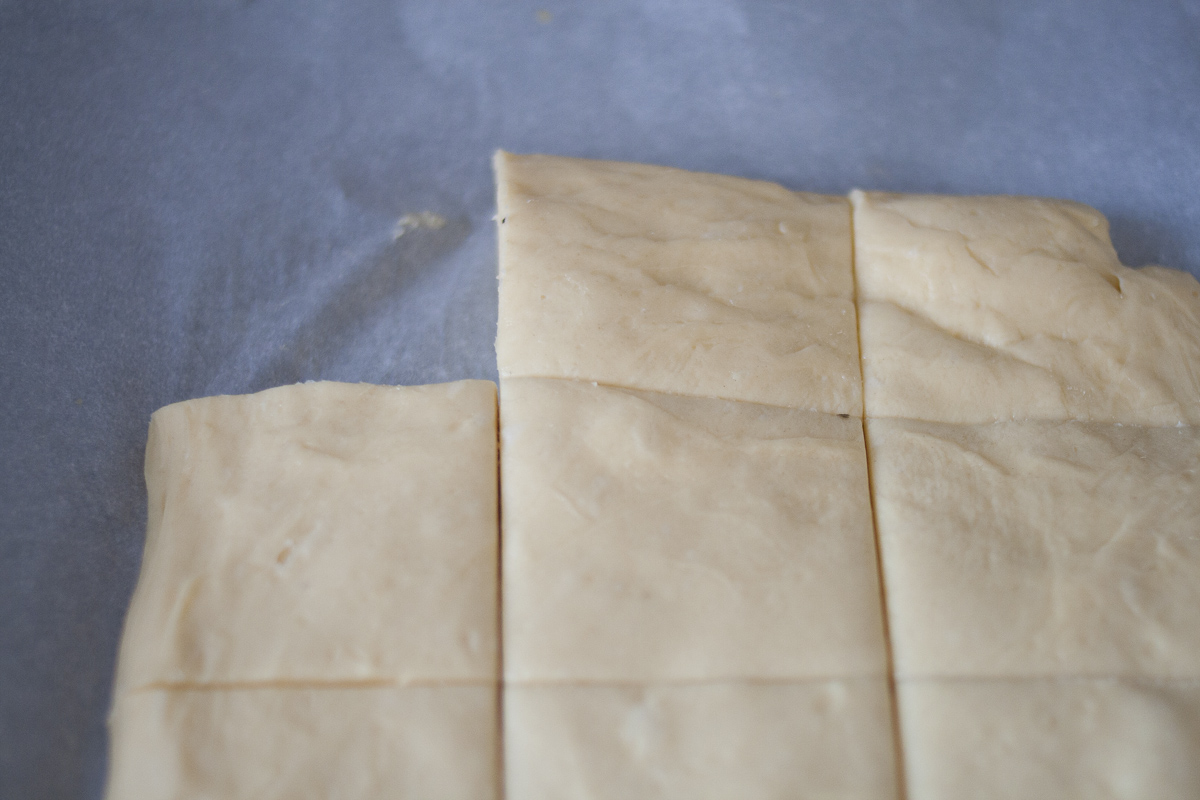
Shape the dough. Line two baking sheets with parchment  Coat lightly with oil. Remove the dough from the fridge and immediately shape. I was making hamburger buns so I used a pizza cutter to divide the dough into 12 equal squares. I then used my hands to roll each square into a ball. I spaced the balls evenly on each sheet, six per baking sheet. They’ll about double in size so you’ll want to keep that in mind. Coat each ball lightly with oil and cover with plastic wrap.
03-30-13-19

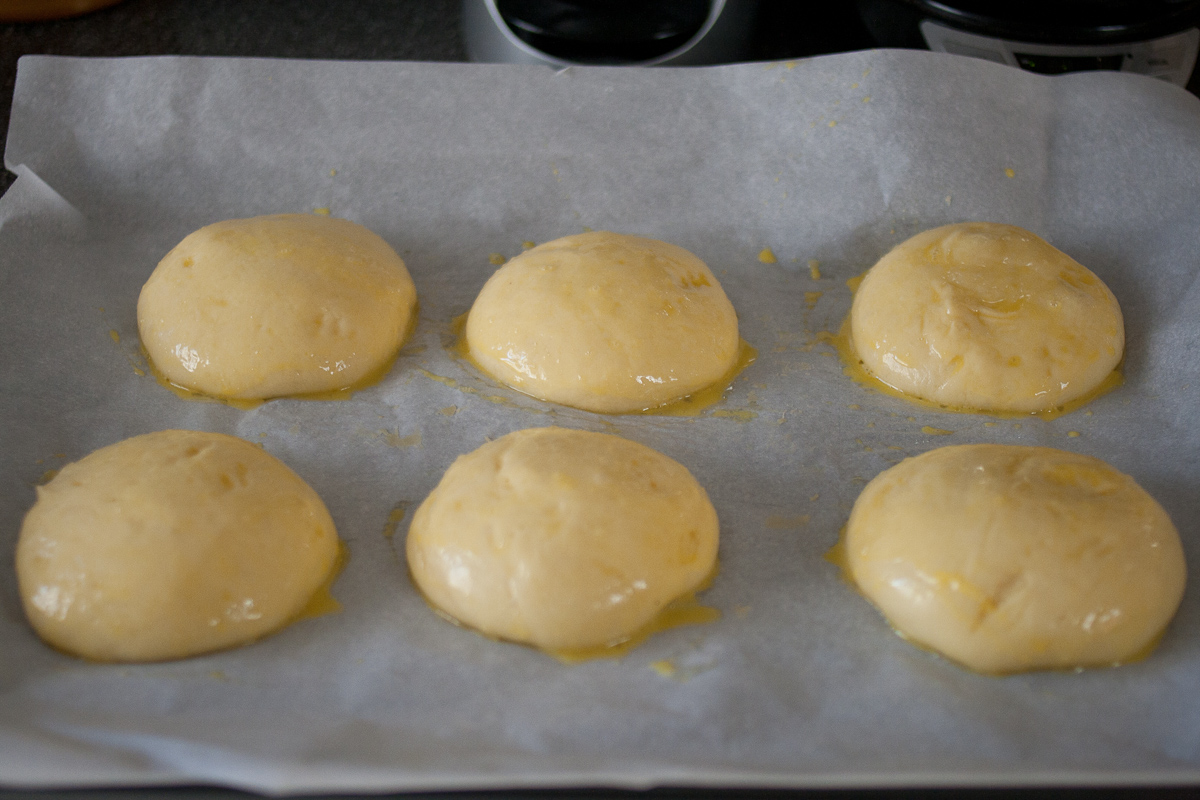
Proof the dough. Let the dough rise in a warm place for about 2 hours. It will just about double in size. After about two hours, preheat the oven to 400 degrees. Whisk the egg in a small bowl. Coat the dough balls throughly with the egg wash. This is what gives them their beautiful shine. Let them proof for another 15 – 20 minutes.

03-30-13-21

Bake the buns for 15 – 20 minutes. They should be golden brown and 180 degrees internal temperature. Baking brioche with make your house smell like heaven. You’ll probably want to have the scent of baking brioche as a perfume and you’ll likely text that exact thing to several friends. Sit on your kitchen counter while your brioche bakes and savor it.


03-30-13-18

03-30-13-20

Cool on a rack for 20 minutes before serving, or until cool before glazing. I turned half of the brioche into dessert brioche and left half plain for hamburger buns. The dessert brioche I glazed with a grapefruit glaze. I’d highly recommend it.

03-30-13-24

GrapeFruit Glaze
1 cup powdered sugar
grapefruit zest
2 tablespoons grapefruit juice

03-30-13-22

Sift the powdered sugar into a medium bowl. Add the grapefruit zest and juice. Whisk to combine. Once the brioche buns have cooled, spoon the glaze over them. Let the glaze set. If you have extra glaze, feel free to do a second coat.

-Emily

Categories
Recipes

spelt quick bread

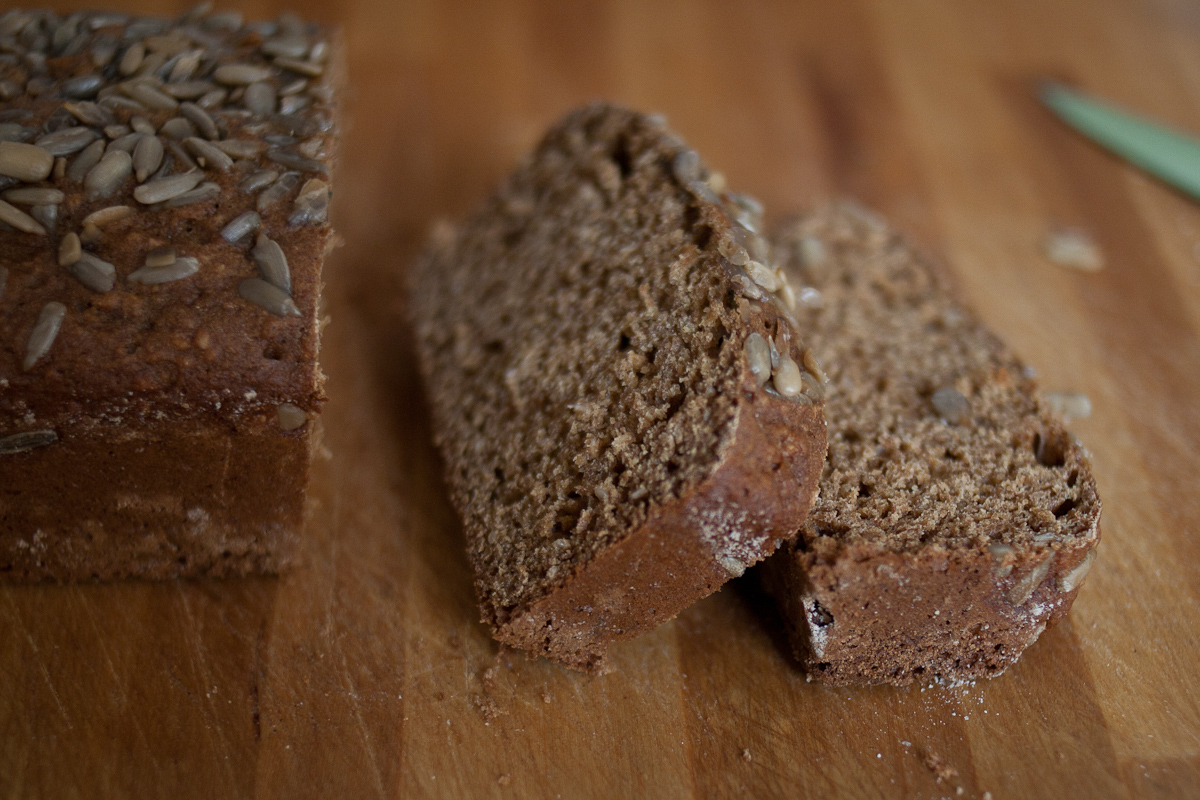
This recipe is dedicated to my mother. This bread precisely is her type of bread. She’s never been a fan of fluffy white breads, at least not in my memory. As kids we’d plead for a sandwich loaf that didn’t look like a bird feeder. But, since we cannot help but turn into our parents, my recent love affair with seedy loaves probably shouldn’t come as a surprise.

03-19-13_-5

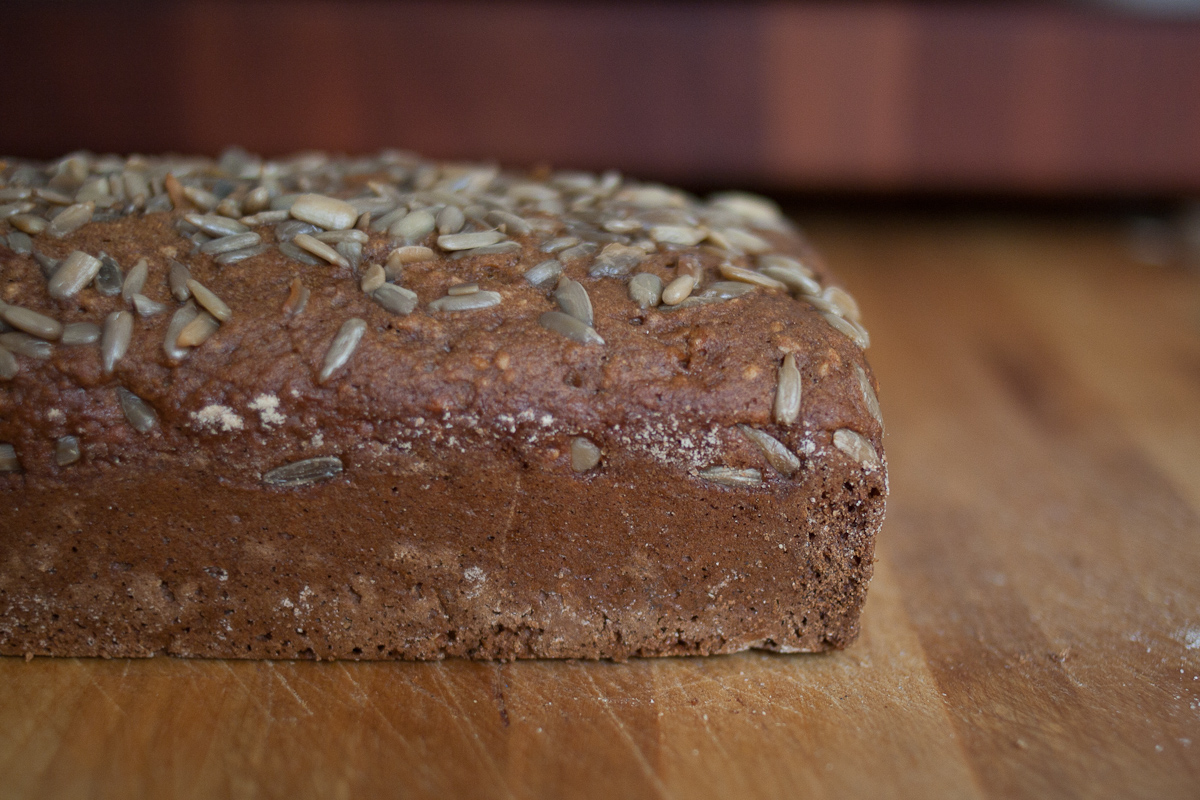
This bread is dense and nutty. Two slices of it and you’ll feel full until noon. I’ve been tweaking the recipe for a few weeks and now it comes close to a few really great spelt breads that you can find around San Francisco that kicked off my recent obsession.

This is a quick bread, which means you just mix and bake. With no waiting for dough to rise and loaves to proof, you can have a hot loaf of bread in about an hour and a half.

photo-4

Spelt Quick Bread
4 cups spelt flour
1/2 cup sesame seeds
2 teaspoons baking soda
1 teaspoon kosher salt
1 tablespoon molasses
3 tablespoon honey
1 tablespoon brown sugar
1 egg
2 – 2 1/4 cups milk
1/4 cup sunflower seeds
butter for greasing the pans

03-19-13_-1

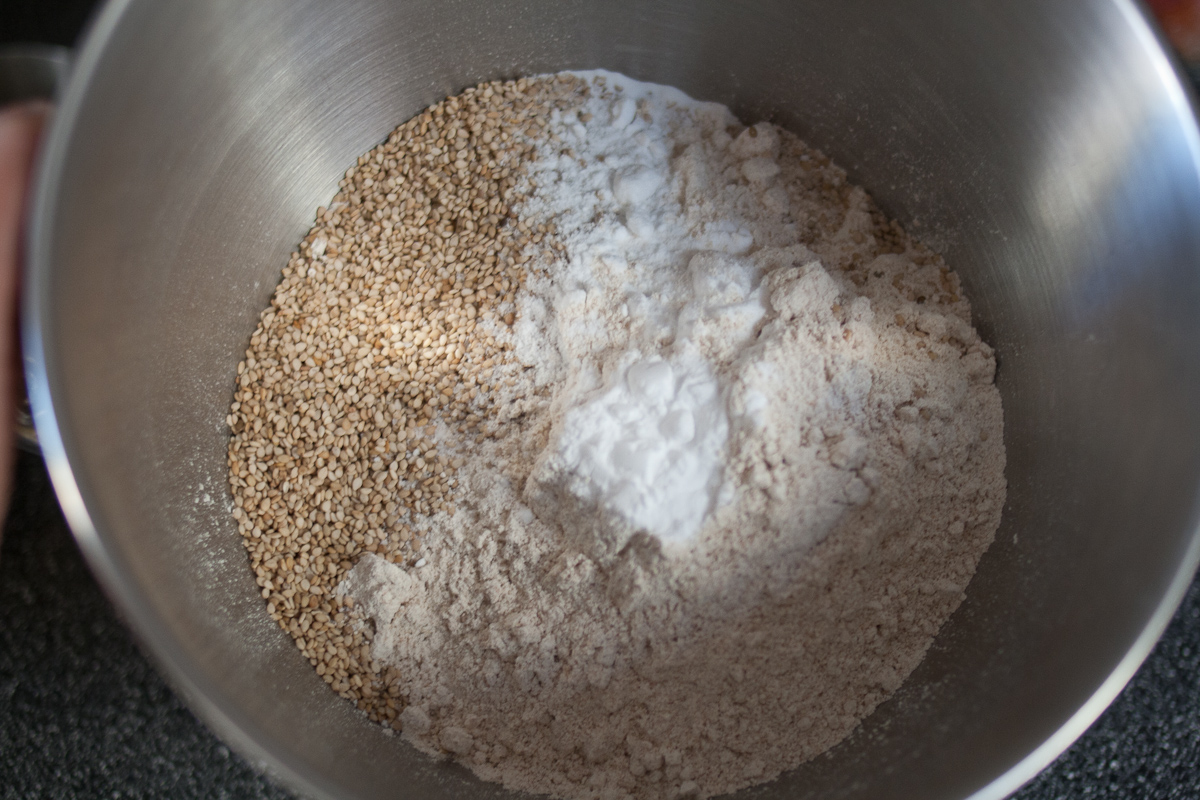
Preheat oven to 350 degrees. Butter and flour two 9 x 5 loaf pans. In a large bowl, mix together the flour, sesame seeds, baking soda and salt. In another medium bowl, whisk together the molasses, honey, brown sugar, egg and milk. Combine the wet and dry ingredients in the larger bowl, stirring to combine. Spoon half of the batter into each loaf pan. Top generously with sesame seeds.

03-19-13_-3

Place both loaf pans side by side with some room between in the middle rack of the oven. Cover both with a baking sheet. This will help get a nice even brown crust on the top that doesn’t split open. Bake 40 minutes – 1 hour, until a toothpick inserted into the center comes out clean.

03-19-13_-4

We love this bread topped with goat cheese for lunch or dinner. It is also lovely for breakfast broiled with butter and cinnamon sugar.

03-19-13_-6

-Emily

Categories
Recipes

heavenly cheesy buns

I’ll just put this out there up front, you should probably make these cheesy buns this weekend. Eat them for breakfast, lunch or dinner (or for all three!)—you won’t be disappointed.  Imagine the puffy dough of a perfect cinnamon roll and then swap the sweet cinnamon filling for sharp cheddar cheese and onion. Yep, pretty much perfect. And, I’ve even got a secret to share so you can have them for brunch without even waking up at an ungodly hour.

1.17.13-9

One year ago: Best Chocolate Pudding
Two years ago: Ad Hoc at Home Brownies 

Sharp Cheddar Cheesy Buns, adapted from the Smitten Kitchen Cookbook
For the dough
3 cups (375 g) all-purpose flour
1 teaspoon salt
a few grinds of black pepper
1 tablespoon sugar
2 1/4 teaspoons (or one 7 g packet) of instant yeast
1 cup milk (if you want the dough to rise easier, warm the milk to about 100 degrees)
4 tablespoons melted butter, cooled to lukewarm

For the filling 
1/2 cup grated white onion (about half an onion)
1 1/2 cups grated sharp cheddar cheese (you could substitute swiss, provolone, mozzarella or use a mixture)
2 teaspoons fresh dill, minced (you could also use 1 teaspoon of fresh thyme or rosemary)
1/4 teaspoon salt
a few grinds of black pepper

First make the dough. You can make the dough the night before you plan to serve the rolls for convenience’s sake, but you can also make it the day of if you plan to serve them for dinner. They take about 5 hours in total, but most of that is rising time.

1.17.13-3

Combine the flour, salt, pepper and sugar in a large bowl, preferably the bowl of a mixer with a dough hook. In a medium bowl, whisk the yeast in the milk until it dissolves. Add the melted butter into the milk mixture. Pour the milk mixture into the flour and mix them together with the paddle attachment or a wooden spoon until a shaggy ball forms.

Switch to the dough hook. Knead the dough on low speed for about five minutes, until the dough is smooth and a slightly sticky ball has formed. You can also do this by hand on a lightly floured counter.

Place the dough in lightly oiled bowl and cover with plastic wrap. Place the bowl in your off oven and let it rise until doubled, about two hours. I find that my house is too cold for yeasted bread doughs to rise well without putting them in my oven with my pilot light to keep them warm. If it is warm in your house, you can just leave the dough on the counter and appreciate your insulation.

While the dough is rising, make the filling. Combine grated onion, cheese, dill, salt and pepper together in a medium bowl. Set aside. Line the bottom of a 9″x 13″ baking dish or two 9″ round baking pans with parchment paper.

1.17.13-5

After the dough has risen, turn it out onto a lightly floured counter. Roll it into a 12″ x 16″ rectangle. With the long edge facing you, spread the filling in an even layer, leaving a 1/2″ margin on the far edge. Roll the dough tightly and seal the far end. Using a sharp knife, cut the log in half, then cut each half into thirds, then cut each third in half. You should have 12 rolls. Space them evenly in the baking dish, leaving room around each roll for it to expand.

1.17.13-6

Let the rolls rise in an off oven for another two hours, until doubled again. Alternately, you can cover with plastic wrap and put in the fridge to cook the next day.

One hour before you want to serve the rolls, remove them from the fridge. Place them in an off oven. Fill a dish below the rolls with boiling water. Let them rise for 30 minutes, until puffy. Remove the rolls from the oven.

Preheat your oven to 350 degrees. Brush the tops of the rolls with 1 tablespoon melted butter. Bake for 20 – 25 minutes until the cheese begins to brown and bubble. Serve immediately. Don’t worry, they won’t last long.

-Emily

Categories
Recipes

four-hour baguette

You may be familiar with my sourdough bread adventure—a rustic country bread that in the end took over a year to perfect and became my Sunday obsession for months. Well, my experience with this bread was the exact opposite. I found the recipe, gathered ingredients, made the dough, baked and ate, all in about four hours. It was refreshing.

These french baguettes are very different from my sourdough. Where baguettes are light and delicate, my bread is dense and toothy. This baguette recipe is quick—thanks to commercial yeast—uses all purpose flour and doesn’t require any special equipment, which makes it pretty ideal for most home cooks. On top of that, your house will smell amazing while the loaves are baking. This recipe makes three 14″ long baguettes, which you’ll easily eat all of.

Four-Hour Baguette, from Saveur May 2012 Issue
1 1/2 cups tap water, heated to 115 degrees
1 t active dry yeast
3 1/4 cups all-purpose flour
1 1/2 t kosher salt
canola oil, for greasing the bowl
1/2 cup ice cubes, for making steam in the oven for a good crust

In a large bowl, whisk together the water and yeast. Let sit until foamy. Add the flour, stirring with a fork or your hands, until a dough forms. Let the dough rest 20 minutes.

After 20 minutes, sprinkle in the salt and knead it in. Transfer the dough to a lightly floured work surface and knead for about 10 minutes, until the dough is smooth and elastic. Transfer the dough to a lightly greased bowl and cover the bowl with plastic wrap. Don’t forget to grease the bowl, this is a very sticky dough. Place in a cold oven to rise. Let dough sit for 45 minutes, until doubled in size.

Transfer the dough to a lightly floured work surface and shape it into a 8″ x 6″ rectangle. Fold the long sides into the middle and then fold the short side into the center. Return the dough seam side down to the greased bowl. Cover and let rise again in the cold oven for an hour.

After an hour, remove the dough from the oven. Place a cast-iron skillet in the bottom rack. Position another rack above the skillet and place a baking stone on that rack. Heat the oven to 475 degrees.

Transfer dough to a lightly floured work surface. Divide into three equal pieces and shape each into a 14″ long rope (the length of a standard baking sheet). Flour a sheet of parchment paper and place it on a baking sheet. Place the dough ropes on the sheet evenly spaced apart. Lift the paper between the ropes to form pleats so they don’t stick together as they rise. Place two kitchen towels on each long side of the baguettes to support the loaves as they rise. Cover loosely with plastic wrap and let double in size, about 50 minutes.

By this time your oven will be hot. Uncover the loaves, remove the towels and flatten the paper to space out the loaves. Use a razor blade to score the loaves with several long diagonal cuts. Carefully, with the loaves still on the parchment paper, slide them onto the hot baking stone. Place the ice cubes in the skillet and close the oven door. The ice will create steam which helps form a nice crust on the bread. Bake the baguettes 25 – 30 minutes, until browned.

Cool on a rack or enjoy straight out of the oven with some salted butter. Jordan and I ate an entire loaf just standing at the kitchen counter, they go down that easy.

These baguettes were delicious don’t get me wrong, but the flavor wasn’t very complex. Next time I’m going to try adding a bit of sugar to the yeast and water and try for a slightly sweeter baguette.

-Emily

Categories
Recipes

pumpkin bread

It’s fall, which also makes it time to bust out pumpkin-everything. First up to the plate …  pumpkin bread. The sugar crust on this bread is lovely, the spices are perfectly balanced and it has a moist, delicate crumb. Basically it is everything you want from a quick bread.

Pumpkin Tea Cake, from the Tartine Bakery Cookbook
1 1/2 cups all-purpose flour
1 1/2 t baking powder
1/2 t baking soda
1 T plus 2 t cinnamon
2 t nutmeg, freshly ground if possible
1/4 t ground cloves
1 cup plus 2 T pumpkin puree
1 cup vegetable oil
1 1/3 cups sugar
3/4 t salt
3 eggs
2 T sugar for topping

Preheat your oven to 325 degrees. Butter a loaf pan.

Sift together the flour, baking powder, soda and spices into the bowl of your stand mixer or a large bowl.

In another bowl, whisk together pumpkin, oil, sugar, and salt.  Add eggs, one at a time, mixing well after each addition. On low speed, mix the wet ingredients into the dry. Mix until just combined. You don’t want to over mix because it will make a tough bread.

Sprinkle with the sugar topping and bake for about an hour. Let cool in the pan for 20 minutes and then invert onto a rack to cool completely.

In what I thought was a stroke of pure genius, I decided to try to turn this pumpkin bread into pumpkin donut muffins. You might remember my life-changing donut muffin experience, but in case you need a refresher, check it out here. We thought that pumpkin donut muffins would be the crowning achievement of my life, but sadly (or perhaps not so sadly because now I still have future achievement to look forward to) the donut muffin topping did not really add anything to the pumpkin bread. This bread stands up perfectly well on its own. Those pumpkin donut muffins did look adorable though …

-Emily

Categories
Recipes San Francisco

a bread success!

I’ve been working on my sourdough bread for about 9 months now. It was a rough beginning with sad, flat loaves of super sour bread. Still, I was determined. I dreamed of crusty, deep brown, slightly sour loaves of airy but chewy bread. I tried different recipes, different flours, adding commercial yeast to supplement the wild yeast. My breads were ok, but nothing close to the better artisan breads you can get here in San Francisco.

Everything changed when my sister bought me the Tartine Bread cookbook for my birthday. I’ve raved about Tartine Bakery on the blog before, and now I will proclaim that their bread cookbook changed my life. In it are the secrets to amazing bread, simply yet throughly explained, with amazing pictures alongside. While I’m going to go through the process briefly here, if you want to make wonderful bread, you should just buy their book.

The general idea is this: Take your starter. Make a leaven by adding water and flour to a very small amount of your starter. The next morning, take part of your leaven and add more flour, water and a bit of salt. Then start the rising process. The first rise is in a large bowl or tupperware and lasts about 4 hours. Shape the loaves. Now for the second rise with the dough shaped in bowls. The second rise lasts about 4 – 6 hours. Now bake each loaf in a 450 degree oven for 40 minutes.

While each step of this process is extremely important to creating the bread of your dreams, perhaps the most obvious innovation that I took from Tartine was cooking the bread in a cast iron dutch oven. You heat the cast iron to 450-500 degrees in the oven, plop the loaf into the bottom of the pan, cover it with the top and bake for 20 minutes. The dutch oven creates a mini steam chamber very similar to a commercial bread baking oven, but impossible to achieve in a regular home oven. Steam is crucial for a proper rise and also for creating the chewy crust. Using the dutch oven in this way allows the bread to steam itself! Amazing! Then you remove the dutch oven top for the second 20 minutes of cooking and the bread browns to perfection.

Following Tartine Bread’s detailed schedule, I began a sourdough starter from scratch. After culturing my starter for a few weeks, I made my first loaf. It was beautiful, so tasty and almost perfect. My first real bread success! I was so pleased! I gloated by sending photos of this bread miracle to my mother, sister and friend.

I’ve since made bread many times using Tartine’s method and I couldn’t be more satisfied with the results. Seriously good bread.  I’ve tweaked the recipe a bit to match Jordan and I’s tastes, but it has turned out incredibly well every time. Bread from scratch is time-consuming —we’re talking a day of baking here— but it is so fulfilling when it turns out well.

Recently, I’ve been experimenting with the rise and proofing times to figure out the best way to fit this bread into my regular schedule without devoting a day to baking. And, I think I’ve worked it out! I make the leaven before bed 2 days before I plan to bake. Around 3 – 4 pm the next day I mix the bread and do the first rise. I shape the loaves that night before bed and then put them in the fridge. Around 3 pm the next day, Jordan takes the breads out of the fridge for their final rise. They rise until 7 when I get home from work and have preheated the oven and then I bake! Maximum bread, minimum “wasted” down time!

And now I’m really going to brag … last night Jordan said that my bread was better (!!!better!!!) than Acme Bread! Maybe he is biased, but I’ll take the compliment anyway. I set out to make bread that was as good as Acme – and now I’ve done it!

-Emily

Categories
Recipes

homemade sandwich bread

Jordan was on a bread kick for a while, making all kinds of delicious breads from Rose Levy Beranbaum’s The Bread Bible. Sadly, his bread baking has declined since he is super busy being an awesome student. I decided to pick up the torch when my friend Andrea recommended a fail-proof sandwich bread recipe that she’s been making for the past few weeks. I like fail-proof, especially when there is hours of rising time on the line.

This recipe is from Farmgirl Fare and it details the process and potential pitfalls of bread baking really well. I’d recomend you check out her post if you are new to the homemade bread world.

Farmhouse White, a classic sandwich bread by Farmgirl Fare

4 cups all-purpose flour (I used Whole Foods 365 brand)
1 1/2 T instant yeast (I used Fleischmann’s Active Dry Yeast)
2 T granulated or brown sugar
2 T melted butter
4 cups milk, warmed to 85 degrees
About 6 cups bread flour (I used King Arthur Bread Flour – King Arthur makes quality flours and I recommend them)
1 1/2 T salt

Mix together the all-purpose flour, yeast and sugar in a large bowl. Make a well in the middle of the mixture  and pour in the warm milk and melted butter. Mix well. Continue to stir vigorously slowing adding the bread flour one cup at a time, until you have added 3  – 4 cups and have a sticky, shaggy dough. Cover with a damp tea towel and let rest for 20 minutes.

Walk your whiny dog who can’t understand why you are putzing around in the kitchen when at this hour you should be walking her to the park.

Add the salt and 1 more cup of the bread flour. Stir as best you can. Add a bit more flour if the dough seems too sticky to knead. Turn the dough onto a floured surface and knead with floured hands for 8 – 10 minutes. Your arms will get very tired, but you will find an awesome slapping-dough-into-counter-rhythm that will allow you to confidently turn down the assistance of your much stronger boyfriend.

Place the dough in a clean, oiled bowl and dust the top with flour. Cover with a tea towel and let rise for 60 – 75 minutes in a warm place. I used the oven with pans of boiling water inside technique developed when I made cinnamon rolls and it worked very well.

Grease 3 loaf pans (I used two glass pans and one metal pan without issue). Turn the dough onto a floured counter. Divide into 3 equal balls and pat into loaf-like shapes. Put the dough in the loaf pans and dust with flour. Cover with a tea towel and let them rise for another 40 – 60 minutes. They are ready to go into the oven when you poke a floured finger into the dough and it springs back just a little.

Preheat an oven to 375 degrees. Bake the loaves for 35 minutes until they are golden brown. Remove the loaves from their pans immediately and allow to cool on a rack for 40 minutes. Store at room temperature in a bag or in the freezer wrapped tightly in plastic wrap.

This bread is good. It has a great crumb and a mild taste. It makes great peanut butter sandwiches and awesome grilled cheese sandwiches. It contains just a few normal ingredients, not a ton of weird gums and preservatives like store-bought sandwich breads. Now that I have the classic recipe down, I am excited to try a few variations … maybe adding some whole grain flours or sourdough bread starter.

-Emily

Categories
Recipes

leek bread pudding

One of our favorite things is a nice loaf of fresh sourdough.  Another one of our favorite things is how versatile the leftover bread is when it gets stale.   Normally we just make toast with it, but I was inspired by Thomas Keller’s leek bread pudding from Ad Hoc at Home.  My sister and her boyfriend Kyle gave Emily and me this book as a gift.  After my sister confessed to reading the entire thing, she turned to page 213 and informed me that I must make this beautiful side dish.  The recipe calls for brioche and serves twelve, so I made a few minor changes.  With about half of an Acme sourdough batard leftover and leeks from our CSA box, I got to work.

First, preheat your oven to 350 degrees.  Slice the leeks and clean them in a bowl of cold water; the grit will fall to the bottom and the leeks will float.  When you’re confident that they are grit-free, add them to a dry saute pan over medium-high heat.  Season and stir until they release liquid (it won’t be much), then lower the heat to low, add about two tablespoons of butter, and stir to create an emulsion.  Cover and stir occasionally until the leeks are very soft.  Once they are done, taste and season with salt and pepper.

While the leeks are getting soft and sweet, cut your bread into one inch cubes and place in the oven and brown on both sides.  When the bread is toasted and the leeks are done, mix the two in a bowl and add a tablespoon of chopped chives and a teaspoon of fresh thyme leaves.

Now that you’ve got your bread and your leeks, you need some pudding, right?  Kinda.  It’s a custard and while that sounds difficult, it’s actually really easy.  Whisk together one egg, one cup of whole milk, and one cup of cream.  Add a very small pinch of nutmeg and a generous pinch (maybe a half teaspoon) of salt and some fresh pepper.  That’s it.

Next, you need some cheese for extra decadence.  The recipe calls for comté or emmentaler, but any semi-soft, flavorful cheese will work.  I had some cave-aged emmentaler on hand, so I used that.  I shredded it all and got about half a cup.  Butter an appropriately sized baking dish (I used a medium sized, round casserole) and put about a third of the cheese on the bottom.  Then place about half of the bread mixture and top with another third of the cheese.  Then add the last of the bread and pour in the custard until there’s about half an inch of bread poking out of the top; you can push the bread into the custard a little bit if it looks like there’s not enough custard.  Here, the recipe says to let the bread pudding sit to absorb the custard for about 15 minutes, but Emily and I don’t really like a super gooey texture, so I just topped it with the rest of the cheese and threw it in the oven.  Bake until the center has set up and the top is browned, about 45-60 minutes.

Conclusions:

It was very tasty, you don’t have to be very precise with it, you can switch thing out if you need to, and it make a great side dish.  The cookbook says it can be a main course, but that seems like a bit much.  It would be fantastic with any hearty fall or winter meal, but it may overshadow the main course.  As a matter of fact, I can’t remember what we ate this with.  I guess that means it was a winner, right?

-Jordan