Categories
Recipes

fresh corn risotto

We’ve been on a serious corn kick lately. Summer corn is just so irresistible. Sweet, fresh, and crunchy—I want it on everything. This is our summer take on a winter favorite, leek and butternut squash risotto. I’ve swapped the butternut squash for corn and topped it with a fresh tomato ‘salsa’ to give it the extra acidy I crave in warmer months.  It was so easy to build off of this risotto base—it’s impossible to go wrong with rice, white wine, cream and parmesan—and this variation turned out beautifully. I’m brainstorming combinations for each season so stay tuned.

corn-risotto-1

Fresh Corn Risotto with Tomato Salsa 
2 medium spring onions, diced (or 1 large yellow onion or 3 leeks)
2 tablespoons butter
2 tablespoons olive oil
2 cups arborio rice
1/2 cup dry white wine
6 cups vegetable broth (chicken broth would also do just as well)
3 ears of corn, cut off the cob and cobs scraped of their juice
1/2 cup cream
1/2 cup parmesan cheese, grated
salt and pepper
2 tomatoes, chopped
1 tablespoon chives, minced

corn-risotto-3

In a medium saucepan, bring the stock to a simmer. In a large, heavy bottomed pot, heat the butter and olive oil over medium heat. Saute the onion until translucent, about 10 minutes. Add the rice and stir until the outside of the kernels becomes translucent and a few are starting to brown, but the inside is still white. Add the wine and simmer until absorbed, stirring constantly.

corn-risotto-4

Add the stock, 1/2 cupful at a time,  stirring until it is absorbed. Continue to add stock by the 1/2 cupful until the rice is tender and the mixture has thickened, stirring frequently with each addition.

corn-risotto-2

While your risotto is cooking, chop the tomatoes into small chunks and mix with the minced chives. Add a little sprinkle of salt.

Once you’ve incorporated all the broth and the rice tender, add the corn, cream and parmesan. Cook for a few more minutes to cooke the corn. Season with salt and pepper. Serve warm with a spoonful of the tomato salsa on the top!

corn-risotto-5

-Emily


Categories
Recipes

pesto pasta salad

Last week I was lucky to attend an awesome blogging conference Alt Design Summit. It was fun and inspiring and I’m buried under a mountain of insanely cute business cards from all of my new bloggy friends. I’ll share more soon, but since I know you’re hungry, here is a recipe for a quick, easy and delicious pesto pasta salad.

+++

Pesto pasta is an old standby here. I make it about every other week in the summer when basil is in season and readily available. We usually have it for lunch over the course of a few days. It is fresh, flavorful and cheap. Plus you can through a little of whatever you’ve got lying around in it and it still turns out pretty good. I guess pesto just works miracles like that.

pesto-pasta-4

Pesto Pasta Salad
For the pesto
1 bunch basil (we used a small bunch of basil and some arrugula which was a day or two past its prime)
1 lemon, zest and juice
1-2 cloves of garlic
1/4 cup nuts (pine nuts are the standard, but we’ve used pecans and walnuts also)
1/4 cup parmesan cheese
1/4 olive oil
salt and pepper

pesto-pasta-2

In the bowl of a food processor combine basil, lemon zest, lemon juice, garlic nuts and parmesan. Pulse until you’ve got a coarse paste. Now turn the food processor on and drizzle olive oil in through the top hole until the pesto comes together and everything is chopped uniformly. Season with salt and pepper.

For the pasta salad
1 lb dry pasta
1 can whole pitted olives
8 oz mini mozzarella balls
1 cup cherry or grape tomatoes, cut in half
1 batch of pesto

pesto-pasta-1

Bring a pot of water to boil. Salt it until it tastes like sea water. Cook the pasta according to the package directions. Drain and rinse for a minute or two with cold water. Combine pasta, olives, mozzarella, tomatoes and pesto in a large bowl. Stir to combine. Serve at room temperature or cold.

pesto-pasta-3

This pasta salad recipe is super flexible. You can add more veggies—blanched green beans are great, kidney beans or chick peas are a good way to make it heartier, marinated artichokes would be lovely too! Just remember that more sauce is better when you’re making a pasta that you’ll refrigerate and eat over a few days. Without enough sauce, the pasta will seem dry, bland and rather sad.

-Emily

Categories
Recipes

how to make perfect french macarons

I’m the type who likes projects. While I enjoy cooking dinner each night for my little family and our friends, what really gets me excited is a new project. I like the research phase at the start of a project and the challenge of stepping up my game and out of my comfort zone. And I love the satisfaction of making something I’ve never made before, especially if it turns out right. I also love losing myself in a project, letting my worries slip away for a few hours and focusing in on the task at hand. It’s why I started cooking in the first place and probably why I’ll never stop. These projects are freeing for an overactive worrier like myself. My mind gets a break, and in the end, I usually have something delicious to show for it.

french-macaron-17

I decided to try my hand at french macarons last weekend. I had a free day, no plans at all. After a pep talk from Jordan the day before, it was settled and the research commenced. I read lots of recipes, read horror stories of macarons gone awry, read encouraging posts assuring me that it wasn’t nearly as hard as everyone claimed.

I’m happy to say, this will be one of those encouraging posts. It really is not as hard as you’d expect. Yes, precision is necessary and some understanding of a few key techniques is helpful, but if you’re mindful, you can make perfect a french marcaron the first go round.

french-macaron-16

The recipe I used is from a wonderful pastry blog Brave Tart. I’m positive her recipe and tips are the reason my macarons were a success the first time around. Thank you Stella!

French Macaron with Vanilla, Passionfruit or Blackberry Buttercream, adapted from Brave Tart
For the cookies
4 oz | 115 grams almond meal or almond flour (you can also grind blanched almonds in a food processor until powdery)
8 oz | 230 grams powdered sugar
5 oz | 144 grams egg whites
2.5 oz | 72 grams sugar
1/2 teaspoon | 2 grams kosher salt
the scrapings of 1 vanilla bean or 2 teaspoons vanilla extract

First, before we get into how to make the recipe, let’s talk about measuring the ingredients. Measurements by volume (cups, teaspoons, etc) are a bad idea for delicate pastry. Really, we all should always bake by weight and never volume because there can be such huge discrepancies between how each person measures one cup. There are also other intervening factors like humidity that can throw volume measurements off. So save yourself some macaron grief, and get a kitchen scale. Measuring ingredients by weight is not only more accurate, but I’m sure you’ll find that it is actually faster and easier.

Preheat your oven to 300 degrees. If you have an oven thermometer, put it in the oven to double check the temperature. If your oven is too hot, your cookies will cook unevenly or their shells will crack and crumble as they rise. Move both racks towards the center of your oven to ensure the cookies get the most even heat. See what I mean about precision? Not overwhelmingly difficult, but necessary.

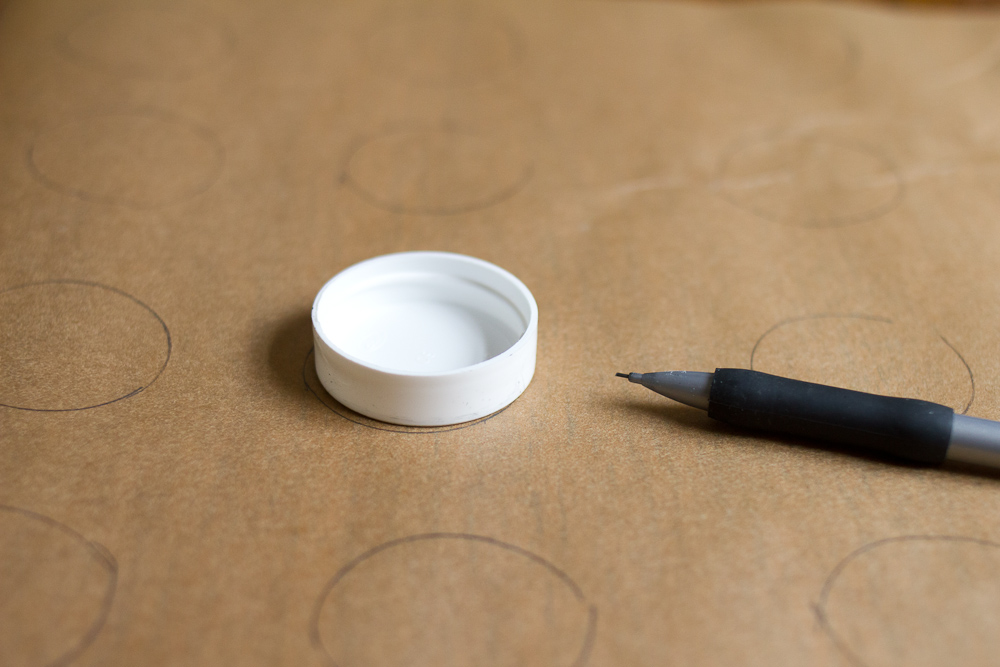
Line baking sheets with parchment paper. I traced 1.5″ circles on my parchment paper so that I would have something to trace when I piped the cookies onto the sheet. It’s important that the cookie shells are all about the same size because you sandwich two together.

french-macaron-1

Insert a plain round tip into a pastry bag. This is for piping the macarons onto the baking sheet.  Here are some great tips on how to easily fill a pastry bag if the task seems daunting.

Sift together the almond flour and powdered sugar into a medium bowl. You’ll have a spoonful or two of little almond granules that are larger than the rest and don’t sift through, just discard those. Separate your egg whites from the yolks. Put your yolks in the fridge and save them to make pastry cream for a raspberry napoleon.

In the bowl of your mixer, combine egg whites, sugar, vanilla bean (not the extract if you’re using that) and salt. Mix on medium power (4 on a Kitchen Aid) for three minutes.

french-macaron-3

Increase the speed to medium-high (7 on Kitchen Aid) and whip for another three minutes.

french-macaron-4

Increase the speed to high (8 on Kitchen Aid) and whip for another three minutes.  Turn the mixer off and add any extracts or colors here. Whip on high for another minute to incorporate. The mixture should look like a very stiff, dry meringue and should clump inside the whisk. If it isn’t very stiff, beat for another minute or two until it is. Aren’t the vanilla bean flecks just the cutest!

french-macaron-5

Add the almond flour and powdered sugar to the meringue.  Using a large spatula, fold the dry ingredients into the meringue. It will take quite a while to fully incorporate. The purpose of this step is to deflate the meringue so don’t worry about knocking it around a little bit.

french-macaron-7

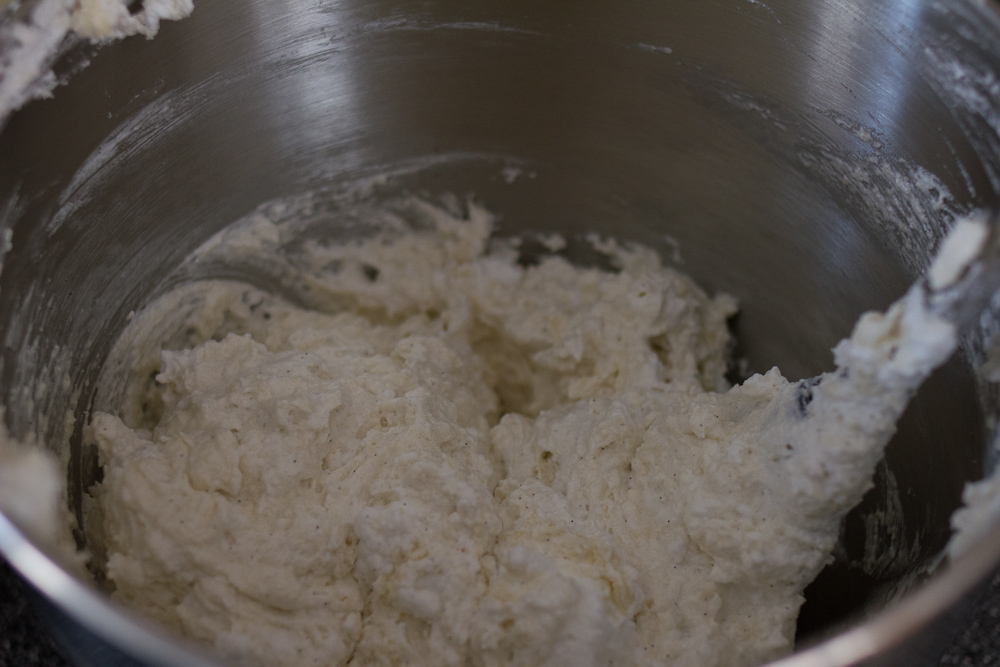
Stella’s recipe was astoundingly accurate for me. She said it would take about 40 folds to incorporate the dry ingredients into the wet and get a good batter consistency and she was right. You want a batter that is thin enough to pipe, but not so thin it runs all over the baking sheet. She describes the texture as “molten” if that helps you. Mixing the ingredients thoroughly is important so be sure to scrape the sides the bowl several times while mixing. Streaks of unmixed meringue could also cause your cookies to crack in the oven.

french-macaron-8

Once your batter is mixed, spoon it into a pastry bag. I’d recommend you only fill the bag about two-thirds full and then tie the top with a rubber band. Make the piping easier on yourself, don’t overstuff the bag! With a 10″ pastry bag, I only had to refill twice. Not bad.

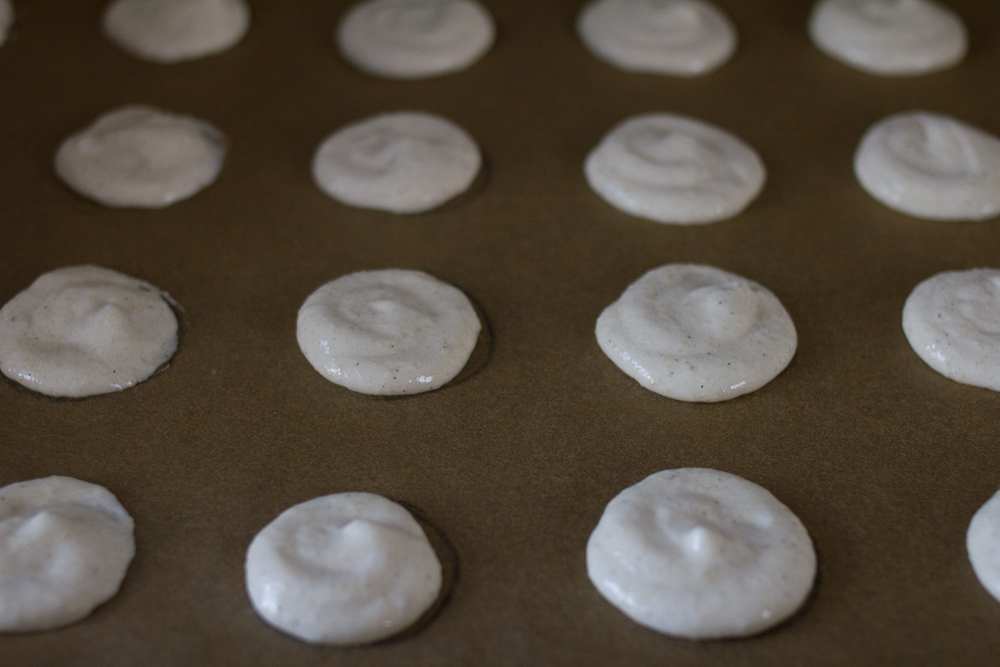
Pipe small circles onto your parchment lined baking sheet. Let the cookies sit for a few minutes on the counter to settle. Rap the trays hard on the counter several times. Don’t be shy about it.  This removes the air bubbles that could also cause your shells to crack in the oven. I didn’t rap my first batch with quite enough vigor and most of my cookies came out with cracked shells. While cracked shells do nothing to harm the flavor, take this easy step to avoid them. For my second batch, I hit the tray hard against the counter about 10 times taking care to rotate it 90 degrees for a few of the raps and the shells came out perfectly.

french-macaron-9

Bake the cookies at 300 degrees for 18 minutes. You should be able to peel the parchment away from the macaron without tearing out the center of the cookie. I’d test on a corner cookie before removing the sheet from the oven. Remove the cookies the oven and let them cool on the trays. Use a metal spatula to detach the cookies from the parchment after they are completely cooled.

french-macaron-11

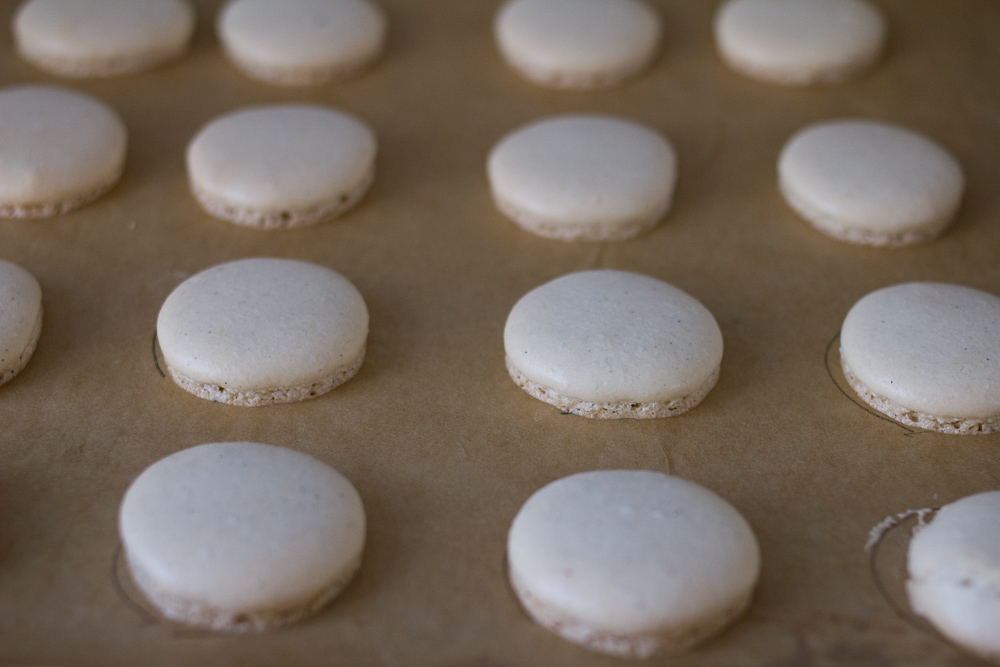
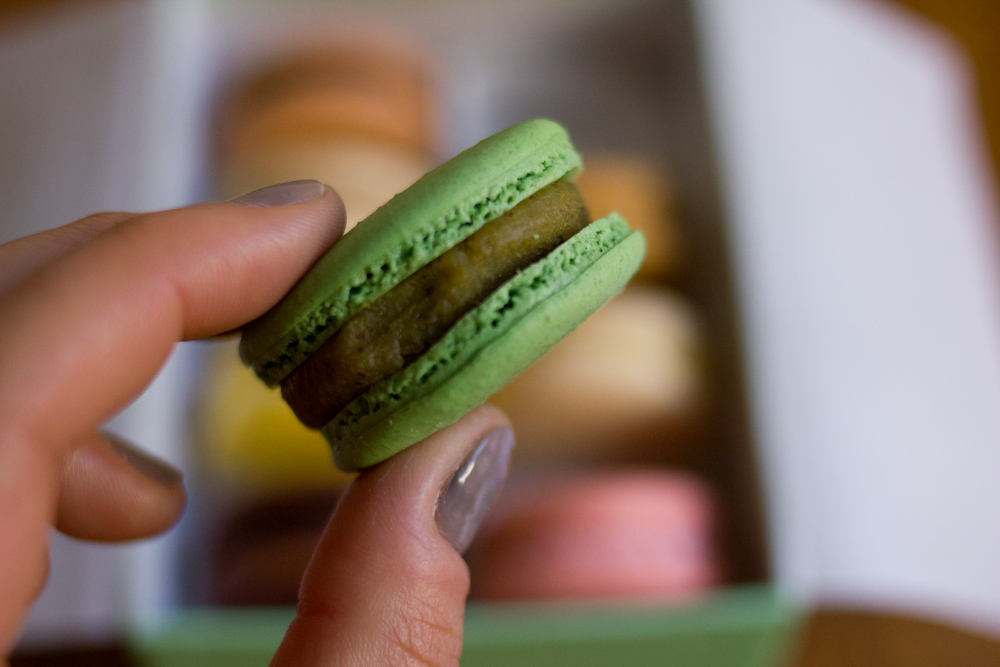
Below you can see the difference between a perfect shell and a cracked shell. The top of the cracked shell will sort of crumble and collapse when you fill it with cream, while the good shell will remain intact. Both are delicious though so don’t dispair if your shells crack!

french-macaron-12

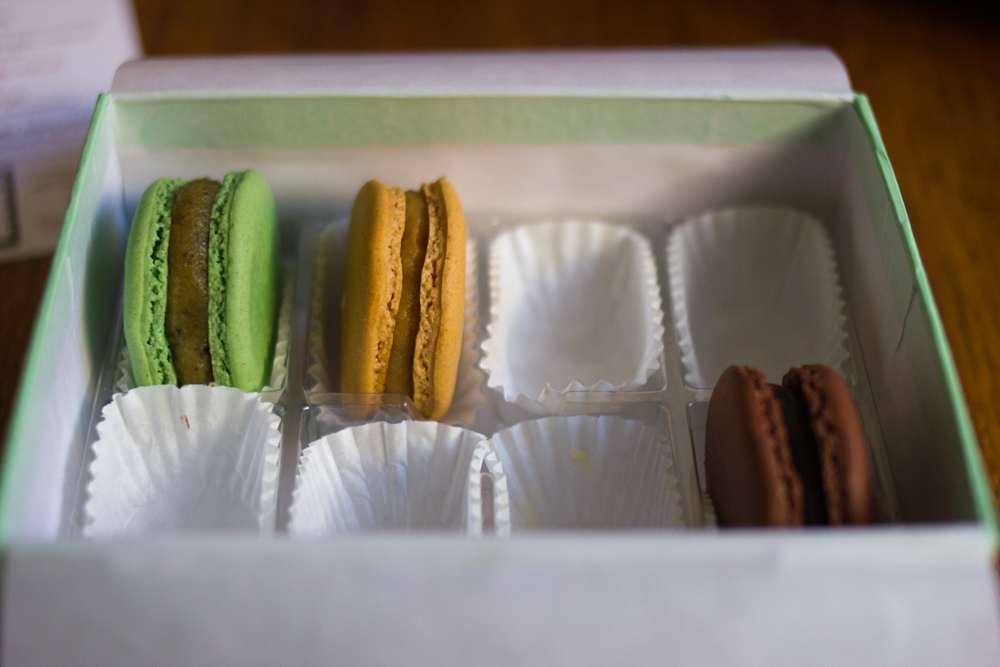
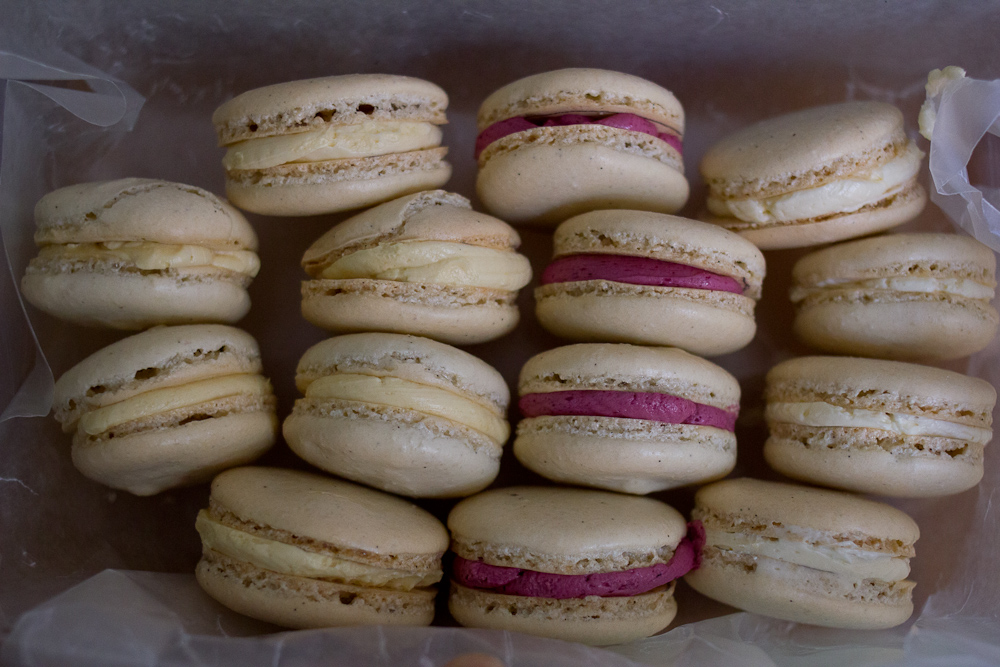
Once cooled, fill the macarons with the buttercream of your choice. I did vanilla, passionfruit and blackberry. All were divine!

For the filling
1/2 cup sugar
2 large egg whites
12 tablespoons butter, softened
1 teaspoon vanilla extract
a pinch of salt
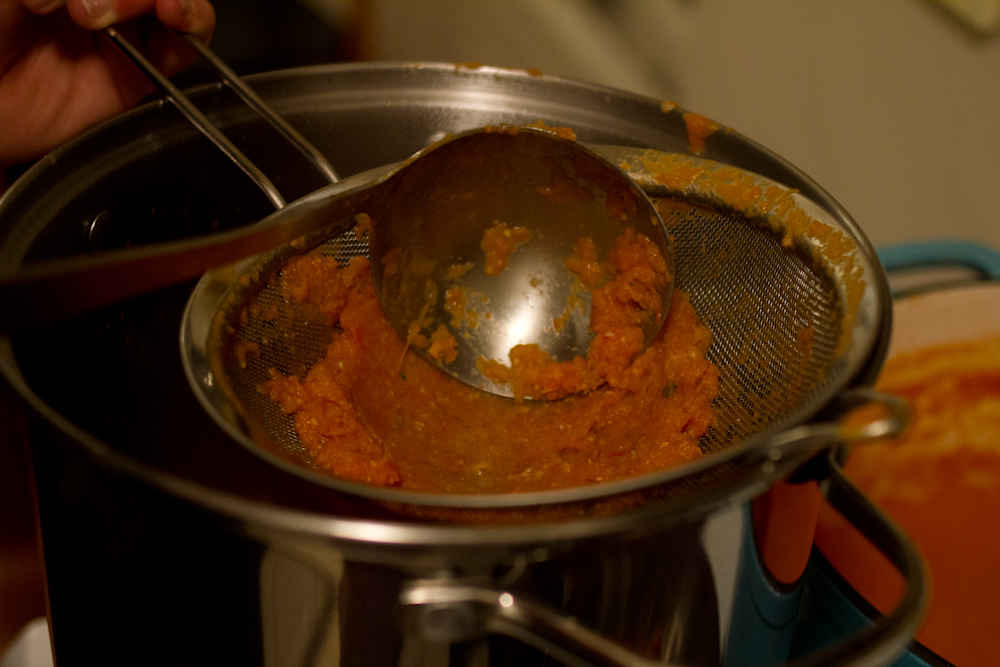
3 tablespoons passionfruit syrup (mine was made from 4 oz of frozen passionfruit pulp and 1/2 cup sugar simmered together for 30 minutes and strained)
3 tablespoons blackberry syrup (mine was made from 4 oz of frozen blackberries and 1/2 cup sugar simmered together for 30 minutes   and strained of the seeds)

In a bowl over a pot of simmering water, combine the sugar and egg whites. Heat the egg and sugar mixture until you cannot feel the sugar granules when you rub the mixture between your fingers.  Transfer mixture into the mixer and whip until it turns white and about doubles in size. Add the vanilla. Finally, add the butter a few tablespoons at a time and whip, whip, whip. It will look like your buttercream is ruined for a few minutes. Don’t dispair! It will come together if you just keep whipping.

french-macaron-15

Once the buttercream is has been whipped into submission, put two thirds of it another bowl. To the remaining third, add the 3 tablespoons of blackberry syrup. Whip, whip, whip again until the syrup is incorporated. Remove that from the mixer, wash the bowl and whisk and then add another 1/3 of the frosting. Add 3 tablespoons of passionfruit syrup and whip whip whip!

Put the filling in a disposable pastry bag with a round tip. Pipe about a teaspoon of filling onto the flat side of the macaron cookie. Sandwich the cream between another cookie. Continue with the rest of the cookies, alternating fillings if you’d like.

french-macaron-13

The surprisingly truth about macarons? They only get more tasty as they age. While they are delicious the first day, they are insanely good on the second and third days once the cream and cookie have really melded together and become one. Store your cookies in a tupperware in the refrigerator, but let set them out for about an hour before serving to let the buttercream warm up a bit before you eat them. The texture is even more pleasant when you let them warm a bit.

french-macaron-14

I am absolutely stoked with how these came out. They were delicious—sweet but not overwhelmingly so. Their texture was incredible—a crunchy exterior that shatters when you bite into it revealing a creamy, chewy interior. The passionfruit filling was positively addicting. Plus they are adorable.  I’ll be making them again very soon.

-Emily

Categories
Randomness

we’ve got a recipe index! and email subscription too!

Another awesome announcement!

We’ve got a recipe index! 3 years of delicious recipes nice and organized for your viewing pleasure. If there is something you want to eat, but don’t find a recipe for it or if you want someone else to do the heavy lifting of perfecting a recipe, let us know! We’re always up to the challenge.

If you want to search for a recipe or ingredient, click the little grey (+) at the top of the page and a search field will open up.

+++

But there is more! After 3 years, we’ve decided to migrate The Answer is Always Pork off of WordPress.com and onto our own server! More control, snazzy new blog design, no random wordpress ads. It’s great!

But sadly, we’re not able to transfer our WordPress followers and email subscribers.

If you’d like to get all of our new posts by email, please sign up here. Or click the subscribe link in the top menu.  

If you’d like to follow on WordPress like you did before, please do! Click the  button that appears in the top toolbar of WordPress sites or bottom right corner of your browser window (when you’re logged in).

Or now that Google Reader has met its untimely end, you can follow along on Bloglovin.

Em & Jordan

Categories
Recipes

trout with creamed corn

Shall we talk some more about fish?

Butterflied trout really are a perfect fish. Tender, mild meat, no pesky bones or guts to get in your way because the fishmonger took care of that for you, affordable and sustainably harvested. Plus, for something that cooks in about 10 minutes, they still manage to look quite impressive. I’m of the mind that whole fish are always impressive. You?

trout-creamed-corn-7

And, now that July is here and summer is in full swing, it is time for everyone to get on this creamed corn. Originally from Thomas Keller’s Ad Hoc at Home, we’ve made a few tweaks so it pairs a bit better with the fish and eliminates some of TK’s meticulous technique. This creamed corn is good, really good. If you’ve only ever had creamed corn from a can, this is an entirely different world. One you want to live in. Forever.

trout-creamed-corn-6

Now go get yourself some summer corn, a few fish and make this gorgeous dinner in 30 minutes. I’ve already done it twice. The recipe below serves four, so cut it in half if you’re cooking for two. While the corn makes good leftovers, the same can’t really be said about the trout.

Creamed Corn
4 ears fresh corn, cut off the cob
2 tablespoons butter
1 lemon, zested and juiced
3/4 cup cream
1 tiny pinch of cayenne
2 tablespoons chives, minced
salt, pepper

trout-creamed-corn-1

Cut the corn off the cob. Scrape the cob with the back of a knife to get the rest of the corn flesh. In a heavy saute pan over medium-low heat, combine the fresh corn, butter and lemon juice. Cook the corn for 5 – 7 minutes. Season with salt.

trout-creamed-corn-4

Add the lemon zest and cayenne. Add the cream and cook for another 10 – 12 minutes, until the cream sauce has thickened. While the corn is cooking with the cream, cook the fish. Check for seasoning,  add a little pepper and the chives. Serve fish with a bed of creamed corn underneath it.

Butterflied Trout with Lemon Butter Sauce
2 – ~1lb butterflied trout (I think half a trout per person is good, but it depends on their size)
2 tablespoons butter
2 tablespoons olive oil
3 – 4 cloves garlic confit (if you don’t have any on hand, just skip it)
1 lemon, juiced
salt and pepper

trout-creamed-corn-2

Season the inside and outside of the trout with salt. In a large saute pan, melt the butter and olive oil over medium heat. Add the garlic confit and smoosh the cloves a bit.

trout-creamed-corn-5

When the butter and oil mixture is hot, add the trout. Put it in the pan skin side down, spread flat. Cook for 7 – 10 minutes, basting the top occasionally with the butter. Because the fish is thin, you don’t need to flip it.  This way the skin gets super crispy, but the fish doesn’t dry out. Just before serving, squeeze a lemon over the fish and add some freshly ground pepper. Serve on top of a bed of creamed corn with a salad or alternatively with roasted summer squash and potatoes anna.

trout-creamed-corn-8-Emily


Categories
Randomness San Francisco

polaroids from a day in santa cruz

A few weekends ago we met friends in Santa Cruz. We caught a few solid rides before the tide turned on us and we decided to head in. We ate lunch at The Picnic Basket. In a land of corn dogs and funnel cakes, they serve beautiful local food. I don’t turn my nose up at funnel cake, but something so fresh and good on the boardwalk was a nice surprise. After we finished eating we still had time on the meter so we walked around the neighborhood.

santa-cruz-polaroids-4
santa-cruz-polaroids-1
santa-cruz-polaroids-comp
santa-cruz-polaroids-5

The meter ran out and we parted ways. Jordan and I drove up the coast as the fog rolled back in. We stopped to get strawberries and artichokes. We listened to Eat a Peach. It felt like summer.

-Emily

Categories
Recipes

green smoothie

We’ve been having smoothies for breakfast everyday for a while now and have been tweaking this recipe along the way. It started out as an attempt to sneak more leafy greens into my diet, but Jordan and I both got hooked. It’s a great way to start the day—fresh and full of fruits and veggies. We use one of those infomercial-famous Magic Bullet blenders, which was my dad’s parting gift when I moved out of the house, so this recipe for a single serving.

Like all smoothie recipes, this recipe is flexible. If you’re missing an ingredient, swap it for something else in your crisper. Also, if you’ve got a winning smoothie recipe, please let us know. We’ve been enjoying this one for about a month straight, but I expect we’ll hit a wall with it eventually.

green-smoothie-1

Green Smoothie
1 banana
2 – 3 tablespoons of frozen pineapple tidbits
2 – 3 tablespoons plain greek yogurt
1/2 cup fresh spinach (or as much as you can cram into the remaining space in the blender)
1/4 cup orange juice
1/4 cup coconut water

green-smoothie-v2-1

Combine ingredients in a blender and blend until smooth. Though the Magic Bullet infomercial claims it will make a fruit smoothie in miraculous 5 seconds, mine usually takes about a minute.

-Emily

Categories
Giveaway

sucré macarons giveaway {closed}

Today is an exciting day! Today you have the chance to win these delicious cookies!

sucre-macaron-2

Before you think, “Dang, Emily, you’ve gotten so good at making delicate french pastries. And snap, that packing is impressive for a food blog,” I’ll clarify. I have yet to attempt the difficulties of the french macron—though the idea will eternally be bouncing around in my head. These beautiful macrons are from Sucré, an artisanal sweet boutique in New Orleans specializing in macarons and chocolates and glorious baked goods.

sucre-macaron-3

They kindly send Jordan and me a box of their delicious macrons, which we promptly devoured in one sitting. Our plan was just to have one as an after work snack before starting dinner, but these cookies are good—impossible to just have one good. I was a big fan of pistachio and dark chocolate, Jordan was torn between pecan and salted caramel.

sucre-macaron-4

We know you’ll love them too, which is why we’re happy to say that Sucré has offered to send a box to one of our readers. Comment below to enter to win some of these delightful confections delivered right to your door! Giveaway ends next Tuesday June 18th so get on it!  Giveaway closed. Congratulations Elisabeth Springer! Thanks for playing along everyone!

sucre-macaron-1-Emily


Categories
Recipes

caramelized onion tart

Every time I have caramelized onions, I wonder why caramelization isn’t obligatory for all onions. It is just magical how onions can transform from sharp and pungent to sweet and magnificent with just a little heat and a little patience. This tart is lovely because it lets the onions shine. If you can crank out a decent pie crust, all the better. Flaky dough + creamy onions = heaven.

onion-tart-2

You could also consider this tart a perfect opportunity to eat bacon. I’d cook the bacon first, drain off some of the fat from the pan, add a tablespoon of butter and then saute the onions in the bacon fat and butter combo. Chop up the bacon in to bits and then combine them with the onion custard before you pour it into the tart shell.

We had this tart for dinner with a salad and roasted veggies. It would also go nicely with soup or roast chicken. I had it for lunch the next day and can attest that it reheats like a dream—in the unlikely event that you have leftovers.

Simple Caramelized Onion Tart, adapted from Orangette
1/2 recipe for flaky pie dough
3 tablespoons butter
2 large yellow onions, peeled and sliced thin
1/2 cup heavy cream
1 egg
salt
pepper
pinch of nutmeg

Flaky Pie Crust 
2 1/2 cups all purpose flour
1 1/4 teaspoons kosher salt
2 1/2 sticks unsalted butter
about 5 tablespoons ice water

Make the pie crust the night before. In a food processor, combine flour and salt. Remove the butter from the fridge and cut into 1 inch cubes. Add them to the flour mixture. Process until the butter chunks are about the size of peas. Add the water and pulse a few times to combine. Divide into two equal balls, wrap in plastic wrap and refrigerate.

Preheat your oven to 375 degrees.

onion-tart-1

In a heavy-bottomed pan over medium low heat, melt two tablespoons of butter. Add the onions. Caramelize the onions stirring occasionally. Depending on your stove, this will take somewhere in the neighborhood of 45 minutes.

onion-tart-3

While your onions are caramelizing, roll out the pie dough. Put it in a 9-inch tart pan and trim off the excess. My favorite Julia Child trick for getting perfect edges on a tart is to drape the excess dough over the edges of the pan and then roll the rolling pin on top of the dough over the edges of pan. The sharp edges of the pan will cut through the dough and you can easily pull away the excess. Put the tart shell in the fridge until your onions are done caramelizing.

Whisk together the egg, cream, salt, pepper and nutmeg.

onion-tart-4

After the onions are a medium brown, remove them from the heat. Mix them with the egg mixture and pour into the tart pan. Bake for 30 – 45 minutes, until the top of the tart is golden brown. Unmold the tart and serve hot or let cool to room temperature and serve.

onion-tart-5

-Emily

Categories
Recipes

simple tomato soup

For once I don’t have much to say. The past two weeks have really been tough and my brain refuses to remember what spurred me to make tomato soup in the first place, not to mention the struggle to come up with anything in the way of creative prose.  This soup is simple and good. It wouldn’t hurt to pair it with a sage grilled cheese sandwich or perhaps a cheesy bun. A simple salad wouldn’t be amiss.

In case the idea of tomato soup intrigues you, but you don’t feel up to making it from scratch, I’d recommend the creamy tomato soup from Whole Foods – either their prepared version from the deli or the boxed one – and would avoid the creamy tomato soup from Trader Joe’s – it’s strangely sweet and needed a fair amount of doctoring to be palatable.

tomato-soup-6

Tomato Soup, adapted from The Art of Simple Food by Alice Waters
2 tablespoons olive oil
2 tablespoons butter
1 large onion, sliced
1 – 2  leeks, sliced and rinsed of their grit
3 garlic cloves, sliced
2 – 28 oz cans of  tomatoes, or four pounds fresh tomatoes
2 tablespoons white rice
1 bay leaf
2 springs of thyme, basil or oregano
1 cup water
2 tablespoons butter
salt and pepper

tomato-soup-1

In a large heavy-bottomed pan, saute onion and leeks in olive oil and butter. Cover and cook until soft but not brown, 5 -10 minutes.  Add the garlic and cook for another two minutes. Add the tomatoes, rice, bay, herbs and salt.  Saute for 10 minutes. Add the water and continue cooking for another 10 minutes.

tomato-soup-3

Remove the herb sprig and bay leaf. Blend the soup until as smooth as possible. Strain the soup through a fine mesh strainer into another pot. It is worth the straining, trust me.

tomato-soup-4

Rewarm the soup and add the remaining two tablespoons of butter. Season with salt and pepper. Garnish with creme fraiche and croutons.

Bite-Sized Croutons
several slices day-old bread
olive oil
salt

tomato-soup-2

I like my croutons to be manageable. Huge croutons that fill your mouth and seem like they’ll crack your teeth are not my thing. Make these using any old french bread you’ve got lying around.

Preheat your oven to 325 degrees. Slice the bread into 1/3″ – 1/2″ cubes. Toss with olive oil. Spread onto a baking sheet. Sprinkle with salt. Bake 20 minutes, until browned and just slightly crunchy. They’ll get crunchier as they cool.

tomato-soup-5

-Emily