Categories
Recipes

the year of the dumpling

We’ve been on a bit of a dumpling kick lately. Eating dumplings at spots all around the city, making our own at home, forcing friends to work for their dinners, being forced by friends to work for ours. We’re affectionately referring to this obsession as the Year of the Dumpling, but based on how things are going, it may evolve into the Decade of the Dumpling.

spicy-dumplings-6 spicy-dumplings-3

I have a backlog of dumpling recipes to share, but I’m thinking it’s best to start with a classic. Basic pork dumplings. A little garlic, ginger, scallions, and that’s about it. When I was doing research, it seems that many recipes also call for cabbage, sesame oil, onions and pepper, which we added the first time we made these. The second time, we forgot those other ingredients and no one was the wiser. Simple wins.

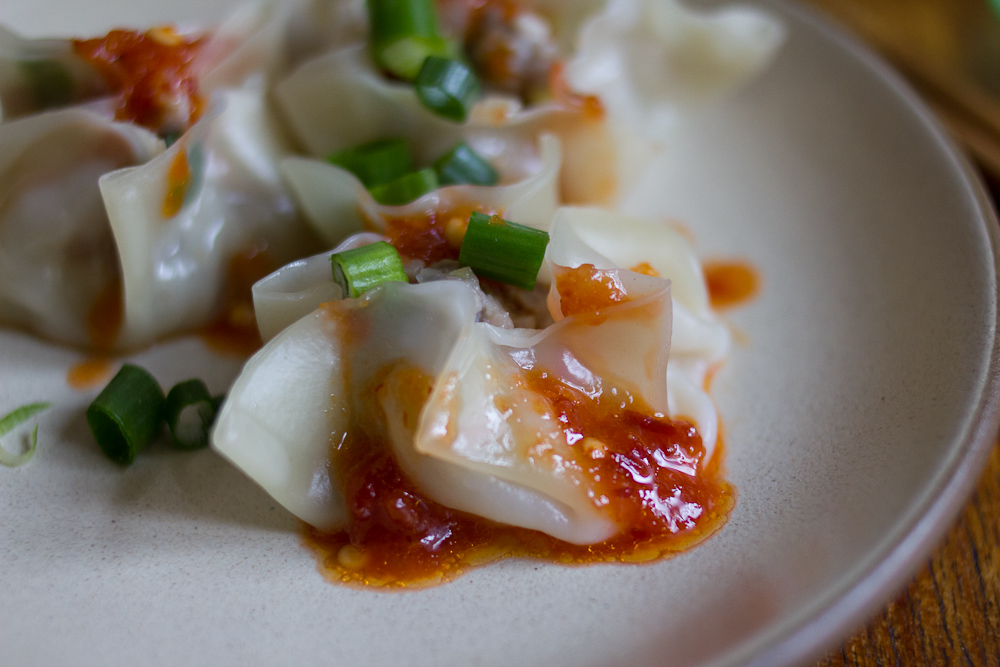
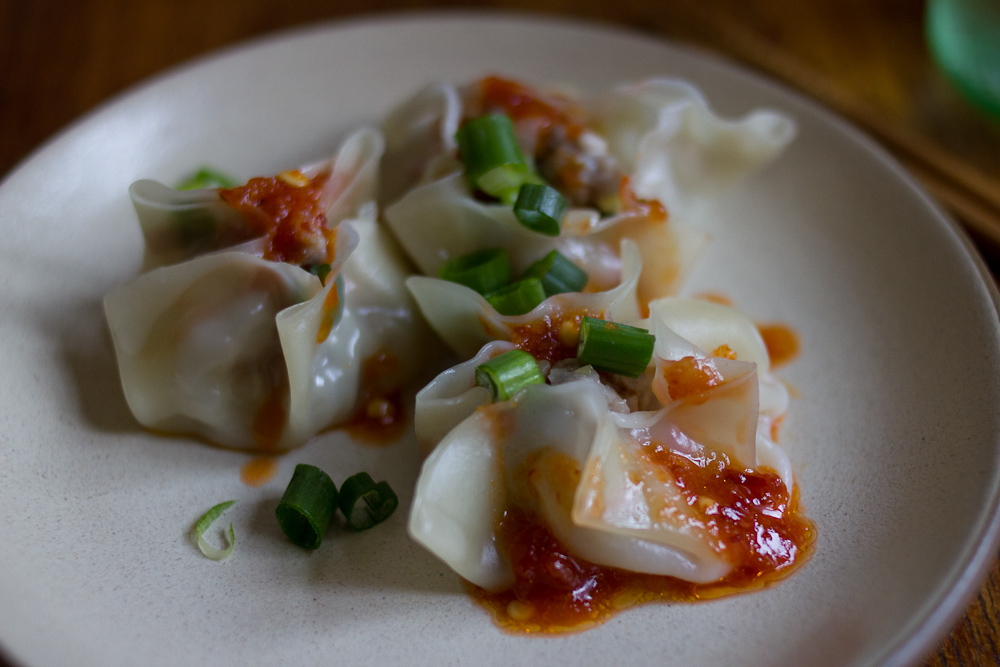
I like my dumplings with vinegar, a good amount of it. Jordan likes chili oil. We joined forces for this sauce—if joining forces can be described as mixing together two ingredients in a bowl. If you like spicy, make the sauce. If you don’t, mix a little soy sauce and rice vinegar in a dish. Or just eat the dumplings plain. Everyone is free to eat their dumplings however they like, we accept all forms of dumpling eatery.

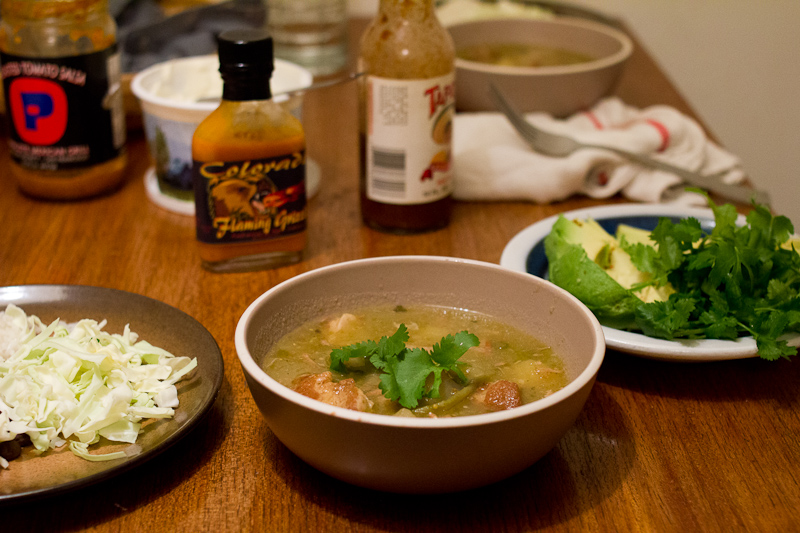
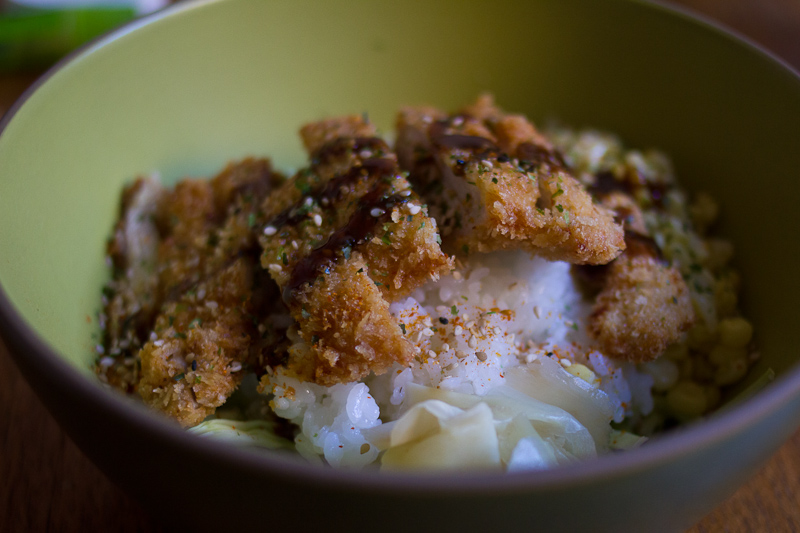
Dumplings also freeze exceptionally well, which is handy because this recipe makes about fifty. I love dumplings, but I can’t eat fifty in one sitting. Yet. Make sure to take the frozen-factor into account when steaming or pan frying, they’ll take a few extra minutes to cook. We’ve gotten to the point where we’re nervous if there isn’t a bag of dumplings in the freezer. (Trader Joe’s frozen gyoza are also really good, if you’re in the mood to eat dumplings but not to make them yourself). Dumplings are perfect for a quick, weeknight dinner. Steam some rice, sauté some greens, fry up a few dumplings and you’ve got yourself a great meal. We have it at least once a week.

Basic Pork Dumpling with Chili Sauce
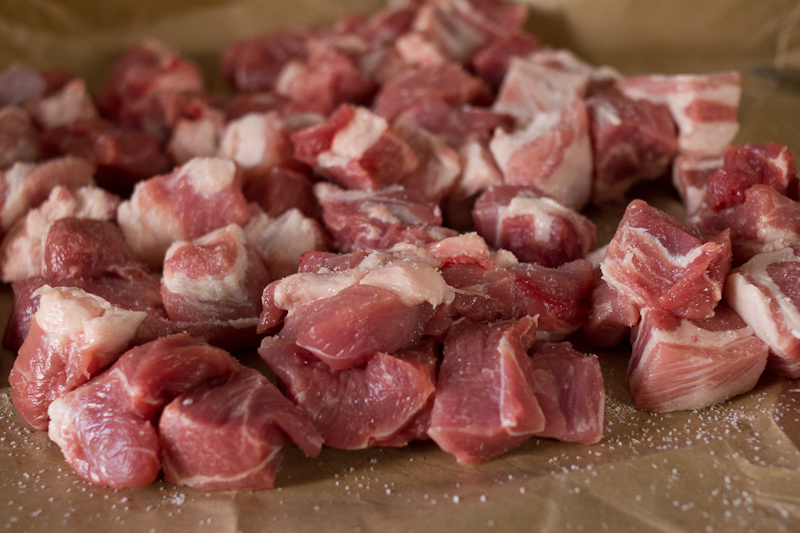
1 lb pork shoulder, cut into cubes and ground with a meat grinder (or ground pork, the fattier, the better)
1 tablespoon fresh garlic, diced
1 tablespoon fresh ginger, diced
4 scallions, white and green parts, sliced thinly
2 teaspoons kosher salt
2 teaspoons soy sauce
1 package of dumpling wrappers (about 50 wrappers)

For the Chili Sauce
2 tablespoons sambal oelek chili sauce (find it at any Asian grocery for $1.70, or substitute sriracha)
1 tablespoon rice vinegar

spicy-dumplings-1 spicy-dumplings-2 spicy-dumplings-4

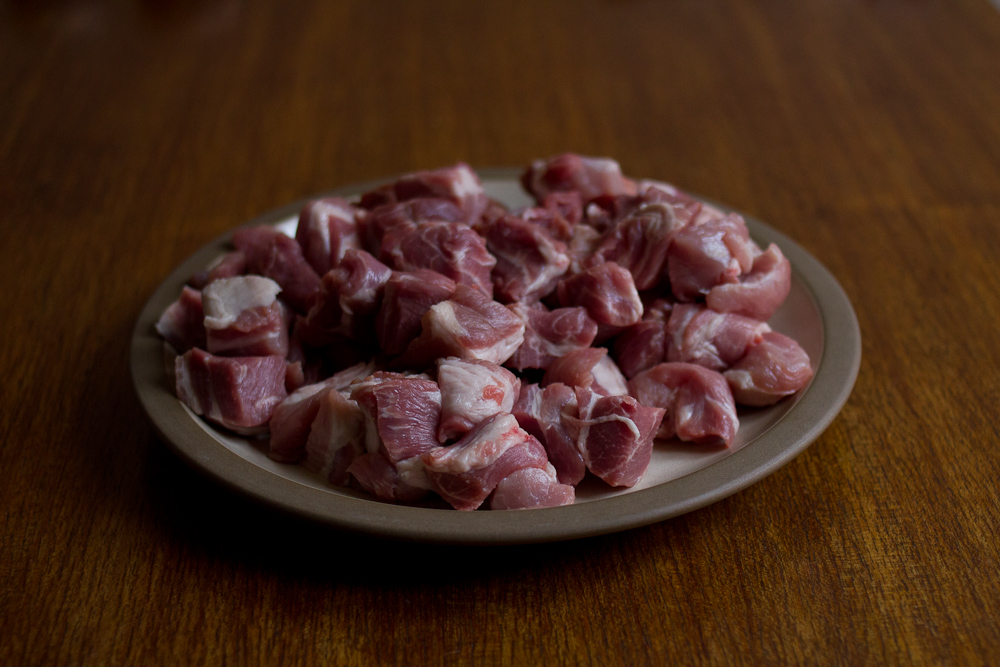
Cut the pork shoulder into 1 inch cubes and sprinkle with salt. Chill in the freezer for 20 minutes, then grind on the fine die with your meat grinder. Or, if you don’t have a husband who loves to grind meat, purchase some ground pork from your butcher. Make sure it isn’t too lean. A little fat means juicy dumplings.

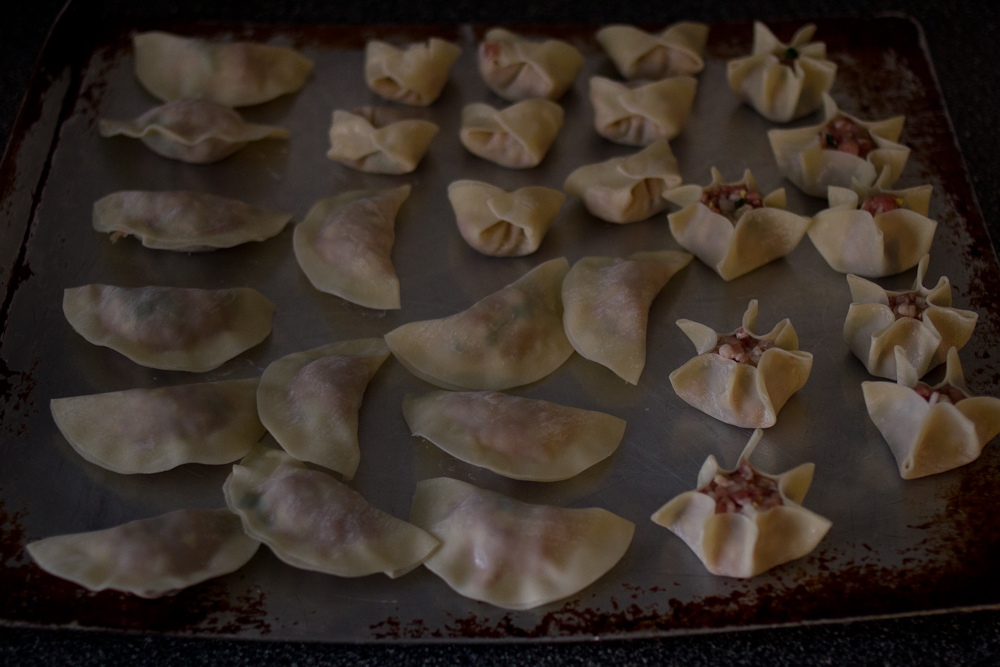
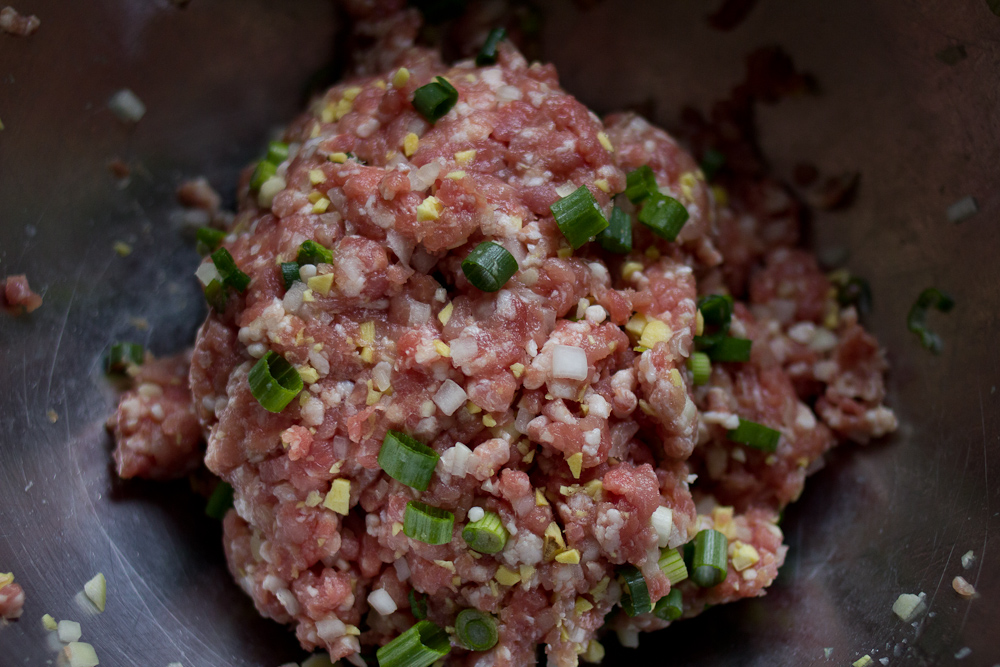
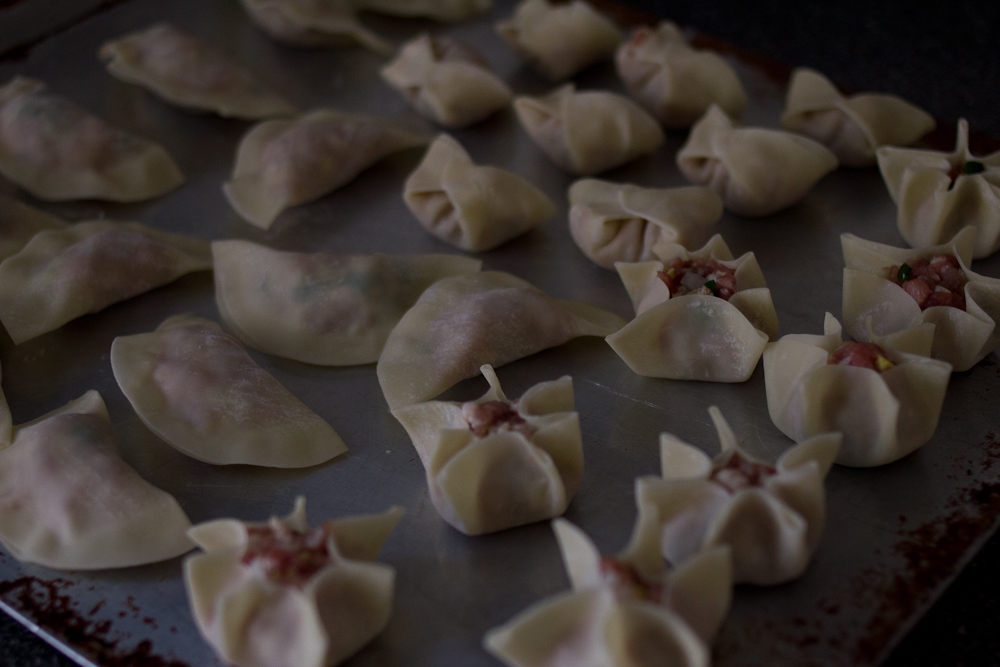
Mix the ground pork, garlic, ginger, scallions and soy sauce together until everything is evenly distributed. Lay out a few rows of dumpling wrappers on a baking sheet or countertop. Put a heaping teaspoon of filling in the center of each wrapper. Using your finger, moisten the edges of the dumpling wrapper. Fold in half and crimp the edges.

To cook, heat a small amount of water in a pot and top with a steamer or colander. Line the steamer with some parchment paper so your dumplings don’t get stuck to the steamer. Plan to cook at least 10 dumplings per person—they go down easy. Steam the dumplings for about 5 minutes, until the internal temperature is 160° F. I recommend using a thermometer to check the temperature until you get your steaming technique down. If you let the dumplings go too long, the pork filling can end up a bit dry and crumbly instead of juicy and succulent. Top with chili sauce and enjoy!

spicy-dumplings-5

Categories
Recipes

chili verde

I’d always been opposed to the idea of owning a crock pot. Our apartment is so tiny and it doesn’t seem possible to nestle another thing in between our kitchen aid mixer, vitamix, coffee maker, soda stream, food processor … so many gadgets … that I use surprisingly regularly. A crock pot also felt like giving up. Surrendering my culinary creativity to mushy foods that all taste and look the same. Not to mention the myriad of crock pot recipes that call for condensed soups, seasoning packets and all of those industrial food products that I just can’t get behind.

And then, around Thanksgiving, I was visiting my mom. We ran errands all day, hopping in and out of the car, driving from place to place, and got home around six in the evening. And her house, her house smelled amazing. The kind of smell that really makes you feel taken care of and instantly banishes the “what the hell are we having for dinner tonight” worry. Unbeknownst to me, my mom had thrown leeks, potatoes and vegetable stock into her crockpot before we’d left to take on the days errands, and now all that was left to do was to puree the soup and make a salad. This was when I realized that I could indulge the convenience of the crock pot without giving up good food.

chili-verde-4

Fast forward to Christmas, and my grandparents gifted us a crock pot. Since then I’ve been experimenting with a few new recipes, including my mom’s leek and potato soup. Most of these recipes could also be braised in a dutch oven or made on the stovetop, but I must again admit it is insanely nice to come home to a meal that is nearly ready to eat.

This chili verde is a mashup of several different recipes from around the Internet. It’s hard to go wrong when you combine tomatillos, chilis and pork. They’re made for each other. This version is not particularly spicy and makes enough for at least eight meals. Not surprisingly, it freezes well and you can easily reheat it in your crock pot and enjoy another round of chili verde at a later date. I’m starting to see why people like these things.

But, I still resist the microwave. It is my last stand.

Chili Verde
1 1/2 lbs tomatillos, taken out of their husks
1 onion, cut into eighths
6 cloves of garlic
4 serrano chilis, stemmed and de-seeded (Keep in mind that the heat of serranos is quite variable, it’s good to taste them to see how spicy they are before you increase the amount of chili you use)
3 lbs pork shoulder, peeled and cut into 1.5″ cubes
4 yukon gold potatoes, cut into 1″ cubes
1 orange, juiced (or 1/4 cup orange juice)
4 cups of chicken stock
1 teaspoon cumin
1 teaspoon dried oregano
2 bay leaves
salt and pepper
olive oil/bacon fat/lard
fresh cilantro, sour cream, avocado, cabbage, lime, tortillas and hot sauce/salsa for serving

chili-verde-1chili-verde-2

Cut your pork into one and half to two inch cubes. Season it with salt. Heat a tablespoon of oil/bacon fat/lard in a non-stick skillet over medium high heat. In batches, brown the pork on all sides. Put your first batch aside and brown the next few pieces. Continue until you’ve browned all of your pork. It will probably take somewhere in the neighborhood of 20 to 30 minutes to brown this much pork, but it adds a ton of flavor into the final dish.

Meanwhile, line a baking sheet with parchment paper and spread the tomatillos, onion, garlic, and serrano chilis into a single layer. Turn your broiler to high and char the vegetables. You’re looking for a deep dark spots on all of the vegetables and for the tomatillos to look deflated. Pour your charred vegetables and all of their juice into your crock pot vessel, or into a dutch oven.

After you’ve browned all the pork, deglaze with some orange juice, chicken stock or water. Be sure to scrape up all the delicious browned bits and add those into your crock pot, along with all of the pork.

Add the potatoes, chicken stock, cumin, oregano, bay leaf, a little salt and pepper, and cover. (FYI – If this is too much to do before work, you can prep the recipe up until this point and refrigerate the entire dish, and then start the cooking in the morning). Set your crockpot to high and cook for 6 hours, or low and cook for 8 to 10 hours. If you’re cooking in a dutch oven in the oven, preheat your oven to 300° F and cook for about 4 hours. The pork should be super tender by the end of the cooking time, and the vegetables will have become a soupy sauce.

Taste for seasoning. Add more salt and pepper as needed. It may need salt, especially if your broth was unseasoned. I serve chili verde in a soup bowl with tortillas, cilantro, sour cream, avocado, salsa and cabbage on the side. This way folks can make their own mini tacos with whichever fixings they like best, and you get to drink up that delicious tomatillo broth at the end of the meal.

chili-verde-3

-Emily

Ps. Do you have a crock pot or crock pot-adaptable recipe that you love? Please send it my way! We’ll soon tire of the three dishes I’ve added into the meal rotation and I’ll need new ones to try. Gracias!

Categories
Recipes

tonkatsu

You and tonkatsu have probably met each other’s acquaintance at your local sushi restaurant. It’s usually an option in a bento box of some kind, alongside other Americanized favorites—salmon teriyaki, vegetable tempura, California rolls. Like Argentine milanesa or Italian chicken parmesan, tonkatsu is basically a pounded piece of meat that is breaded, fried and served with sauce. It’s hard to go wrong.

We don’t do anything fancy with our tonkatsu. It is easy to prep and takes just 10 minutes to fry (and you can shallow fry it – no need to bust out the dutch oven and a liter of oil).  We usually serve it in a large bowl with shredded cabbage, vinegar rice and a few garnishes picked up during the occasional visit to Japantown. It’s not traditional to serve tonkatsu with vinegar rice, but I love vinegar rice and it’s my kitchen. Plus it helps jazz up cabbage.

Tonkatsu | The Answer is Always Pork

Tonkatsu 
2 thin cut, boneless pork chops, pounded a bit (you could also use chicken)
1/4 cup flour
1 egg, beaten
1/2 cup panko bread crumbs
salt and pepper
high temp oil for frying (safflower, sunflower, or canola oil)

For Serving
Vegetable and Fruit Sauce (Japanese BBQ sauce)
Vinegar sushi rice (1 cup rice, 1/4 cup rice vinegar, 2 tablespoons sugar, 1 teaspoon salt)
Shredded cabbage, about 1/2 cabbage cut into thin slices (toss with some rice vinegar if you’re not making vinegar rice)
Pickled ginger (optional)
Togarashi (Japanese dried chili pepper, optional)

Tonkatsu | The Answer is Always Pork

Cook your rice according to your rice cooker or the package directions. While your rice is cooking, make the sushi su by combining 1/4 cup rice vinegar,  2 tablespoons sugar and 1 teaspoon salt in a small saucepan and heating until the sugar and salt dissolve. Slice your cabbage into very thin slices and set aside. Then prep the pork.

Using a rolling pin or the flat side of a meat mallet, pound the pork cutlets until they are about 1/2 inch thick. Season well with salt and pepper. Then dredge the pork in the flour, then the egg, then the panko. Set aside or refrigerate if your rice still has a while left to cook.

When your rice is done cooking, heat 1/2 inch of oil in a heavy sauté pan or cast iron skillet. When the oil is hot (test by dropping a bit of panko into the batter. If it immediately starts to bubble, the oil is ready), add the pork to the pan. Cook 5 minutes per side, until the pork is golden brown. Remove from the pan and let drain on a plate with paper towels or a cooling rack. Cut into thin strips.

Add the sushi su to the rice and stir gently to distribute.  Split the cabbage between two medium bowls. Top with some rice. Then top with the tonkatsu. Serve with Vegetable and Fruit sauce, togarashi, and pickled ginger.

-Emily

Tonkatsu | The Answer is Always Pork


Categories
Recipes

meatloaf

Both Jordan and I were craving meatloaf last week. It had been years since we’d had it, I’d never made it, and so we decided to give it a go. For this meatloaf, we used an Italian meatball sandwich recipe as our inspiration. It was topped with a simple tomato sauce, instead of the more traditional American loaf topped with ketchup. We liked it, but you could easily swap the marinara for a combo of ketchup, sugar and worcestershire sauce. Because this recipe makes a two-pound loaf, we recommend you share it with friends.

12.18.12-8

One Year Ago: Bacon-Wrapped Dates
Two Years Ago: Ricotta Gnocchi

Meatloaf, adapted from Tartine Bread

For the meatloaf
2 tablespoons olive oil
1 onion, chopped
3 cloves garlic, chopped
1 lb ground beef
1 lb ground pork
4 large eggs
1 cup whole milk
1 cup grated parmesan cheese
1/4 cup red wine
2 cups bread crumbs
1 1/2 teaspoons salt
1/2 teaspoon pepper
1/4 teaspoon red pepper flakes
a few tablespoons of assorted fresh herbs (I used mostly parsley with a bit of thyme and oregano thrown in)

Preheat an oven to 350 degrees. In a large skillet, saute the onion in the olive oil over low heat until translucent, about 10 minutes. Add the garlic and saute for a few more minutes. Remove from the heat.

12.18.12-6

In a large bowl, mix onion and garlic mixture with the ground beef, pork, eggs, milk, cheese, wine, bread crumbs, salt, pepper, red pepper flake and herbs. Mix well so all the ingredients are evenly distributed. At this point, I like to pinch off a bit of the meat and fry it up quickly in a pan to test for seasoning. If you need more salt after testing, add a bit more.

12.18.12-7

Press the meat mixture into a loaf pan or shape into a loaf form and place on a rimmed cookie sheet. Bake for an hour at 350 degrees. You could also use the same mixture to make meatballs. Shape them into 1.5-inch balls and then bake for 20 – 30 minutes. Alternatively, you could simmer the meatballs in a tomato sauce for 30 minutes. I’d serve them with pasta or rice.

For the tomato sauce
1 – 16 oz can of whole tomatoes
2 tablespoons olive oil
2 tablespoons butter
2 tablespoons sugar
1/4 cup red wine
salt and pepper to taste

While the meat is cooking, you can make a quick tomato sauce to go with it. I basically just tossed all the ingredients into a sauce pan, let it simmer for 30 minutes partially-covered and then pureed it. When you take the meat from the oven, let it rest for five minutes then cut into 1/2″ slices. Spoon the tomato sauce over the meatloaf and enjoy!

Jordan suggested that for our next meatloaf we cook it on a baking sheet and pour the tomato sauce over it before baking so the sauce cooks into the meat and caramelizes along with it. Sounds promising. We’ll report back.

-Emily

Categories
Recipes

pasta bolognese

I’d never made pasta bolognese. We weren’t sure if we’d ever even eaten a true pasta bolognese. The closest we’d ever gotten was marinara sauce with ground beef, which as we found out in our recipe research, is not even close to a pasta bolognese.

This recipe is from the Chez Panisse Cafe Cookbook and was cross-referenced with a Mario Batali recipe so we’ve got on pretty good authority we’re approaching authentic with this one. We had to make a few minor modifications (bacon in place of pancetta), but good golly pasta bolognese is good! Meaty comfort in a stock pot, real pasta bolognese kicks Ragu‘s ass.

Pasta Bolognese, adapted from the Chez Panisse Cafe Cookbook
4 oz bacon, diced
1 onion, diced
1 carrot, diced
2 stalks celery, diced
2 cloves garlic, diced
salt
1 lb ground beef
1/2 lb ground pork
1 cup dry white wine
2 bay leaves
2 sprigs thyme
2 cups chicken or beef stock
1 1/2 cups milk
3 T tomato paste
1/4 cup cream
pepper
parsley and parmesan for serving

In a large saucepan or dutch oven over medium heat, add the bacon. Once the bacon has released some of its fat, add the vegetables. Saute the vegetables until they have softened and add the garlic. Remove the vegetables and bacon from the pan and set aside.

Brown the beef and pork in the same pan. Cook 10 – 15 minutes, until the meat is browned. Add the wine, herbs and vegetables to the meat. Adjust the heat to maintain a simmer and let the liquid evaporate.

Once most of the liquid has evaporated, deglaze with the stock and milk. Add the tomato paste. Simmer until the sauce is thickened, 30 minutes to an hour. Season with salt and pepper.

Before serving, add the cream and simmer for a few minutes.

Serve over pasta garnished with parmesan and parsley.

-Emily

Categories
Recipes

in the name of all things pancetta

Goodness me, we’ve reached a whole new level of pork devotion and oh it is glorious. During the past month, we’ve been busy—busy curing our own pork! Inspired by our friend Jessi and in collaboration with our supper club (food nerdom complete), we made pancetta. Pancetta is basically the Italian version of unsmoked bacon—pork belly that has been seasoned, rolled into a log and hung for a few weeks to cure. It’s typically cut into thin slices or small cubes then sautéed and added to pasta or vegetable dishes.

Because it takes about three weeks total to prepare, pancetta is certainly a commitment—of both time and closet space. But it is worth it, especially if you have a few friends to split the resulting 8 pounds of pancetta with.

Home-cured pancetta is complex. It is herby and slightly sweet, porky but also a little beefy. We were surprised by how many different flavors the pork belly acquired during the three-week curing process.

We followed the recipe from Charcuterie by Michael Ruhlman and Brian Polcyn. You can also find a step by step guide of the recipe complete with videos from Chow. Because their instructions are so thorough, I am going to skip the detail and just go with a photo overview of the process.

First you rub the slab of pork belly with herbs (rosemary, thyme, juniper berries), pepper, sugar and salt.

Make sure you really massage those seasonings into the belly.

Then wrap the pork belly in large plastic bags and put it in your fridge under a heavy pot or pan. Refrigerate it for a week, flipping it once a day.

After a week of refrigeration, take the pork belly out and wash of the seasonings. Pat it dry and sprinkle a bunch of cracked peppercorns on the inside. Roll it up nice and tight and truss those puppies.

Hang in a cool, dark place with some air circulation (and out of puppy’s reach) for two weeks. Ours replaced our jackets in the hall closet. Oh it just made us smile when we opened the door to grab our shoes and saw two gigantic logs of pork hanging there.

After two weeks, cut the pancetta down and slice off any little bits of mold. Slice into one-inch thick slices and share with your best foodie friends!

So far we’ve made spaghetti alla carbonara and pasta with vodka sauce. I’m thinking pancetta wrapped asparagus next. Any other ideas for me?

-Emily

Categories
Recipes

devils on horseback, datiles, or bacon-wrapped dates

Starting off the new year right … with more pork! I’ve had this appetizer in several iterations over the years and it never disappoints. I’m actually surprised I haven’t sung its praises before. The first time I had this dish was at a tapas restaurant in Washington, D.C. I was a vegetarian at the time, but was convinced by some good friends to try the datiles regardless. They couldn’t have been more right—those datiles were date-bacon-donuts sent from heaven. That was the beginning of the end for my vegetarianism. More recently, our friends Matt and Alexa brought their version of those datiles so fondly etched into my memory to a dinner party, this time calling them devils on horseback. Basically, this mind-blowing, vegetarian-converting appetizer is a date stuffed with goat cheese wrapped in bacon, and then baked or fried to crispy perfection. They are insanely easy to make and everyone at the next party you go to will want to be your best friend.

Bacon-Wrapped Dates Stuffed with Goat Cheese
1 lb medjool dates, pits removed
1 lb bacon
8 oz chevre goat cheese

Using a sharp knife, slice the date to the pit and remove taking care to not cut through the date. Stuff the date with a small spoonful of goat cheese. I recommend stuffing the dates with slightly less goat cheese—some of mine oozed out while cooking and burned. No point in wasting cheese!

Wrap the date with one half bacon slice, securing with a toothpick. The prep can be done several hours or even the day before you plan to serve the dish, another appetizer plus!

Preheat an oven to 400 degrees. Bake the dates for 20 – 25 minutes, until the bacon is browned and crispy. Serve warm. I guarantee they won’t have time to get cold.

-Emily

Categories
Recipes

mock porchetta—it’s porktastic!

Before heading back to Sacramento for Christmas, we had a Pre-Christmas/Hanukkah/ Winter Solstice dinner with our dear Supper Club friends. Being that the dish served at this dinner would also become our 200th blog post (!!!), we knew that it had to be pork and it had to be good.

We decided on a recipe for mock porchetta from the Zuni Cafe Cookbook. You might be wondering what a porchetta is and why the one we made is considered an improvisation. Well, porchetta is an Italian dish wherein an entire pig is deboned, stuffed with herbs and spices and roasted to perfection. I like to cook for a crowd, but an entire hog is out of the question for most home cooks. This recipe borrows the seasoning and cooking method from the traditional recipe, but scales it down to 3 pound pork shoulder proportions—perfect for a holiday meal.

Mock Porchetta with Roasted Vegetables, from the Zuni Cafe Cookbook by Judy Rogers
One 3-pound boneless pork should butt roast (my 3.5 lb roast fed 7 people)
salt
1 T capers, rinsed, dried between two towels and chopped
zest of one lemon
3 garlic cloves, chopped
12 fresh sage leaves, coarsely chopped
1 – 2 sprigs of rosemary, leaves stripped and chopped
2 t fennel seeds, lightly crushed
2 t cracked black pepper
1 – 2 pounds vegetables, for roasting (carrots, potatoes, parsnip, turnip, onion)
olive oil
2/3 cup chicken stock or water
3 T dry vermouth

Judy recommends that you season and tie the pork 2 to 3 days in advance to let the meat absorb the flavors of the seasonings. Absolutely do this. Two to three days before you plan to eat, trim off any discoloration and all but 1/4 inch thick layer of superficial fat. Now you’ll want to trim the roast into one long piece of meat that is 1 to 1 1/2 inches thick. The idea is to roll the seasonings into the roast, making a sort of pork butt roulade. Study the seams in the roast and carefully separate the meat into one long piece. In my experience, this was actually much easier than it sounded. Salt the splayed piece of pork on both sides. Judy recommends 1/2 t of salt per pound of meat. The lady knows where it’s at.

In a small bowl, combine capers, zest, garlic, sage, rosemary and most of the fennel seeds and black pepper. It should be about 1/2 cup loosely packed.

Spread and pack this mixture onto one side of the roast. Roll the pork back into its natural shape and then tie 4 – 5 strings around its circumference and one around the length of the roast. Rub the outside of the roast with the remaining fennel seed and black pepper. Put the pork on a plate, cover loosely and refrigerate.  I thought my roast was a beaut!

To roast: preheat your oven to 350 degrees. Plan for 2.5 hours of cooking time. Toss your vegetables with some olive oil, salt and pepper. In a roasting pan or oven-proof skillet (you make a pan sauce later so use a pan you can put on the stove), add the porchetta and surround with vegetables.

Place in the oven. If after 45 minutes, the roast hasn’t begun to color, turn the oven up to 375 degrees. After one hour, turn the roast over and roll the vegetables in the rendered fat. After two hours, turn the roast again and add 1/3 cup of stock. Roast another 15 – 3o minutes, until the roast reaches an internal temperature of 185 degrees.

Turn the oven to warm. Take the roast out of the oven and put on a cutting board to rest. Cover loosely with foil. Place the vegetables in the oven on a warm platter. Make a sauce of the pan juices. First, tilt the skillet and spoon off any excess fat. Add the remaining 1/3 cup stock and vermouth. Turn the heat to medium low. Scrape and stir to dissolve the caramelized drippings on the bottom and sides of the pan. Continue to skim the fat, until you have a nice porky sauce. Slice the pork, removing the strings as you go. Serve each slice with a spoonful of the pan sauce over the top.

In addition to the roasted vegetables, we also enjoyed potato latkes (thanks Robin!) and a salad of winter greens. Kelly made gingerbread for dessert and Jesse made mexican hot chocolate. It was the most delicious and festive of feasts!

I think this porcetta may be my new go-to holiday dish. It is simple to prepare, but oh so tasty. Plus, it has the particular flare that only dishes that require three days advance preparation can muster. Bottom line: if you want to impress, make this roast.

-Emily


Categories
Recipes

pasta with roasted tomato sauce and bacon

In the past few weeks, I’ve made three variations on this recipe. The first was great but time-consuming, the second was delicious and will become my fallback recipe, and the third was our ultra-budget version that turned out better than expected. Here is how it all went down …

A few weekends ago, I was reading cookbooks and drinking coffee while Jordan slept in and Willow took up too much space in the bed. (It’s hard to kick something this cute out from under your covers, trust us).

I stumbled across a variation on Pasta Amatriciana—pasta with braised bacon and roasted tomato sauce—in the Zuni Cafe Cookbook. When Jordan woke up, I shared just the recipe title and he was sold. I set out to make this magical pasta. The recipe calls for slab bacon, which you then braise with a variety of vegetables and spices. Well, slab bacon is really hard to find, even at a fine market like Whole Foods. In a stroke of genius, I tied the cut bacon together so it re-formed a slab. Sadly, this does not work. My braised bacon was so bland; all of the smokey, salty flavor had leached into the broth and left the bacon beyond dull. There are few things sadder than flavorless bacon.

Fortunately, Jordan saved the dish by bringing home the back-up bacon. We sautéed that bacon and added it into the roasted tomato sauce, plus some of the braised bacon for texture. It worked well, but was slightly disappointing. The time-energy input did not match the deliciousness output.

The second time I made this recipe, I skipped right to adding sautéed bacon to the roasted tomato sauce. It is so good and so easy.

The last time I made this recipe, we had no bacon at all. We did however have some rendered bacon fat in our fridge. I sautéed the onions for the sauce in that bacon fat, and  like magic, delicious bacon flavor infused the whole sauce. It was unexpected and amazing and so inexpensive. The next time you cook bacon, pour the fat into a small bowl. Fill with the bowl some water to separate the fat from the burnt bits.  Refrigerate this mixture until the fat forms a solid mass on top of the water and carefully scoop the fat off the top. Sauté away, adding delicious bacon essence to whatever you cook!

Pasta with Roasted Tomato Sauce and Bacon, adapted from The Zuni Cafe Cookbook
1 16 oz jar of whole tomatoes
1 onion, chopped
2 cloves garlic, sliced
2 T sugar
2 T olive oil or bacon fat
salt, pepper, chili flake
1/4 lb bacon, cut into lardon
1 lb pasta (we used ziti and penne).

*A is a beautiful photo of a technique that I don’t recommend you subject your bacon to.

Heat an oven to 475 degrees. Strain the tomatoes of their juice and reserve that juice. In an oven safe dish, add the strained tomatoes and a drizzle of olive oil. Roast the tomatoes for 20 – 30 minutes, until browned.

In a saute pan, saute the bacon until just cooked through. Remove from the pan and set aside. Pour off the excess fat, leaving a tablespoon or two. Sauté the onion in the bacon fat until translucent. Add the garlic and sauté two minutes more. Add the roasted tomatoes and reserved juice. Add sugar, salt, pepper and a pinch of chili flakes. Cook for 20 minutes and test for seasoning.

Meanwhile, put a pot of salted water to boil. Cook the pasta until al dente. When the pasta is nearly done, add the bacon back into the sauce. Toss the sauce with the cooked pasta and serve with a sprinkle of parmesan.

-Emily

Categories
Recipes

pork on pork action

Oh yeah.  Even though it was Mother’s Day, Emily and I couldn’t help it.  Things got naughty and juicy.  You know what I’m talking about: bacon wrapped pork loin.  A dish so simple and so porky that you’ll lose all track of time basking in its glory.  Seriously though, this is such an easy dish and it’s definitely a crowd pleaser; in other words, it’s perfect for entertaining.

1 3-4 pound pork loin
8 strips of good bacon
Salt and Pepper

Preheat your oven to 375 degrees.  Season your pork loin with salt and pepper and wrap with bacon.  I put the bacon on a flat surface and overlapped each piece by about a quarter of an inch.  Then I rolled the pork loin like a burrito.  Place it in a roasting pan for about an hour and start checking its internal temperature.  You’re looking for 145 degrees in the thickest part.  Ours took about 1.5 hours, but it was a little overcooked on the thinner side.

Before:

After:

Don’t forget to let the meat rest for 10-15 minutes before slicing into it!

Conclusions:
A wonderful, simple main course that tastes like it’s much more complicated than it really is.  As long as it’s not overcooked and the bacon gets nice and crispy, everyone will be happy.  Also, this dish can be adjusted very easily depending on the number of people you’re serving.  I wouldn’t go below two pounds for a small crowd (4-5 people), but you could double or triple this recipe if just a few pounds won’t satisfy that porky desire. Leftovers make great sandwiches too!

-Jordan