Categories
Recipes

creamy pasta with dill and smoked salmon

I never used to eat fish. I basically avoided it, except for the very occasional piece of grilled salmon at a family party. Until I met Jordan. Jordan is a lover of fish. He was quick to introduce me to sushi, moules frites and smoked salmon. And, since I was very eager for him to like me, I ate them, lifelong avoidance set aside. Turns out he was right, all those fish, they deserve my love.

This particular pasta is a Jordan dish. He never failed to make it when he’d come to visit me at school or when I was home over the summer. It’s lovely all year round. One Valentine’s Day when Jordan was visiting me in D.C., we took the Metro to Eastern Market, wandered into a cooking store, splurged on our first All-Clad saute plan, and then went home to christen it with this dish. Really any pan that gets hot will do, and it’s pretty silly to buy All-Clad when you live in student housing, but that’s the story. Obviously, we still have the pan; those things are rock solid.

salmon-pasta-9

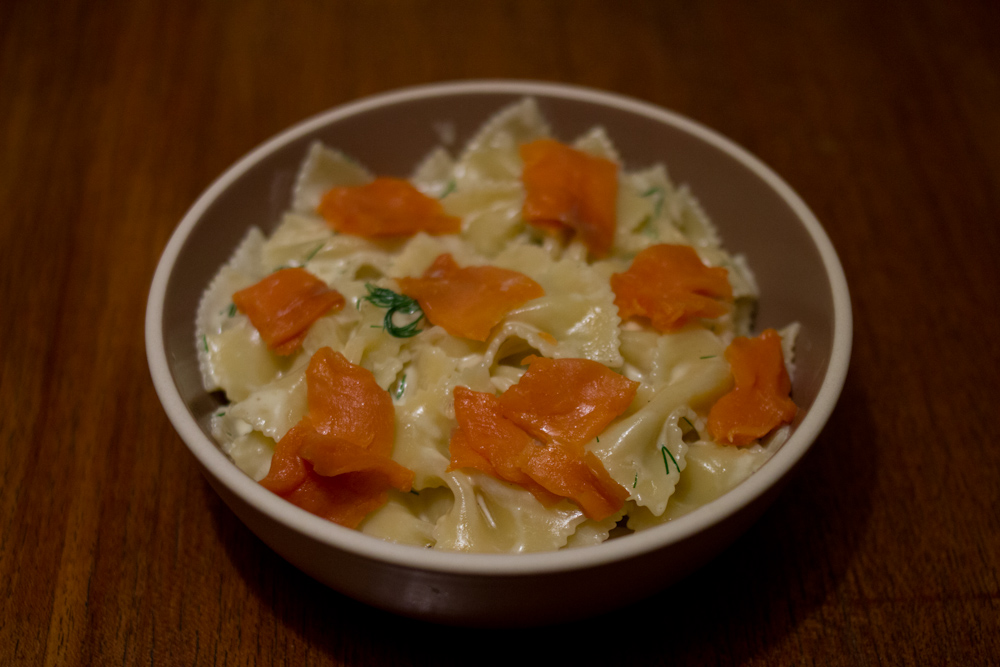
Creamy Pasta with Dill and Smoked Salmon 
1 lb bow tie pasta
2 tablespoons butter
1 shallot, minced
1/2 cup dry white wine
1 1/2 cups cream
1/4 cup dill, chopped
1/2 lemon, juiced
6 oz smoked salmon, cut into 1″ pieces

Put a pot of salted water to boil. In a large saute pan over medium-low, heat the butter. Saute the shallot in butter for a few minutes, until softened but not brown. Deglaze with the wine. Let the wine reduce slightly, about 3 minutes. Add the cream and turn the heat to low. Let the sauce come to a boil and thicken, stirring often.

salmon-pasta-7

Cook the pasta until al dente and drain. Turn the heat off on the sauce, add the dill and lemon juice. Toss the pasta with the sauce. Top with smoked salmon to serve.

salmon-pasta-8

If you’re only cooking for two, you might want to cut this recipe in half. Sadly, this pasta does not reheat well. The cream gets absorbed by the pasta and the smoked salmon is overcooked by the time the pasta is heated through. Microwaved cream sauces really are a travesty.

-Emily

Categories
Recipes

heavenly cheesy buns

I’ll just put this out there up front, you should probably make these cheesy buns this weekend. Eat them for breakfast, lunch or dinner (or for all three!)—you won’t be disappointed.  Imagine the puffy dough of a perfect cinnamon roll and then swap the sweet cinnamon filling for sharp cheddar cheese and onion. Yep, pretty much perfect. And, I’ve even got a secret to share so you can have them for brunch without even waking up at an ungodly hour.

1.17.13-9

One year ago: Best Chocolate Pudding
Two years ago: Ad Hoc at Home Brownies 

Sharp Cheddar Cheesy Buns, adapted from the Smitten Kitchen Cookbook
For the dough
3 cups (375 g) all-purpose flour
1 teaspoon salt
a few grinds of black pepper
1 tablespoon sugar
2 1/4 teaspoons (or one 7 g packet) of instant yeast
1 cup milk (if you want the dough to rise easier, warm the milk to about 100 degrees)
4 tablespoons melted butter, cooled to lukewarm

For the filling 
1/2 cup grated white onion (about half an onion)
1 1/2 cups grated sharp cheddar cheese (you could substitute swiss, provolone, mozzarella or use a mixture)
2 teaspoons fresh dill, minced (you could also use 1 teaspoon of fresh thyme or rosemary)
1/4 teaspoon salt
a few grinds of black pepper

First make the dough. You can make the dough the night before you plan to serve the rolls for convenience’s sake, but you can also make it the day of if you plan to serve them for dinner. They take about 5 hours in total, but most of that is rising time.

1.17.13-3

Combine the flour, salt, pepper and sugar in a large bowl, preferably the bowl of a mixer with a dough hook. In a medium bowl, whisk the yeast in the milk until it dissolves. Add the melted butter into the milk mixture. Pour the milk mixture into the flour and mix them together with the paddle attachment or a wooden spoon until a shaggy ball forms.

Switch to the dough hook. Knead the dough on low speed for about five minutes, until the dough is smooth and a slightly sticky ball has formed. You can also do this by hand on a lightly floured counter.

Place the dough in lightly oiled bowl and cover with plastic wrap. Place the bowl in your off oven and let it rise until doubled, about two hours. I find that my house is too cold for yeasted bread doughs to rise well without putting them in my oven with my pilot light to keep them warm. If it is warm in your house, you can just leave the dough on the counter and appreciate your insulation.

While the dough is rising, make the filling. Combine grated onion, cheese, dill, salt and pepper together in a medium bowl. Set aside. Line the bottom of a 9″x 13″ baking dish or two 9″ round baking pans with parchment paper.

1.17.13-5

After the dough has risen, turn it out onto a lightly floured counter. Roll it into a 12″ x 16″ rectangle. With the long edge facing you, spread the filling in an even layer, leaving a 1/2″ margin on the far edge. Roll the dough tightly and seal the far end. Using a sharp knife, cut the log in half, then cut each half into thirds, then cut each third in half. You should have 12 rolls. Space them evenly in the baking dish, leaving room around each roll for it to expand.

1.17.13-6

Let the rolls rise in an off oven for another two hours, until doubled again. Alternately, you can cover with plastic wrap and put in the fridge to cook the next day.

One hour before you want to serve the rolls, remove them from the fridge. Place them in an off oven. Fill a dish below the rolls with boiling water. Let them rise for 30 minutes, until puffy. Remove the rolls from the oven.

Preheat your oven to 350 degrees. Brush the tops of the rolls with 1 tablespoon melted butter. Bake for 20 – 25 minutes until the cheese begins to brown and bubble. Serve immediately. Don’t worry, they won’t last long.

-Emily

Categories
Recipes

fennel and rice soup

This is another recipe from David Tanis’ The Heart of the Artichoke. I decided to go for it because I’ve never had a fennel soup. It did not turn out as I expected, but was good nonetheless. I had anticipated a much more prominent fennel flavor, but the fennel was subtle and balanced by chicken broth, onion and rice. Jordan thought that the soup was super comforting and he was a big fan of the herb sauce on top. Not only is this soup inexpensive, it will also use up any herbs lingering in your fridge.

Fennel and Rice Soup with Herb Swirl, adapted from The Heart of the Artichoke by David Tanis

For the soup
1/4 cup olive oil
2 – 3 fennel bulbs, sliced
1 onion, chopped
4 garlic cloves
salt and pepper
1/4 cup long grain rice
6 cups chicken broth or water

For the swirl
1 cup fennel fronds, roughly chopped (from the tops of your bulbs)
1/2 cup parsley
1/2 cup basil (I didn’t have basil and instead used dill)
1/4 cup scallions (I didn’t have scallions and instead used shallot)
1/2 cup olive oil
salt and pepper

In a dutch oven or stock pot, heat the olive oil over medium heat. Add the fennel, onion and garlic. Season well with salt and pepper. Saute until the vegetables are softened and lightly browned.

Add the rice and broth. Bring to a boil and then lower the heat to simmer. Add more salt. Simmer for 20 minutes.

Meanwhile, make the herb sauce. In a food processor or blender, puree the herbs and scallions with the oil. Season with salt and pepper. Set aside.

Puree the soup in a blender until you have a smooth puree (or, in my case, with an immersion blender until you have a chunky puree). David recommends that you strain the soup after you’ve pureed it, but I skipped that step. I like rustic food and I was attached to the idea of little rice pearls in the soup.

To serve, ladle the soup into a bowl and then spoon some of the herb sauce on top. Jordan requested that I bring the herb sauce to the table, so I’ll recommend that to you as well. Some cheesy toast never hurt either.

-Emily