Categories
Recipes

butter! homemade butter!

Last night laying in bed, Jordan and I had a serious discussion. It went something like this …

“If you had to live the rest of your life without bacon or butter, which would it be?” “Ummmm, that’s a tough one. But as much as I love pork, especially bacon, I’m going to have to say butter.”

Then …

“If you had to live the rest of your life without coffee or butter, which would it be?” “Oh! Now that is just not fair. Ummmmm. Butter. A life without coffee is cruel, but butter just makes everything better. ” “So, butter?” “Yes, butter.”

Although the final decisions were hard to come to, the clear winner in these match-ups is butter, which brings us to today’s culinary experiment …

Heavy whipping cream -> Homemade butter! from Julia Child’s Mastering the Art of French Cooking 
1 pint heavy whipping cream
Salt (optional)
Garlic, herbs, pepper (optional)

Start with a pint of heavy whipping cream. I poured it into my kitchen aid stand mixer and set the dial to high speed (6-8). You could also use a hand mixer, or put the cream in a jar and shake that sucker for 20 minutes. I took the easy way out and it took about 8 minutes to get from cream to butter.

Beat the cream for several minutes, occasionally scraping down the sides of the bowl with a spatula. The cream will go through several stages. The transformation is pretty incredible. When the cream has turned into butter and buttermilk, you’ll know.

Stage 1: cream

Stage 2: whipped cream

Stage 3: extra-thick whipped cream

Stage 4: broken whipped cream (crumbly looking little bits)

Stage 5: separation of cream into butter and buttermilk!

Note: You may want to drape a kitchen towel over the mixer as to prevent splattering cream all over your kitchen. I realized this about half way through the process, and had a little extra cleaning up to do afterward.

Once the cream has separated into butter and buttermilk, strain the buttermilk out with a fine mesh sieve into a bowl. Place the butter in a separate bowl and press out more of the buttermilk with a wooden spoon. Pour off the buttermilk. Put the buttermilk aside and brainstorm a recipe using buttermilk.

Note: It is very important to get all of the buttermilk out of the butter. If you don’t remove all of the buttermilk from the butter, it will go rancid very quickly.  And that would be very, very sad.

After you’ve squeezed most of the buttermilk, pour a cup or two ice-cold water over the butter. Using the back of a wooden spoon, smash the butter around. Washing the butter with water helps to remove the last of the buttermilk. Pour off the water. Repeat this process until the water you pour off is clear. I did it three times.

Note: the water must be ice-cold as to not melt the butter solids.

Add salt to taste and mix throughly with a wooden spoon.

The final product! Salted butter (about 1/2 cup) and buttermilk (about 1 cup)!  YUM!

As an accompaniment to tonight’s dinner (Jordan will bring us more on that later), I decide to make Beurre d’ Ail garlic herb butter from Julia Child’s “Mastering the Art of French Cooking”.  I’ve reduced her recipe to a one meal for two serving size.

4 T fresh, salted butter

1 clove garlic

1 T  parsley (or other green herb), minced

Set the unpeeled clove of garlic in boiling water. Bring to a boil for 5 seconds. Remove from pot, rinse and peel. Bring to a boil again for 30 seconds more. Pound to a smooth paste in a mortar and pestle (or garlic press, if you don’t have a mortar and pestle).

Pound or cream the butter and garlic  together. Season with additional salt, pepper, and herbs.

Conclusions: The salted butter is divine! I can’t be more thrilled to have it on hand. Plus, making it was a fun (and quick!) science experiment. I highly recommend it! When the cream shifted into butter and buttermilk, Jordan could hear me shouting from the kitchen, “It worked! It really worked!” I’m also pretty happy to have a back-up plan for the next time I over-whip whipped cream. Lastly, the garlic herb butter was terrific on bread at dinner. The garlic flavor was strong so if you don’t love garlic like we do, scale back a bit. Homemade butter is the best!

-Emily


Categories
Recipes

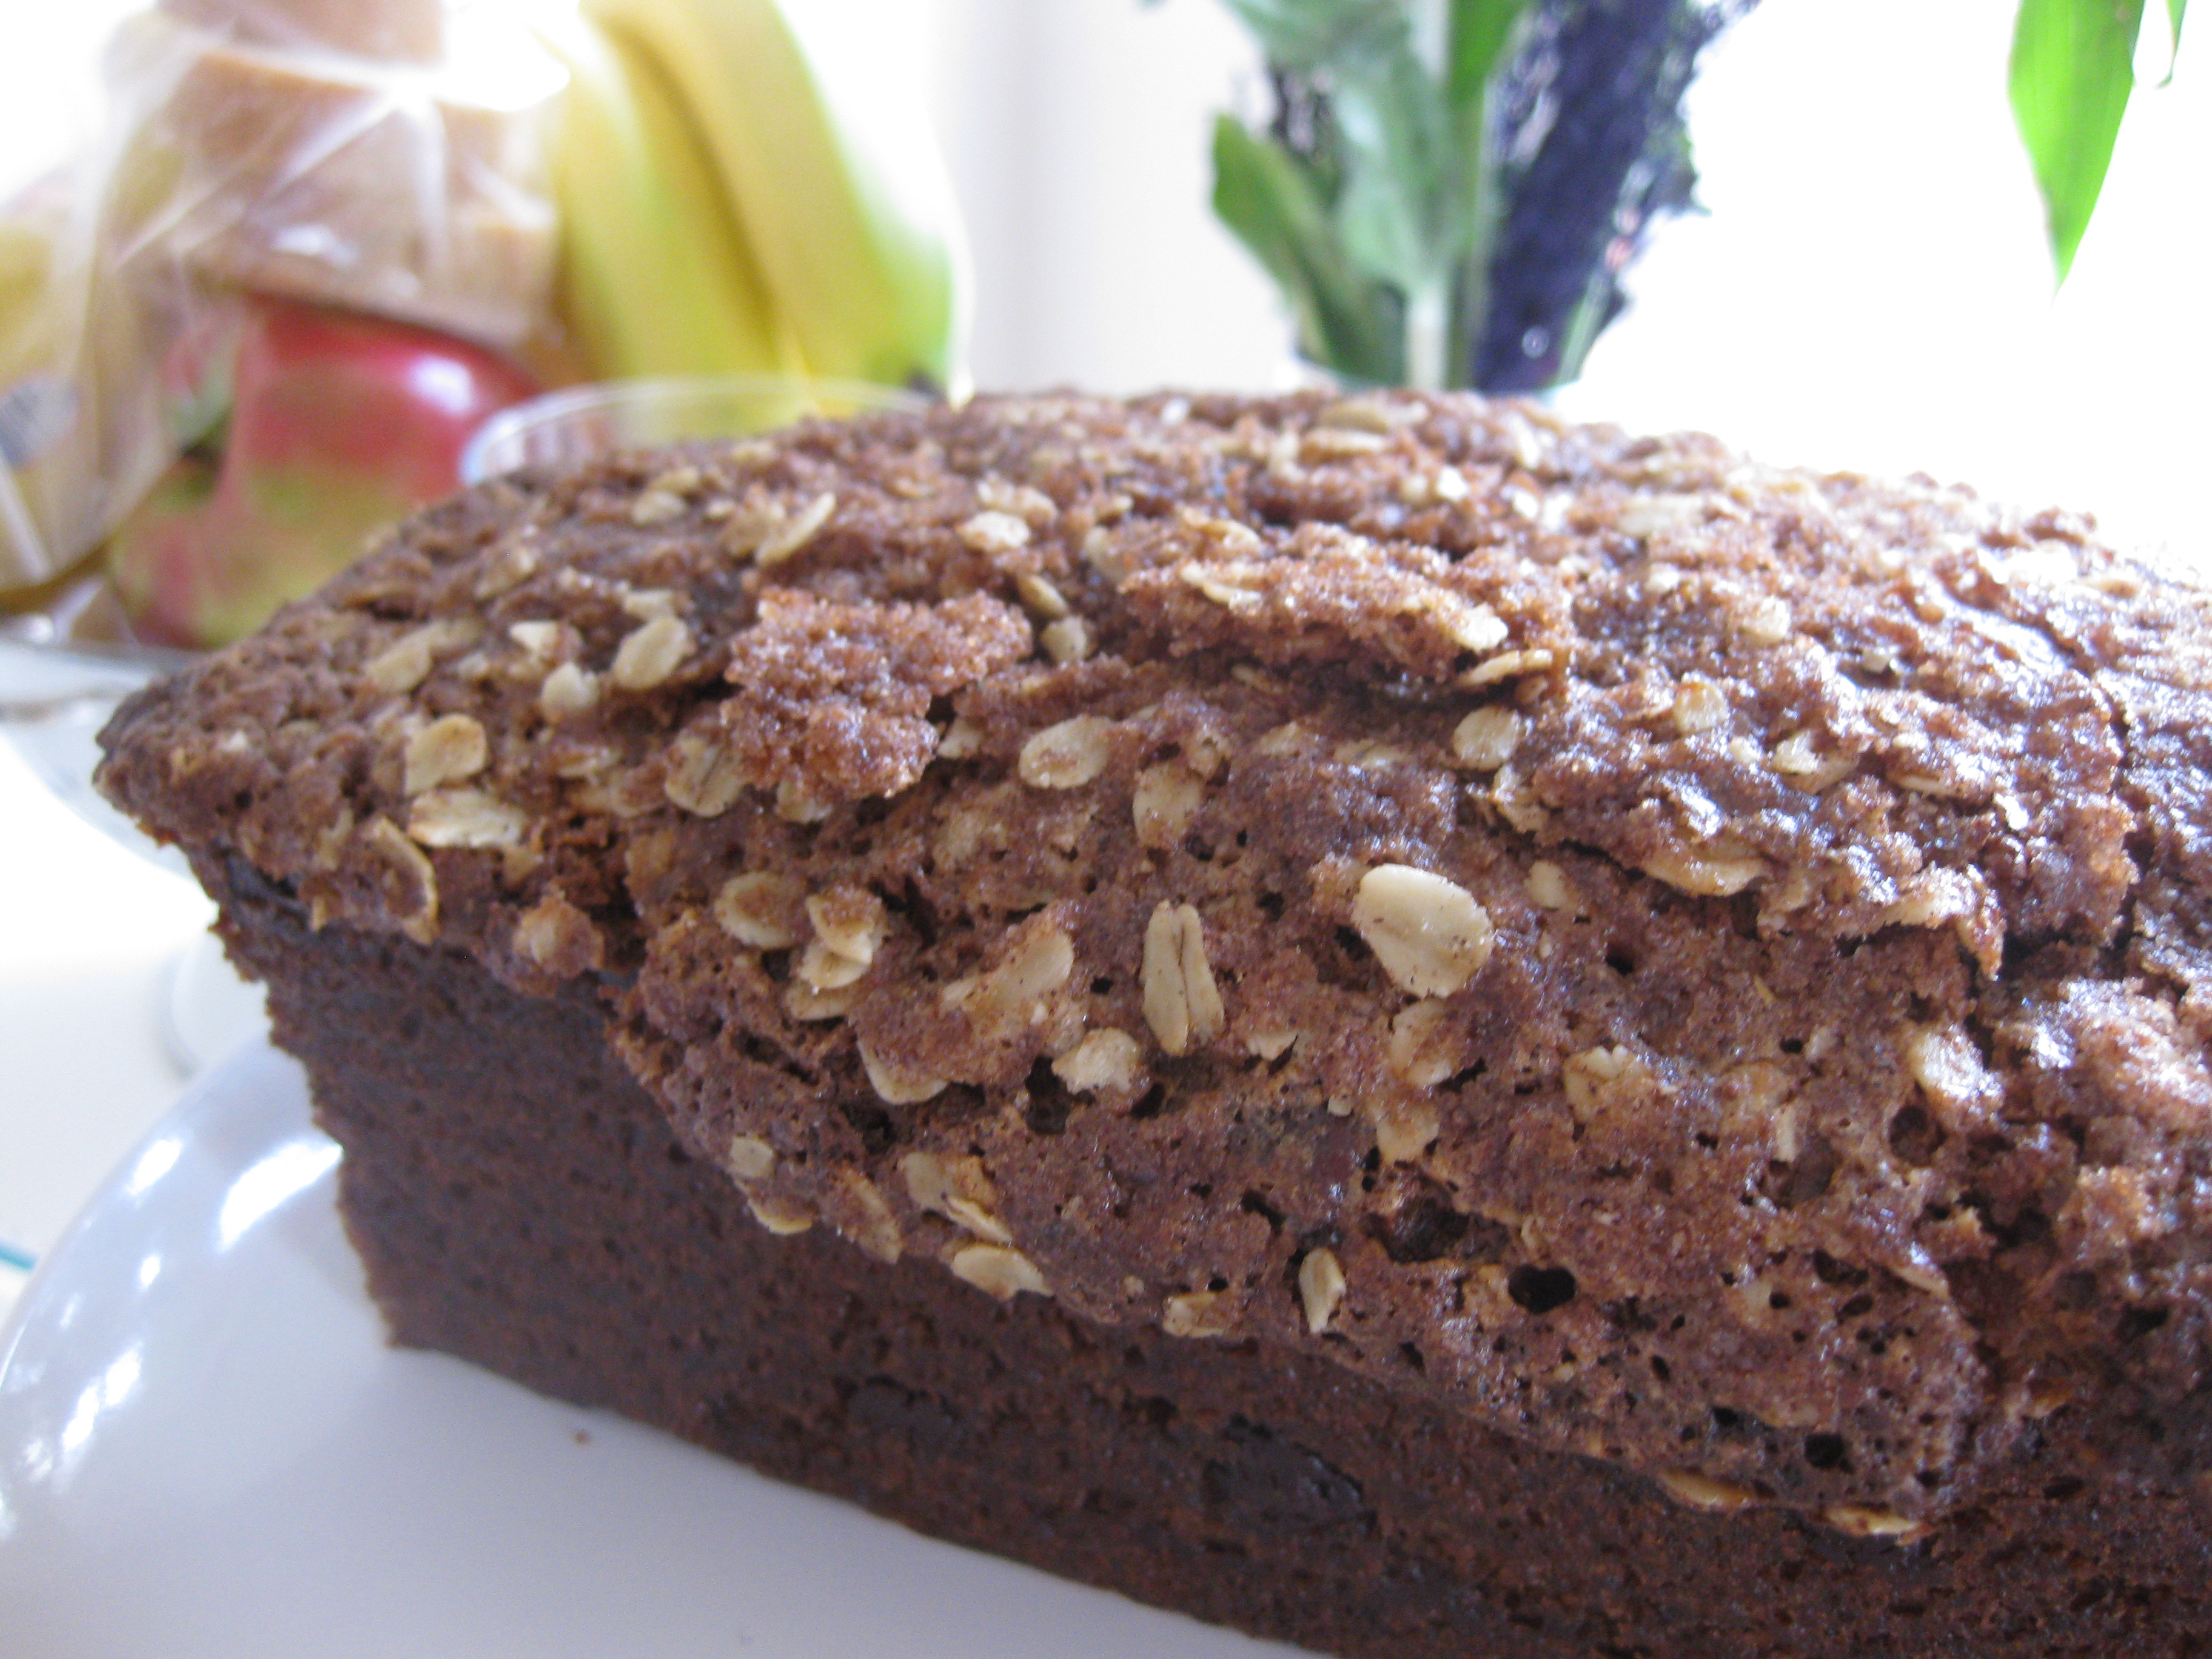
baking therapy: chocolate chip banana bread with cinnamon crumble topping

This week’s baking therapy was inspired by a bunch of over-ripe bananas languishing in the kitchen at work. I poked around the internet searching for a recipe and found several at Orangette, Molly Wizenburg’s delightful food blog. I read over her recipes and, keeping her tips and tricks in mind, decided to take this bread into my own hands.

As I creamed butter with sugar and then added chocolate chips, Jordan asked, “Isn’t the point of banana bread that it’s healthier because you use bananas instead of lots of butter and sugar?” …  I always thought the point of banana bread was to make use of  those gross, black, slug-like bananas that inevitably end up on your kitchen counter instead of throwing them away. Here is my recipe for a decadent banana bread, I make no apologies.

For the bread
1 cup granulated sugar
2 large eggs
1 stick unsalted butter, room temperature
3 medium bananas, mashed
3 T milk
2 cup all-purpose flour
1 t baking powder
1/2 t baking soda
1/2 t salt
1/2 t cinnamon
1 cup chocolate chips

For the topping:
1 T butter, room temperature
2 T sugar
2 T brown sugar
1 t cinnamon
1/4 cup rolled oats

Preheat the over to 350 degrees F. Grease a 9 by 5 inch loaf pan with butter, and set aside.

In a large mixing bowl, cream butter, sugar, eggs, and vanilla.

In a separate bowl, mash bananas. Mix them with the milk.

In another bowl, sift together flour, baking powder, baking soda, salt and cinnamon.

Add the flour mixture and banana mixture to the butter mixture in two parts, alternating, until just combined. Stir in chocolate chips. Pour into greased loaf pan and smooth top.

Combine topping ingredients by cutting in the butter. Sprinkle the bread evenly with topping.

Bake for one hour, or until a toothpick inserted into the center comes out clean. Allow to cool for a few minutes and then turn loaf out onto a wire rack to cool completely. Enjoy!

Conclusions: This is a serious bread …  the sucker weighs in at about two pounds! And I wasn’t kidding when I said it was decadent. The banana flavor is present, but not overpowering and the chocolate chips bring it into dessert level.  Jordan agreed with me that the cinnamon crumble topping was the best part. Most definitely will make again.  Yum!

-Emily

Categories
Recipes

just too cute

Now, those pear tomatoes are too cute! They remind me of stacking dolls. Jordan thought they looked like penguins. Yep. Cute.

This salad celebrates the end of summer with fresh tomatoes, quickly blanched green beans and a tarragon, shallot and white wine dressing.

Conclusions: Jordan and I both liked the tarragon quite a bit.  It’s not an herb we use often and it added a surprisingly satisfying anise flavor. Tomatoes and green beans are two of my absolute favorite ingredients and so I was pretty sold on this salad. It made a great accompaniment to the cous cous with sauteed mushrooms and pan-seared cod we also enjoyed, but were too beige to post a picture of.

-Emily

Categories
Recipes

breakfast for dinner

I love breakfast for dinner (french toast, waffles, pancakes, all those sweet, syrupy delights). Jordan, sadly, does not have the same fervor for breakfast for dinner as I do. This dish was our compromise.

A poached egg with broiled asparagus, crispy bits of pancetta and skillet hash browns.

Conclusions: Poaching eggs is not like riding a bike – it doesn’t just come right back. And, breakfast for dinner is the best! My devotion continues and Jordan said he considering coming over to the dark side. French Toast Fridays, anyone?

-Emily

Categories
Recipes

paella, per se

Let’s start this off by saying, I’m a lucky girl. Why am I a lucky girl? Because my wonderful boyfriend makes me yummy dinners while I sit at the table after work and putz around on the internet. Why else am I a lucky girl? Because that same boyfriend rides his bike down to purchase quality (and reasonably priced!) seafood at Sun Fat Seafood (23rd and Mission) even though its 9 million degrees out in San Francisco today. And one more reason …

… He is incredibly dashing in the kitchen.

Let’s get down to business …

Brown some PORK! chorizo*. Take out the chorizo, but leave that delicious fat in the pan. Toss in some diced onions and garlic. Let those brown a bit. Add broth (Jordan did 3 cups of vegetable stock and 1 cup of clam juice).

*Chicken chorizo was available, but we just don’t see the point in that.

Add saffron. Ours was a gift from our neighbor and came all the way from Dubai! It adds a nice floral taste, and added bonus, the broth will turn a lovely yellow-orange color.

Bring it all to a boil and add Calasparra rice. Use 1 parts rice to 4 parts liquid. We thought “That’s crazy!” but it really is quite absorbent.

Let it simmer for 20 – 30 minutes until most of the liquid has been absorbed and it has a creamy consistency. Then toss in some veggies (we did peas and red piquillo peppers), the sausages and …

the seafood! Jordan’s catch of the day included shrimp and scallops, which he quickly sauteed in some butter before adding to the rice. He wanted to get a nice sear on the scallops, but he’s a bit out of practice. I think this means more scallops in my future!

And the final dish …

Served with lemon and parsley.

Conclusions: Jordan was looking for a paella shortcut and looks like he found one. It still took a while to execute, but not much was lost in the way of flavor. Tasty and satisfying!

But the best part of the meal (according to Jordan at least) was not his paella, but …

this romesco sauce from Bi-Rite Market (18th between Guerrero and Dolores). It was good, but I’m partial to his paella.

-Emily

Categories
Recipes

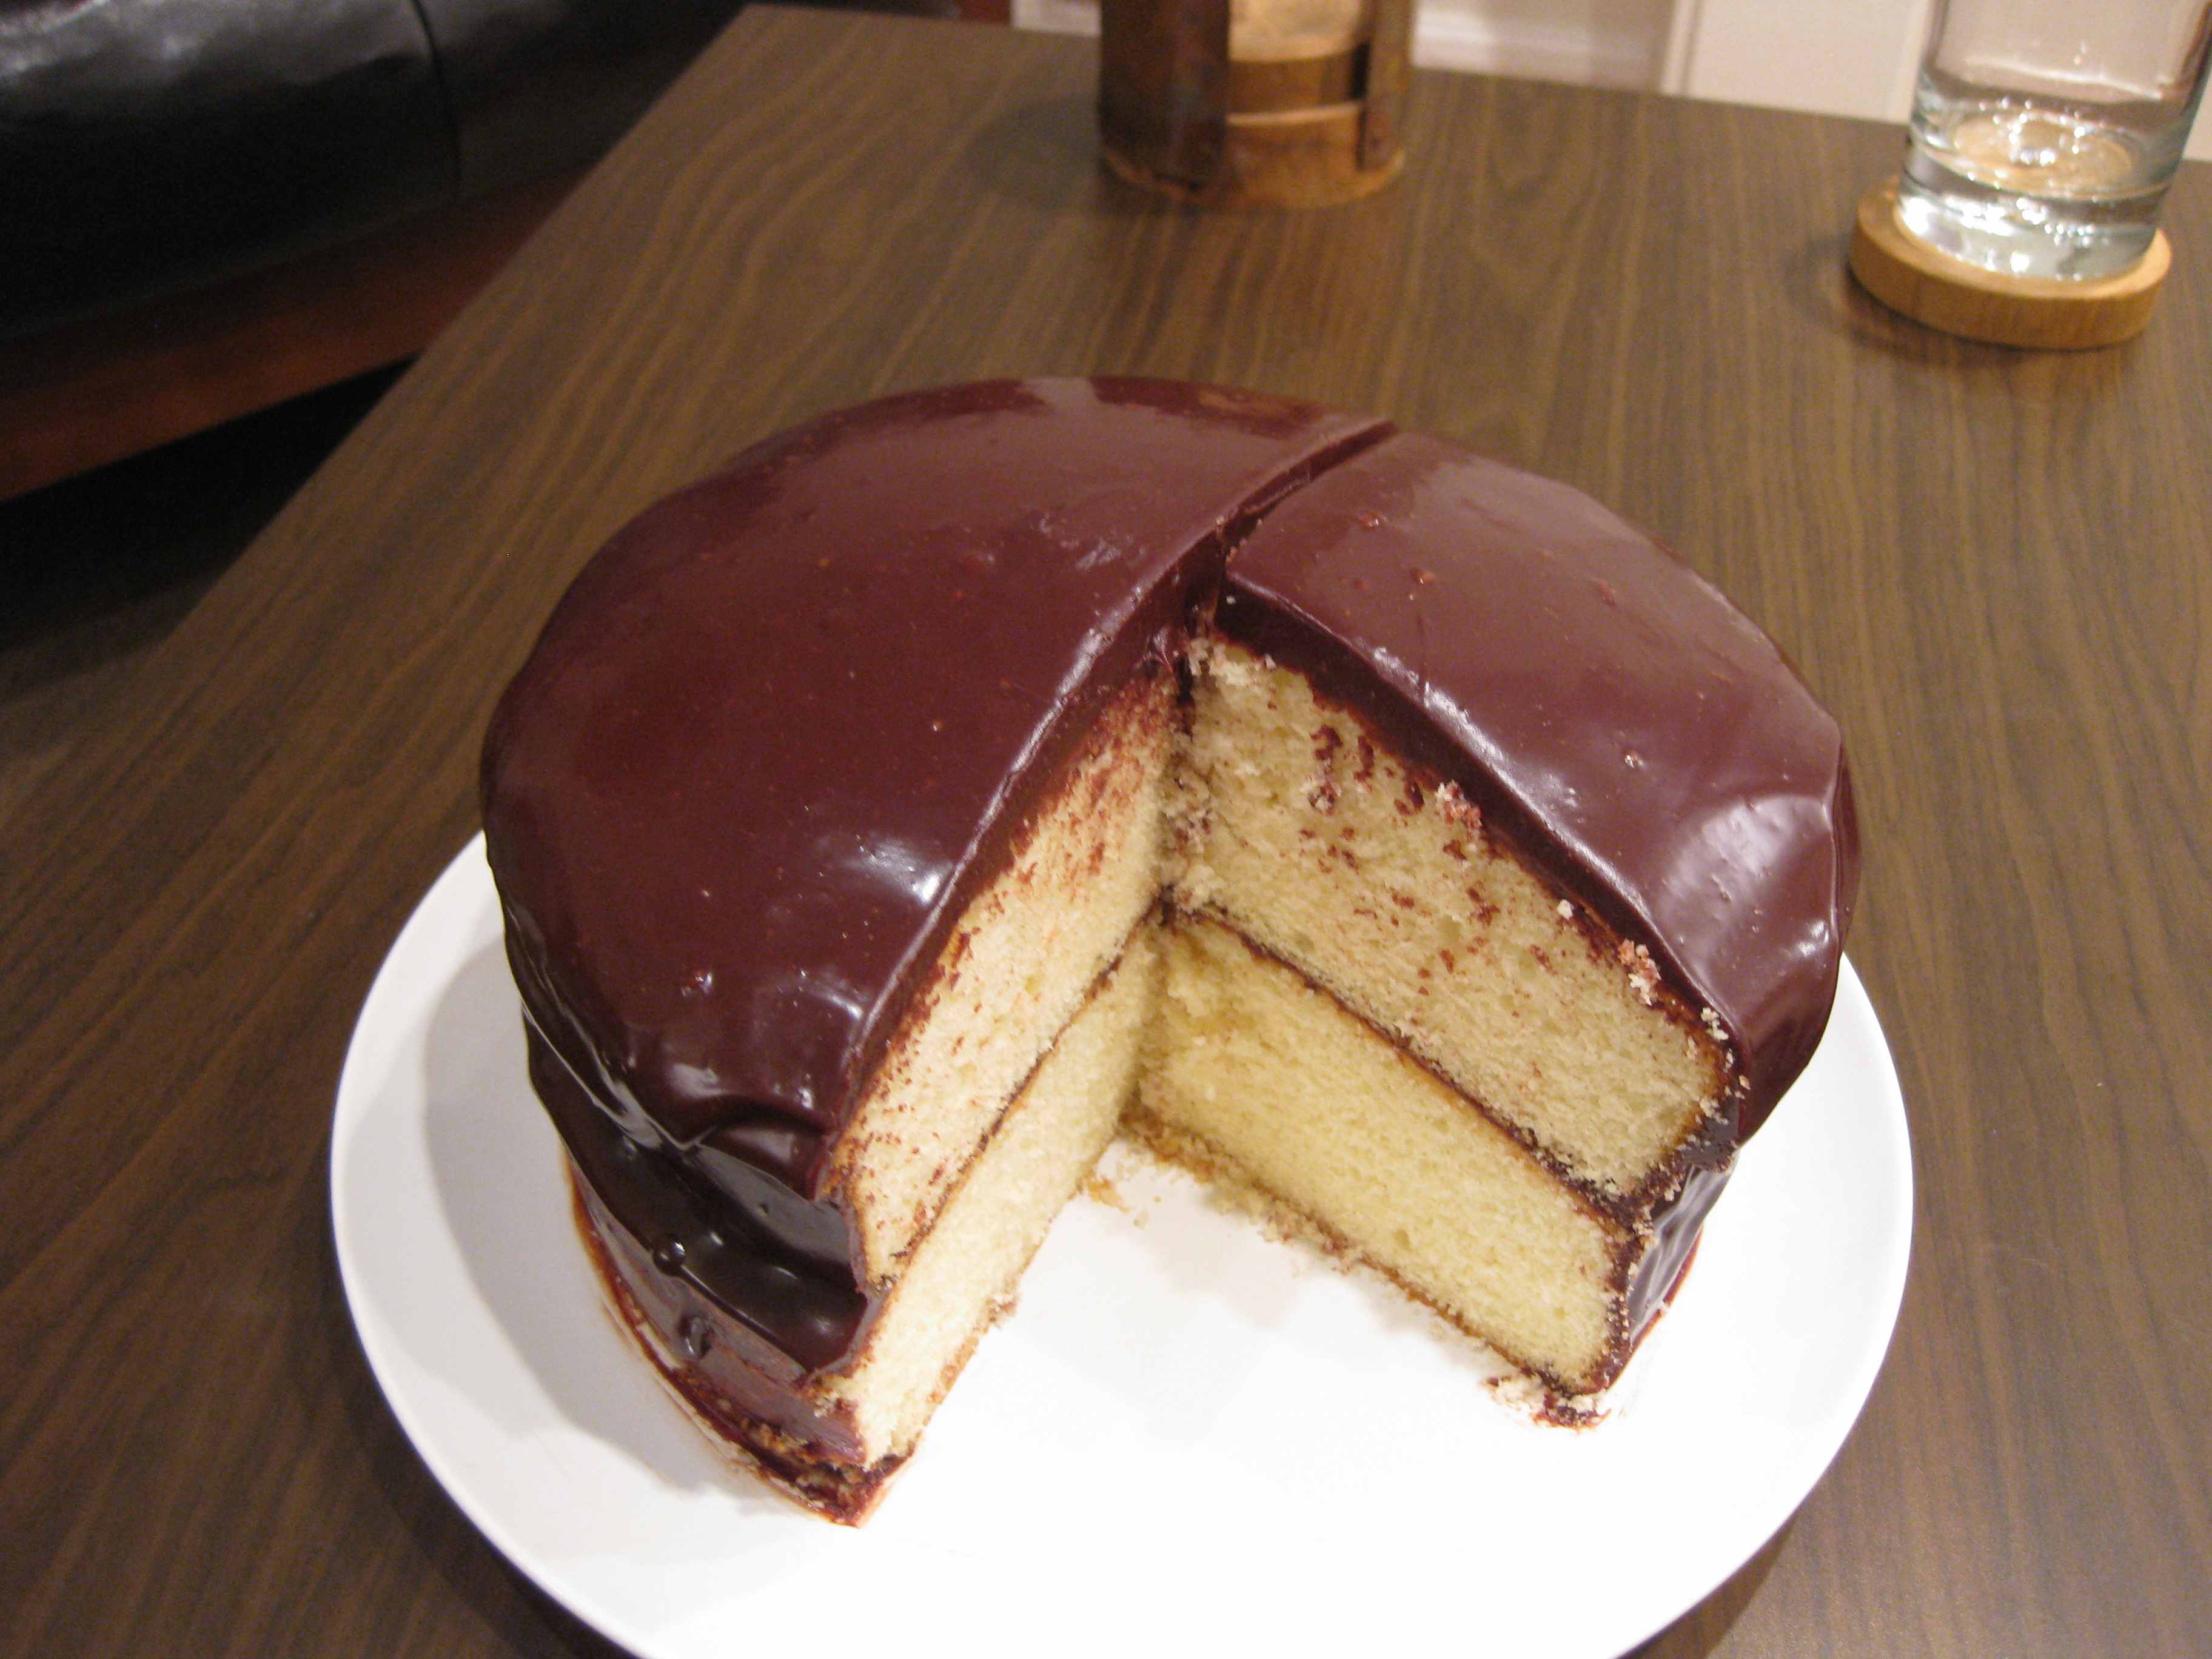
baking therapy: yellow cake with chocolate ganache.

Today, the baking regime began … yellow cake with chocolate ganache.

The background: While I was in school, I cooked and baked as a way to escape everyday stress. And, it worked!  Now I have a moderately stressful job (like most everyone) and I’ve turned to my old standby with new determination.

The plan: Bake something new each and every week as form of delicious and rewarding therapy.

The hope: Bake -> be less stressed -> become a better baker -> bake some more -> become a happier person.

Today’s cake recipe was from Rose Levy Beranbaum author of The Cake Bible.

For the cake …
6 large egg yolks (this is what makes it yellow!)
1 cup milk
2 teaspoons vanilla
3 cups sifted cake flour
1 1/2 cups granulated white sugar
1 tablespoon + 1 teaspoon baking powder
3/4 teaspoon salt
12 tablespoons unsalted butter room temperature and cut into pieces

Preheat oven to 350 degrees F. Grease two 9-inch x 1 1/2 inch cake pans, line bottoms with parchment paper, then grease again. Set aside.

In a medium bowl lightly combine the egg yolks, 1/4 cup (60 ml) milk, and vanilla extract.

In the bowl of your electric mixer combine the dry ingredients (flour, sugar, baking powder and salt) and mix on low speed for about 30 seconds or until blended.  Add the butter and remaining 3/4 cup (180 ml) milk.  Mix on low speed until the dry ingredients are moistened.  Increase the mixer speed to medium and beat for about 2 minutes to aerate and develop the cake’s structure.  Scrape the sides of the bowl.  Gradually add the egg mixture, in 3 additions, beating about 30 seconds after each addition to incorporate the egg mixture.

Divide the batter and pour into the prepared pans, smoothing the surface.  Bake 25 to 35 minutes or until a toothpick inserted into the center of the cake comes out clean and the cake springs back when pressed lightly in center.

Place the cakes on a wire rack to cool for about 10 minutes.  Then invert the cakes onto a greased rack.  To prevent splitting, reinvert cakes so that tops are right side up.  Cool completely before frosting.

For the chocolate ganache …

Heat a 1/2 pint of cream and 2 tablespoons of butter over low heat.

Pour hot cream over 10 oz of yummy semisweet chocolate (we like Guittard). Let that sit for about 5 minutes then whisk into submission (or until its smooth). Pour over the first layer of your cooled cake, spread, stack on layer two, pour again.

Supposedly, this ganaching process is easy, but I managed to get chocolate all over my kitchen counter, three dish towels, a poorly placed bag of pirates booty and multiple utensils. If you decide to ganache, clear yourself some space or if you don’t have much space (like us), prepare for some clean-up afterward.

And what you’ve all been waiting for …  the verdict …


Good. Satisfying. But a bit dry (maybe because I forgot about it in the oven while googling greyhound puppies) and definitely lacking ganache between the layers (I got nervous while ganaching the first cake. It was my first time after all).

Yes, that is a standard-sized dinner plate.

Overall, a lovely weekend baking adventure, stress level low, and we still have a monstrosity of a cake left to devour.

-Emily