Categories
Recipes

mussels and crispy rosemary roasted potatoes

We’ve just been looking for excuses to make these rosemary roasted potatoes from the Zuni Cafe Cookbook—and mussels and fries is a pretty classic combination.  I made these potatoes for the first time a few weeks ago and they are wonderful. The larger chunks will approximate the best french fries you’ve ever had, the smaller mashed pieces will brown into amazingly crispy potato chips. The best part—you don’t have to stand in front of a vat of fry oil to make them.

Mussels in White Wine and Herb Broth
1 lb mussels, scrubbed with beards removed
1 onion, diced
3 cloves garlic, diced
1 1/2 cups white wine
1/2 cup broth or water
2 sprigs thyme
2 sprigs rosemary
1/2 teaspoon fennel seed
1/2 teaspoon chili flake
salt, pepper, olive oil

In a large stock pot, saute the onion in a little olive oil until translucent. Add the garlic and saute for a few more minutes. Add the white wine, broth and herbs and bring to a simmer. Season with salt and pepper.

When you’ve got about 10 minutes left on the potatoes, add the mussels to the broth. Give it a stir and cover. Stir every few minutes to rotate the mussels. When most of the mussels have opened, they’re done. Pour mussels and broth into a large dish to serve.

Crispy Rosemary Roasted Potatoes, from The Zuni Cafe Cookbook by Judy Rodgers

1 1/2 lbs yellow potatoes, peeled and cut into 1″ chunks
salt
1 – 2 sprigs of fresh rosemary
1/4 cup olive oil

Preheat an oven to 400 degrees.

Peel the potatoes and cut them into rough 1″ chunks. Put them in a large saucepan and cover with cold water. Season the water liberally with salt. When you taste the water, it should be well-seasoned. Bring to a simmer over high heat and cook about 10 minutes, until the potatoes are fork tender.  Drain and return to the pot.

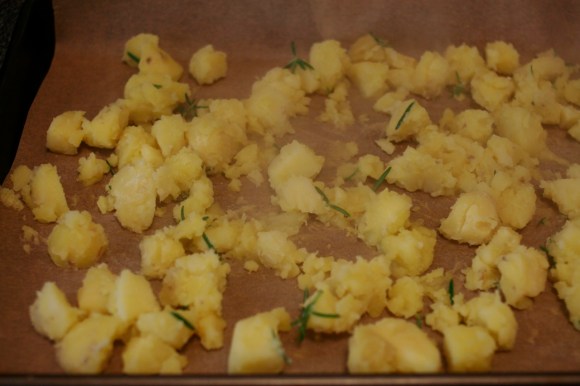
Strip the leaves from the rosemary and crush lightly. Add them to the warm potatoes and drizzle with olive oil. Stir to coat. Some of the potato chunks will break apart and some of the smaller pieces will become mashed. This is good news. Pour the potatoes onto a parchment-lined baking sheet and spread into an even layer.

Bake 30 – 35 minutes, until crispy and browned. Toss or flip the potatoes a few times while cooking so they brown evenly.  Trust me, this blanche then roast method is worth the extra step.

-Emily

Categories
San Francisco

summer in san francisco

Summer in San Francisco is unlike summer in the rest of the state. We wake up most mornings to the sound of the fog horn. We go to sleep most nights to the sound of the fog horn. The temperatures hover around 55 degrees and the misty breeze means you never leave the house without a jacket.

Everything is enveloped in a thick blanket of fog, sounds and colors are muted, the city seems quiet and empty. Spending time snuggled with a puppy is at the top of my list. I love it.

But, we also get some really incredible, actual summer days—75 degrees, sunny and bright blue skies. It is perfection.

The rest of the city knows this type of summer day doesn’t come around often and joins you outside. People are happy, even while waiting in line for gourmet ice cream. The city is alive with people and dogs.

That both of these cities exist in this tiny stretch of land and alternate so seamlessly makes me fall in love again and again. It’s hard to imagine calling anywhere else home.

-Emily

Categories
Recipes

how to bake a wedding cake

Guess what? I’ve successfully baked my first wedding cake! It was easier and less stressful than I expected, and surprisingly, I’d even do it again. Now a most epic blog post about my adventure.

Last weekend, my friend Katie married her sweetheart and I baked her wedding cake. The bride wanted chocolate and the groom wanted vanilla. We needed enough cake for 150 guests—hands down my most ambitious baking adventure to date. After some thoughtful consideration, we decided on a three-tiered vanilla cake with vanilla swiss buttercream icing and three chocolate sheet cakes with chocolate buttercream. Once all the hard decisions were made, it was time to actually bake this monstrosity.

Research & Planning

The research and planning phase of my wedding cake adventure was by far the most crucial part. It involved lots of testing of cakes and frostings, lots of internet research and lots of math. As it turns out, making enough cake for 150 people requires a lot of calculating. Making a cake for 150 people in a tiny San Francisco kitchen with one oven, one standard Kitchen Aid mixer and one refrigerator, that requires even more meticulous calculating.

I tested a few vanilla cake recipes before landing on the final recipe. I was looking for a vanilla cake that was moist and flavorful, but dense enough to stand up to stacking. It also had to taste just as good after freezing, since I had to bake the cakes a few days before the event.

For the vanilla icing, I was looking for a frosting that would taste great, go on smoothly and not disintegrate in the Sacramento heat. The taste and texture of the frosting was key, especially since I wasn’t planning to cover the cake in fondant. In my book, buttercream wins out over fondant any day of the week.  My goal was to create a beautiful cake that was really, really delicious—even if the frosting job wasn’t fondant-pristine.

I knew I had the chocolate cake in the bag. I used my favorite tried and true chocolate cake recipe—it is always a crowd pleaser and easy to pull together. This cake is incredibly flavorful, moist and airy, but won’t stand up to hours of stacking. Sheet cakes that would be served already sliced—perfect!

After landing on final recipes, the calculations began. I had to figure out how much cake I needed to serve 150 guests, how many batches of each of the cake and frosting recipes it would take to create that amount of cake, and how much of each ingredient I would need to buy. I consulted Wilton’s cake serving chart, but decided it was a bunch of crap; 1 inch by 1 inch pieces of cake are not my style. In the end, I was conservative in my estimates on how much cake each person would eat, erring on the side of extra cake. More cake is always better.

For a wedding of 150 people, plus extra cake to be safe, I baked …

  • 2 – 2.5″ by 8″ rounds (serves approximately 15 people)
  • 2 – 2.5″ by 10″ rounds (serves approximately 25 people)
  • 2 – 2.5″ by 12″ rounds (serves approximately 35 people)
  • 3 – 18″ by 24″ sheets (serves approximately 120 people, 40 people per cake)

Which means I needed to plan for …

  • 2 – 8″ rounds = 7 cups of batter (1 batch of cake)
  • 2 – 10″ rounds = 12 cups of batter  (2 batches, minus 2 cups)
  • 2 – 12″ rounds = 16 cups of batter (2 batches, plus two cups from the 10″ cakes)
  • 1 – 18″ 24″ sheet = 14 cups of batter (2 batches)
  • 1 – 18″ 24″ sheet = 14 cups of batter (2 batches)
  • 1 – 18″ 24″ sheet = 14 cups of batter (2 batches)

Yep, that means 5 batches of vanilla cake and 6 batches of chocolate cake. When I went to the grocery store to purchase this insane quantity of  butter, flour, sugar and buttermilk  was when the scale of this task really hit me. Wedding cakes are a lot of cake.

I also purchased  3″ deep round cake pans in 8″, 10″, and 12″ diameters, wooden dowels, cardboard cake boards, cake boxes and rolls of parchment, tinfoil and plastic wrap. I was ready to go!

Baking

Because my kitchen resources were limited, I began my baking a few days before the wedding. I wanted to make sure I had enough time to bake everything before making the trip to Sacramento where I would do the frosting and assembly. Plus, you want the cakes to sit in the fridge or freezer for a day or two before you frost them. They are much easier to handle for stacking and frosting when they’re cold.

First, I cut rounds and sheets of parchment paper to size. Because you want the cakes to come out of the pan as cleanly as possible, be sure to butter the plan, line it with parchment, butter the parchment and then dust the bottom and sides with flour.

I also baked the cakes at 300 degrees for a longer amount of time than the recipe predicted. Baking at a lower temperature prevents the cake from mounding in the center, which reduces the amount of leveling you’ll have to do later.

I started with the vanilla cake. I mixed 2 batches and baked one 10″ and one 12″ cake, adding 1 cup of the extra batter from the 10″ cake into the 12″ pan. Then I baked two 8″ cakes, splitting a batch of cake. Then came a chocolate sheet cake. Then came another 10″ and another 12″ vanilla round. Then another chocolate sheet cake. I was able to bake all of the vanilla cakes and two of the chocolate cakes in one day, but it was epic (and seriously efficient for my tiny apartment kitchen!) baking.

I can now officially say that baking from 9 am to 5 pm is both intense and exhausting.  By the end, my kitchen was a flour and sugar covered disaster, but baking almost everything in one shot is the way to go. The next day, I finished up with the last chocolate sheet cake and it joined its plastic-wrapped buddies in the fridge.

Now for the cake recipes …

***

Vanilla Buttermilk Cake, from Smitten Kitchen
For one 8″ or 9″ cake with two layers 

4 cups plus 2 tablespoons  cake flour (not self-rising)
2 teaspoons  baking powder
1 1/2 teaspoons baking soda
1 teaspoon kosher salt
2 sticks unsalted butter, softened
2 cups sugar
2 teaspoons pure vanilla extract
4 large eggs, at room temperature
2 cups buttermilk

Preheat oven to 300°F. Butter the cake pans and line with circles of parchment paper, then butter parchment and dust with flour.

Sift together flour, baking powder, baking soda, and salt in a medium bowl. In a large mixing bowl, beat butter and sugar at medium speed until pale and fluffy, then beat in vanilla. Add eggs 1 at a time, beating well and scraping down the bowl after each addition. At low-speed, beat in buttermilk until just combined. The mixture will look curdled, don’t worry. Add flour mixture in three batches, mixing until each addition is just incorporated.
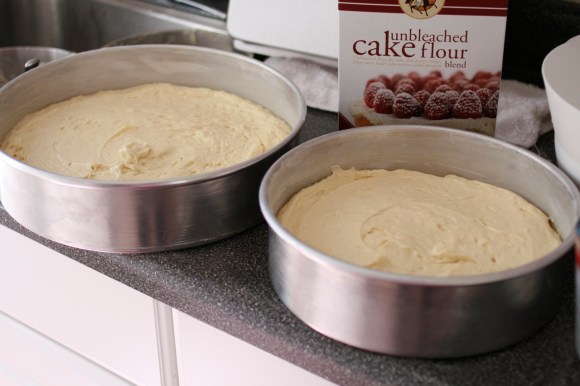
Spread batter evenly in cake pan, then rap pan on counter several times to eliminate air bubbles. Bake until golden and a wooden pick inserted in center of cake comes out clean, 40 minutes to one hour. Cool in pan on a rack for 15 minutes, then run a knife around edge of pan and invert onto rack. Peel off and discard the parchment. Then cool completely, about 1 hour.

***

Best Ever Chocolate Cake, from Ina Garten
For one 8″ or 9″ cake with two layers

Butter, for greasing the pans
1 3/4 cup flour
2 cups sugar
3/4 cup cocoa powder
2 t baking powder
1 t baking soda
1 t kosher salt
1 cup buttermilk
1/2 cup vegetable oil
2 eggs, at room temperature
1 cup freshly brewed hot coffee (I used decaf this time, but have used regular in the past)

Preheat the oven to 300 degrees. Butter the cake pans and line with parchment paper, then butter parchment and dust with flour.

Sift the dry ingredients into the bowl of a mixer fitted with the paddle attachment. Stir to combine. Combine wet ingredients in another bowl. With the mixer on low, slowly add the wet ingredients to the dry. Add the coffee.

Pour into prepared pans and bake for 35 – 40 minutes. Cool in the pan for 15 minutes, then invert onto a rack to cool completely.

***

Once the cakes are completely cool, wrap them tightly and thoroughly in plastic wrap. Then wrap them in  a layer of tin foil and place them in the freezer or fridge. You’ll likely have to split the cakes between both fridge and freezer, unless you’re lucky enough to have industrial sized freezer hanging around.

Frosting

Now that you’ve baked the cakes and it is the day of the wedding, you’ve got to frost those buggers. First, do yourself a favor and buy a nice, long cake frosting spatula. It will save you time and prevent an anxiety attack at the wedding venue. Second, go purchase yourself six glorious pounds of unsalted butter!

For the vanilla cake, I made one massive batch of vanilla swiss buttercream thanks to an industrial scale recipe from Deb of Smitten Kitchen. I filled each of the layers with a unsweetened whipped cream.

For the chocolate cake, I made Ina’s chocolate buttercream and just multiplied the recipe.

***

Vanilla Swiss Buttercream, from Smitten Kitchen
For one 3-tiered wedding cake
2 cups of egg whites (approx. 12 large)
3 cups sugar
5 cups butter, softened (2 1/2 pounds, 10 sticks)
1 tablespoon vanilla extract

For one 8″ or 9″ cake
1 cup sugar
4 large egg whites
26 tablespoons butter, softened (3 sticks plus 2 tablespoons)
1 teaspoon vanilla extract

Whisk egg whites and sugar together in a big metal bowl over a pot of simmering water. Whisk occasionally until you can’t feel the sugar granules when you rub the mixture between your fingers.

Transfer mixture into the mixer and whip until it turns white and about doubles in size.

Add the vanilla. Finally, add the butter a stick at a time and whip, whip, whip.

Don’t freak out when the frosting looks soupy, just keep whipping. It will come together gloriously, it just takes a while. Set the frosting aside, leaving it at room temperature.

***

Chocolate Buttercream, from Ina Garten
For three 18″ x 24″ sheet cakes
24 oz semisweet chocolate (I like Guittard)
2 lbs unsalted butter, at room temperature
4 egg yolks, at room temperature
4 teaspoons vanilla
5 cups sifted powdered sugar

For one 8″ or 9″ layer cake
6 oz semisweet chocolate
1/2 lb unsalted butter, at room temperature
1 egg yolk, at room temperature
1 teaspoon vanilla
1 1/4 cup sifted powdered sugar

Melt the chocolate over a double boiler and set aside to cool to room temperature.

In a mixer fitted with the paddle attachment, beat the butter until pale and fluffy. Add the egg yolks one at a time. Add the vanilla. Add the powdered sugar and mix until combined.

Add the chocolate and mix until just combined taking care to scrape the bottom. Set the frosting aside, leaving it at room temperature.

***

Cut cardboard cake boards about 1/2″ smaller than the diameter of the cake layer. You’ll need one board per tier. Cover the boards in foil—you don’t want the moisture from the cake to make the boards soggy. The boards will help keep your cake from falling in on itself and will also make the stacking easier. I transported each of my tiers to the venue unstacked and then assembled the cake and did the final frosting there. This worked out really well for me and I avoided any heartbreaking cake-dropping disasters.

Another key component of avoiding cake dropping or sliding disasters was the cake dowels. I purchased wooden dowels and cut them into 4″ lengths. Each tier had dowels holding its two layers together. The dowels also help prevent the cake from collapsing in on itself. Insert the dowels in a circle about 3″ from the edge of the cake; the cake board of the tier above will rest on these dowels, preventing any collapse. Win-win!

First, level the cakes, shaving off a bit of cake at a time using a bread knife. Stack the first layer of cake on the cake board. Spread some whipped cream onto the cake and then top it with another layer of the same size.

Insert the cake dowels in a circle about 3″ in from the edge of the cake. Using the vanilla butter cream, smoosh a good amount of frosting in between each of the layers. Then frost the sides and top of the cake. Try and get it as smooth as possible, but don’t stress if it isn’t gorgeous. This is the crumb coat. The cake will get another final coat of frosting at the venue. Put the cake back in the fridge to allow the frosting to firm up.

I did a crumb coat of frosting for each of the vanilla tiers, put them in the fridge to firm up and then put them in cake boxes to transport to the venue. For the chocolate cakes, I just brought the frosting to the venue and took care of them there.

Finishing Touches

Once at the venue, I put the vanilla cakes back in the fridge. I frosted each of the chocolate cakes on the back of a cookie sheet and then slid them onto white cake boards that were about 1″ larger than the cake.

The chocolate cakes went back into the fridge because it was pretty dang hot in the venue’s kitchen. You want to serve cakes at room temperature so I took the chocolate cakes out of the fridge for cutting about 1 hour before dessert was served.

After finishing up the chocolate cakes, I did a final coat of frosting on each of the vanilla layers. I focused mostly on the sides of the cake since that is the most visible part.
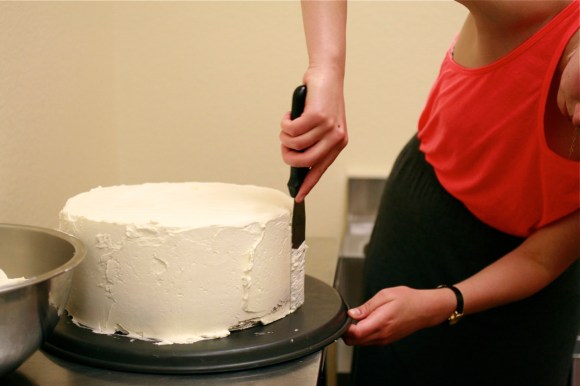
With Jordan’s help,  we stacked the cake in its place of honor in the main room. Once stacked, I touched up all of the frosting, adding a bit more in between each of the layers so there weren’t any gaps.

When the frosting was as close to perfect as it would ever be, I decorated the cake with fresh flowers to match the bride’s bouquet.

Ta-da! It was done! And it was pretty! And it was delicious! I was very proud and very relieved. Now for a deserved break from cake.

-Emily

Categories
Randomness

be back soon … in wedding cake land

Thanks to a kind of crazy twist of fate and two very trusting friends, I am baking a wedding cake. My friend Katie is getting married to her sweetheart this Friday in Sacramento. I’ll be there, wedding cake for 165 people in hand, praying to the sugar and butter gods that it turns out perfectly.

Over the past few days, I’ve been very busy with the prep work for my wedding cake debut. Seeing as I work full-time (not baking!) and my kitchen is 40 square feet, it’s taken a lot of planning to produce the required amount of cake. I’ll be back to tell you all about it soon, but here are some photos of the progress thus far to tide you over.

If you’re insanely curious about how this whole thing goes down, I’ll be sharing as I go on Instagram. Find me @emilyvoigtlander.

Wish me luck!

-Emily

Categories
Recipes

pasta with ricotta and marinated tomatoes

This is one of my absolute favorite summer dinners. I’ve shared the recipe before, but recently made a few improvements and thought I’d share it again. It is quick, light and you don’t need to turn on the oven—beneficial pretty much everywhere except San Francisco. It also features one of my favorite summer ingredients—tomatoes.

Like all simple dishes, the better the ingredients you put into the dish the better it will turn out. I recommend using a decent fresh ricotta over your typical dairy section fare and cherry tomatoes because they are more flavorful and less watery than other varieties.

Pasta with Ricotta and Marinated Tomatoes
1 basket cherry tomatoes, halved
1 lemon, zested and juiced
2 T olive oil
2 T each of fresh parsley, basil or chives, chopped (use any combination of herbs you have on hand)
1/2 T fresh thyme, removed from the sprig
1 lb pasta (shells or tubes are prefered)
1 clove garlic, grated
2 T olive oil
1 cup ricotta
1/2 cup grated parmesan
salt and pepper

Slice the tomatoes and put them in a medium bowl. Add the lemon zest, lemon juice, olive oil and herbs. Season with salt and pepper. Set aside. The longer you let this sit and marinate, the better.

Bring a pot of salted water to boil. Add the pasta and cook until al dente. Just before you drain the pasta, reserve 1/2 cup of the pasta water. Drain the pasta and return to the pot. Add the olive oil and grated garlic clove. Stir. Add the ricotta and parmesan. Stir just to combine. Plate a mound of pasta and top with the tomato-herb mixture. Enjoy!

-Emily

Categories
Recipes

raspberry buttermilk cake

Oh, I love this cake. Discovered on Smitten Kitchen a while back, I’ve already made it several times this berry season. Deb calls it an everyday cake, and she’s right, it is the perfect cake for breakfast, for a BBQ, for a light dessert. And, it’s easy to throw together. I’d advise you to double the recipe and bake two if you plan to bring it somewhere—it’s so good you’ll want leftovers just for yourself when you get home.

Raspberry Buttermilk Cake, from Smitten Kitchen, originally adapted from Gourmet 
1 cup all-purpose flour
1/2 teaspoon baking powder
1/2 teaspoon baking soda
1/4 teaspoon salt
1/2 stick unsalted butter, softened
2/3 cup plus 1 1/2 tablespoons sugar, divided
1/2 teaspoon pure vanilla extract
1/2 teaspoon finely grated lemon zest
1 large egg
1/2 cup well-shaken buttermilk
1 cup fresh raspberries (or any other berry you please)

Preheat an oven to 400°F. Butter and flour an 8″ round pan.

Whisk together flour, baking powder, baking soda, and salt and set aside. In the bowl of an electric mixture, beat butter and 2/3 cup (146 grams) sugar at medium-high speed until pale and fluffy, then beat in vanilla and zest. Add egg and beat well.

At low speed, mix in flour mixture in three batches, alternating with buttermilk and mixing until just combined. Spoon batter into cake pan, smoothing top. Place the raspberries evenly over top and sprinkle with remaining 1 1/2 tablespoons sugar.


Bake until cake is golden, 20 to 25 minutes. Cool in pan 10 minutes, then turn out onto a rack and cool to warm, 10 to 15 minutes more. Enjoy!

And a fabulous tip from Deb of Smitten Kitchen—if you don’t have buttermilk on hand, add 1 tablespoon vinegar or lemon juice to 1 cup of milk and let it sit for 10 minutes until it clabbers. Instant buttermilk!

-Emily

Categories
Recipes

seared salmon over creamed corn

Creamed corn is a good idea, especially when summer corn is at its best and you follow a Thomas Keller recipe. That guy, he knows what’s up.  As a relevant aside, we have all three of Thomas Keller’s cookbooks, but Ad Hoc at Home is the only one we really cook from. The recipes from Bouchon and The French Laundry Cookbook are daunting, to say the least.  Ad Hoc at Home is much more accessible and every recipe we’ve made has been wonderful—homestyle cooking with serious finesse. It is becoming one of our favorite cookbooks.

Seared Salmon with Creamed Corn, adapted from Ad Hoc at Home by Thomas Keller
2 ears of corn
1 T butter
1/4 cup cream
1 lime, zested and juiced
salt
pinch of cayenne
1 small salmon fillet
olive oil
salt and pepper

Cut the corn off the cob and scape the cob with the back of the knife to get all the juice. Zest the lime. In a medium saute pan, melt the butter. Add the corn and juice of one half of the lime. Cook the corn over low heat until the liquid evaporates, about 15 minutes, stirring occasionally. Season with salt.  Add the cream, cayenne and lime zest. Cook another 5 – 8 minutes, until the cream thickens. Season again with salt and turn of the heat.

Season the salmon with salt and pepper. In a nonstick pan, heat some olive oil over low heat. Add the salmon, skin side down. Cook for four minutes. Flip and cook an additional two minutes. We like our salmon pretty rare so just seared for a few minutes on each side is perfect. Spoon a bed of creamed corn on the plate and top with the seared salmon fillet. A nice side salad never hurts—this one was orzo with arrugula and cherry tomatoes.

-Emily

Categories
Recipes

grits with grilled shrimp and zucchini

You may remember a few months back when I extolled the virtues of grits. Well, we decided to give a lighter, more summery version a try last week. Verdict: still really, really good.  Certainly makes the mounds of zucchini you undoubtably have crowding your fridge go down easier.

Grits with Grilled Shrimp and Zucchini
For the grits
2 cups milk
2 cups water
1 1/2 t salt
1 cup grits
1/4 cup parmesan, grated
2 T butter

For the zucchini
3 zucchini, sliced into 1/2 inch slices
olive oil
1 garlic clove, grated
salt, pepper, chili flakes

For the shrimp
1/2 lb shrimp, shell on preferred
1 lemon, juiced
2 T olive oil
1 garlic clove, grated
salt, pepper, chili flakes

In a large bowl, marinate the sliced zucchini in olive oil, garlic and seasonings. In a small bowl, marinate the shrimp in  lemon juice, olive oil, garlic and seasonings. Set aside.

In a medium saucepan over medium-low heat, bring the milk, water, and salt to a boil. Once boiling, whisk the grits slowly into the milk mixture. Turn the heat to low and cover. Cook the grits 20 – 25 minutes, whisking every five minutes or so to avoid clumps. Once they are thick and just before serving, whisk in the butter and grated parmesan. Check for seasoning and add more salt if necessary.

While the grits are cooking, heat a grill or grill pan over medium-high heat. Grill the zucchini, 4 – 5 minutes per side, until browned. After you’ve cooked all the zucchini and the grits are nearly done, cook the shrimp. They only need about 2 minutes per side.

Serve a mound of grits topped with shrimp and grilled zucchini, hot sauce on the side for the boy.

-Emily

Categories
Recipes

fettucini with tomatoes, onions and thyme

I made this pasta for Jordan and I about two weeks ago. It was so good I decide to make it again for my birthday dinner with friends last weekend. Because it is so simple, the quality of the ingredients can really shine. If you’ve got fresh-from-the-garden tomatoes, this is the dish for them. We sadly don’t have a garden, so heirloom tomatoes from Bi-Rite had to substitute—tough life.

Fettuccine with Tomatoes, Onions and Thyme
10 oz fresh fettuccine (dried will work just fine too, but save some of the pasta water to add into the sauce)
1 basket cherry tomatoes, whole or sliced in half
1 small onion, diced
2 cloves garlic, diced
1 t fresh thyme
1/4 cup parmesan
2 T butter
olive oil, salt, pepper
1 t basil, sliced thinly
1 ball of burrata

Bring a pot of salted water to boil. Dice the onion and garlic. In a saute pan, heat the olive oil over low heat. Saute the onions until translucent, about 5 minutes. Add the garlic and thyme and saute for two more minutes. Add the tomatoes.

Add the pasta to the boiling water and cook about two minutes. Drain and put back into the pot. Add the butter and parmesan. Season with salt and pepper.

Plate the pasta and top with the tomato mixture. Top with half of the burrata and fresh basil if you’ve got it around. Enjoy!

-Emily

Categories
Recipes

rhubarb sundae with blueberries and shortbread crumble

I had a bunch of fresh blueberries from my mom’s garden, a Sunset magazine in my mailbox, a dinner party to go to and this sundae was born.

This sundae is wonderful—better than I expected. There just is something really magical about cold ice cream with a warm sauce. It’s like a deconstructed blueberry-rhubarb pie, and because each of the components are made separately, you can easily adapt the recipe to the ingredients and amount of time you have on hand. You could swap the blueberries for another berry or even stone fruit—whatever is in season or on hand. I made the shortbread from scratch, but you could certainly make due with a store-bought shortbread or vanilla cookies. And while the rhubarb in the ice cream is really wonderful and I really recommend you give it a go, you could skip that all together if you’re especially short on time and just serve it with vanilla ice cream.

Rhubarb Sundae with Blueberries and Shortbread Crumble, adapted from Sunset Magazine

For the ice cream
4 cups vanilla bean ice cream
4 stalks rhubarb, sliced thinly
6 T brown sugar

In a small saucepan over medium-low heat, combine the rhubarb and brown sugar. Cook for about 20 minutes, stirring occasionally, until the mixture has a jam like consistency. Remove from the heat and puree. Put in the refrigerator to chill for about 20 minutes.

Once the rhubarb is chilled, stir into the vanilla ice cream and return to the freezer.

For the shortbread
1/2 cup butter, softened
5 T sugar
1 t vanilla extract
1 cup plus 2 T flour
1/8 t kosher salt
1/8 t cinnamon
1 T sugar

Preheat an oven to 350 degrees. Line a baking sheet with parchment paper. Mix 1 T sugar and 1/8 t cinnamon in a bowl and set aside. Beat butter, 5 T sugar, vanilla and salt until light and fluffy. Add flour and mix on low until large clumps form.

Bring the dough together with your hands. Roll it out until about 1/4″ thick on a floured surface. Mine rolled out quite messy, but it doesn’t really matter since you break it into large pieces before serving anyway. Transfer the dough to the baking sheet and sprinkle with cinnamon sugar. Put in the freezer for 10 minutes.

Bake 15 – 20 minutes, until golden. Cool and then break into large shards.

For the blueberries
2 cups blueberries
1/2 lemon, juiced

Just before serving, heat blueberries and lemon in small saucepan over medium-low heat. Meanwhile, scoop rhubarb ice cream into bowls. Just as the blueberries begin to juice, pour them over the ice cream. Add shortbread shards and enjoy!

-Emily